Table of Contents
- Freeze Whole or Minced: Best for Grating into Stir-Fries and Hot Meals
- Refrigerate in Paper Towels: Best for Slicing and Maintaining Raw Crispness
- Submerge in Spirits: Best for Long-Term Storage and Cocktail Infusions
- Pickle in Vinegar: Best for Sushi Sides and Zesty Salad Additions
- Ginger Rescue Guide: How to Rehydrate Dried Roots and Spot Spoilage
- Keeping the Zest Alive
- From the Chef’s Pantry: Q&A
There is nothing quite like the bright, zesty heat of fresh ginger to transform a simple meal into a culinary masterpiece.
Whether you are whisking it into a honey-soy glaze or grating it into a soothing tea, its vibrant aroma is a gift to every kitchen.
Selecting the firmest, smoothest roots is the first step in truly honoring this incredible ingredient.
As a home cook, you know the frustration of finding a shriveled or moldy knob of ginger hidden in the vegetable drawer.
To keep that peppery bite and nutritional power intact, you need professional storage techniques that fit your lifestyle.
Mastering these methods ensures that you always have a splash of sunshine ready for your favorite stir-fries and bakes.
I am thrilled to share my favorite ways to preserve this versatile root for months without losing a single drop of flavor.
From freezer tricks to simple pantry secrets, these expert tips will help you minimize waste and maximize every meal.
Let us dive into the best ways to keep your kitchen stocked with the freshest ginger possible.
Freeze Whole or Minced: Best for Grating into Stir-Fries and Hot Meals
Freezing is widely considered the superior method for preserving ginger for culinary use. It locks in the spicy, aromatic oils that give the root its signature kick.
When you freeze ginger, you stop the enzymatic activity that leads to mold and shriveling. This method keeps the rhizome plump and ready for immediate action in your kitchen.
Frozen ginger is the secret weapon of the busy cook, transforming prep time into an effortless task.
This technique is particularly useful if you love making quick weeknight meals. It allows you to add a burst of flavor to 20 spicy stir-fry recipes that pack a flavor punch without peeling.
Frosty Flavor Hacks
- Skip the peeling! Frozen ginger skin grates so finely that it becomes unnoticeable in cooked dishes, saving you tedious prep time.
- Grate while rock-hard. Do not thaw the root before grating; the frozen texture prevents fibrous strings and creates a fluffy, snow-like consistency that melts instantly into sauces.
- Pre-portion power. If you prefer minced ginger, freeze teaspoon-sized dollops in an ice cube tray, then pop them into a freezer bag for instant flavor bombs in future meals.
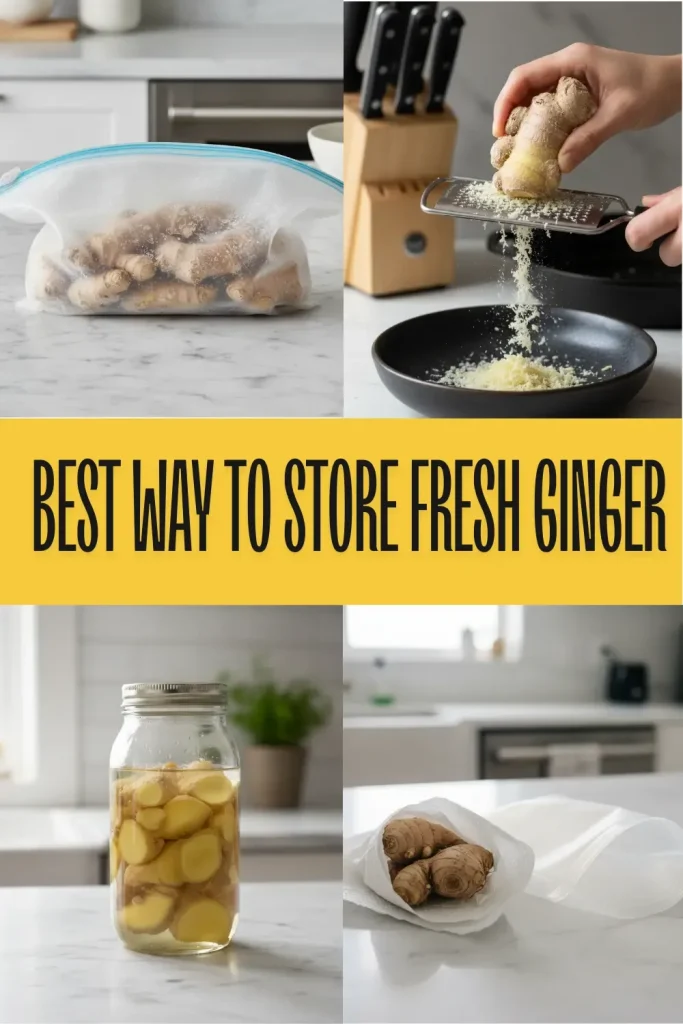
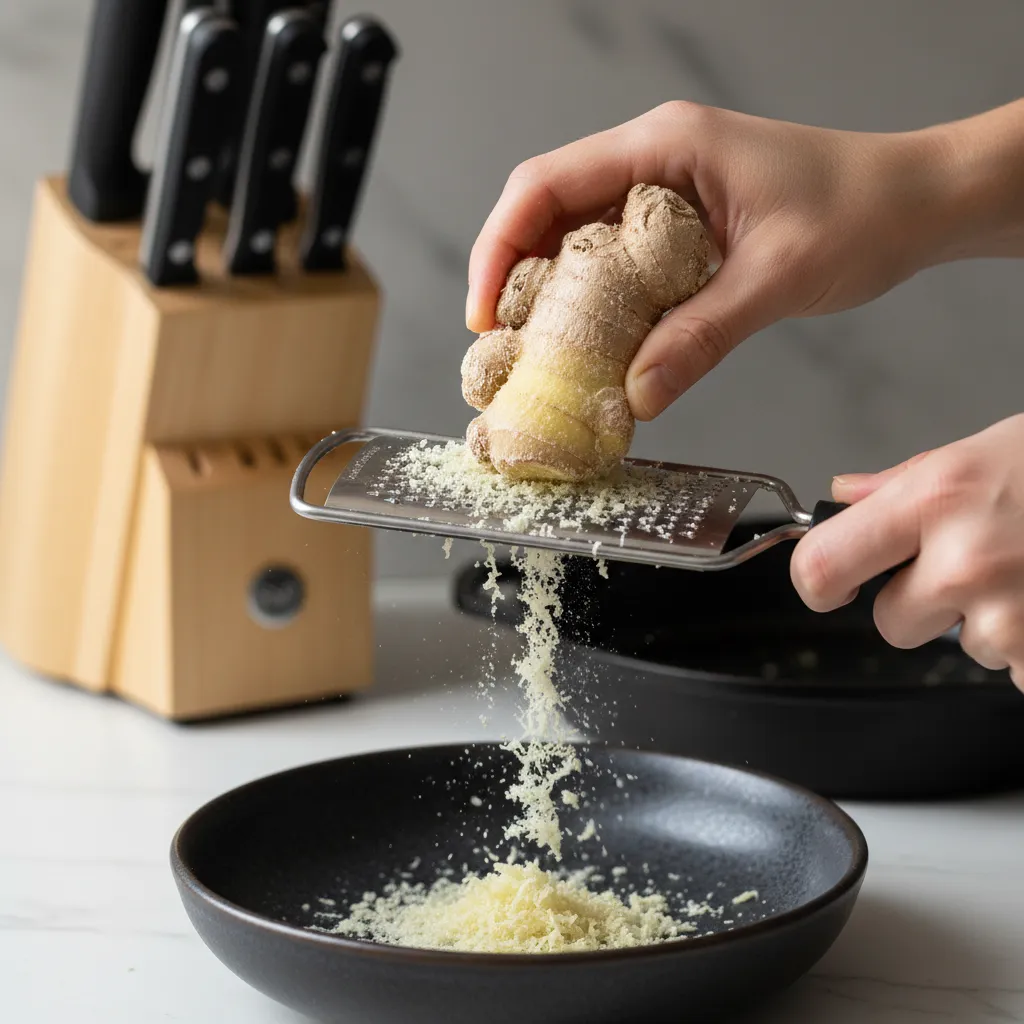
Method 1: Freezing the Whole Root
This is the most popular method because it requires almost zero preparation. The frozen root becomes solid, making it incredibly easy to handle.
Simply scrub the ginger thoroughly to remove any dirt. Dry it completely with a paper towel to prevent ice crystals from forming on the skin.
Place the whole knobs into a freezer-safe bag. Squeeze out as much air as possible before sealing it tight. This prevents freezer burn and protects the flavor.
When you are ready to cook, pull the ginger out and grate it directly into your pan. The frozen skin is so thin that it dissolves unnoticed into hot dishes.
You don’t even need to thaw it first; in fact, grating frozen ginger is easier because the fibers don’t get caught in the grater.
Sheela Prakash, The Kitchn
The Grate Secret
- Use a microplane rather than a standard box grater. The frozen ginger transforms into a fine, fluffy powder that disperses flavor evenly without any stringy fibers.
- Skip the peeling step! Organic ginger skin is perfectly safe to eat and adds zero tough texture once grated, saving you precious prep time.
- To maximize freshness, use a straw to suck excess air out of the freezer bag before sealing, creating a DIY vacuum seal that prevents ice crystals.
Method 2: DIY Ginger Flavor Bombs
If you prefer having your mise en place ready to go, making ginger paste cubes is a brilliant strategy. This saves you from getting the grater out on busy nights.
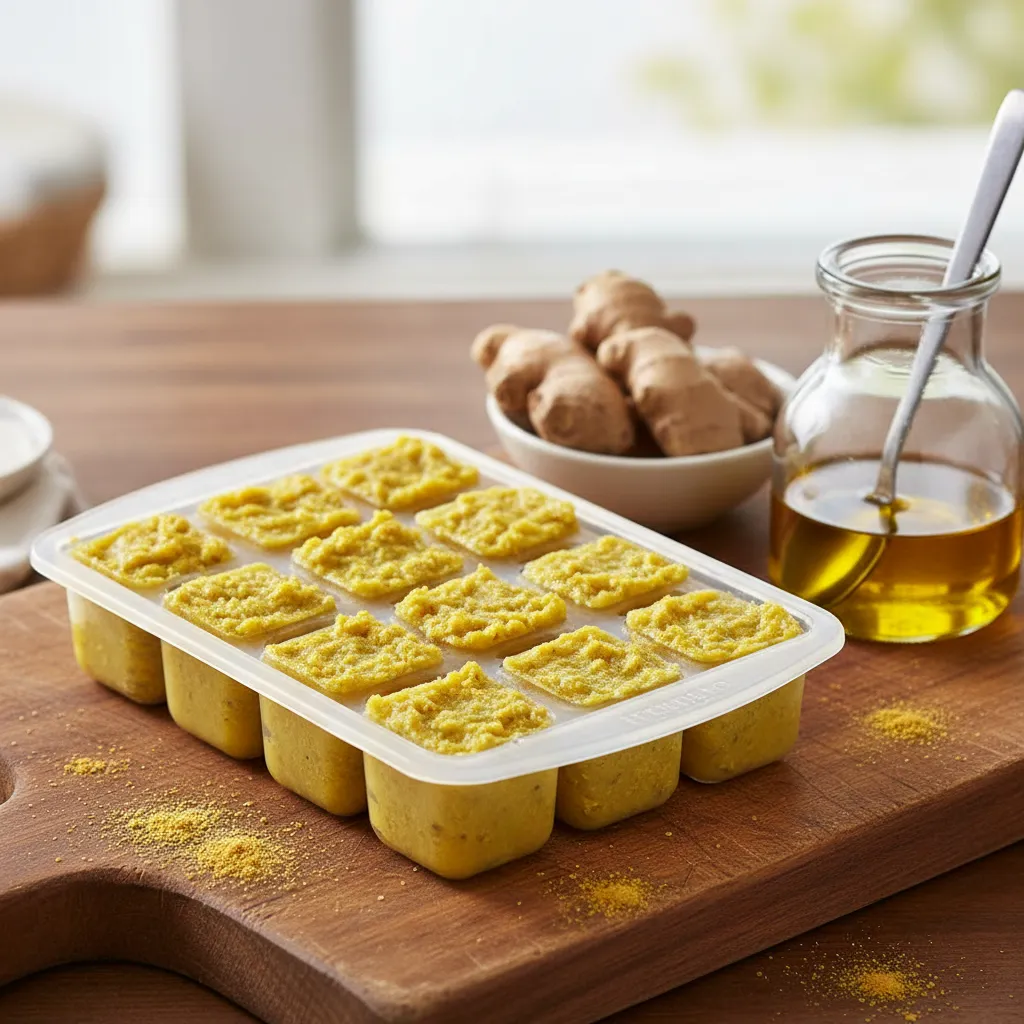
These cubes are perfect for dropping directly into soups or stocks. They dissolve instantly, releasing a potent aroma that mimics fresh root.
Ingredients
- 2 cups fresh ginger root, peeled and roughly chopped
- 2 tbsp neutral oil (like avocado or grapeseed)
- 1 tbsp water (optional, only if needed for blending)
Instructions
- Place the chopped ginger and oil into a food processor or high-speed blender.
- Pulse the mixture until it creates a smooth, thick paste. Scrape down the sides if necessary.
- Spoon the paste into a silicone ice cube tray. Press down firmly to remove air pockets.
- Freeze the tray for at least 4 hours until the cubes are solid.
- Pop the cubes out and transfer them to a labeled freezer bag for long-term storage.
Prep Like a Pro
- Portion Control: Standard ice cube trays often hold about 2 tablespoons per slot. To avoid waste, fill them only halfway or invest in a silicone mini-cube tray to freeze perfect teaspoon-sized portions.
- The Spoon Trick: Peeling a large quantity of ginger is tedious with a knife. Use the edge of a metal spoon to scrape away the skin; it maneuvers around the knobby roots easily and wastes less flesh.
- Flavor Fusion: Want to save even more time? Blend equal parts peeled garlic cloves with the ginger. This creates a ready-to-use ginger-garlic base that is perfect for instant curries and stir-fries.
Comparison: Whole vs. Minced Storage
Choosing between these methods depends on your cooking style. Use this table to decide which approach fits your weekly routine.
| Feature | Whole Frozen Root | Minced Ginger Cubes |
|---|---|---|
| Prep Time | ✅ Very Fast (2 mins) | ❌ Slow (15+ mins) |
| Ease of Use | Grating required | ✅ Drop and go |
| Texture | Fine powder | Smooth paste |
| Best For | Finishing dishes | Soups & Marinades |
Both methods ensure you always have access to high-quality aromatics. This is essential when creating complex bases, such as when learning stock vs. broth: what’s the difference and when to use each.
The Ginger Cheat Sheet
- Skip the peeling step when using the Whole Frozen Root method! The skin is edible and becomes unnoticeable when grated finely with a microplane.
- If you choose the minced route, flash freeze your dollops on a parchment-lined tray for 1 hour before bagging them to prevent the cubes from sticking together.
- Maximize flavor retention by pressing all the air out of your freezer bag to avoid freezer burn, which can dull the ginger’s spicy kick over time.
Refrigerate in Paper Towels: Best for Slicing and Maintaining Raw Crispness
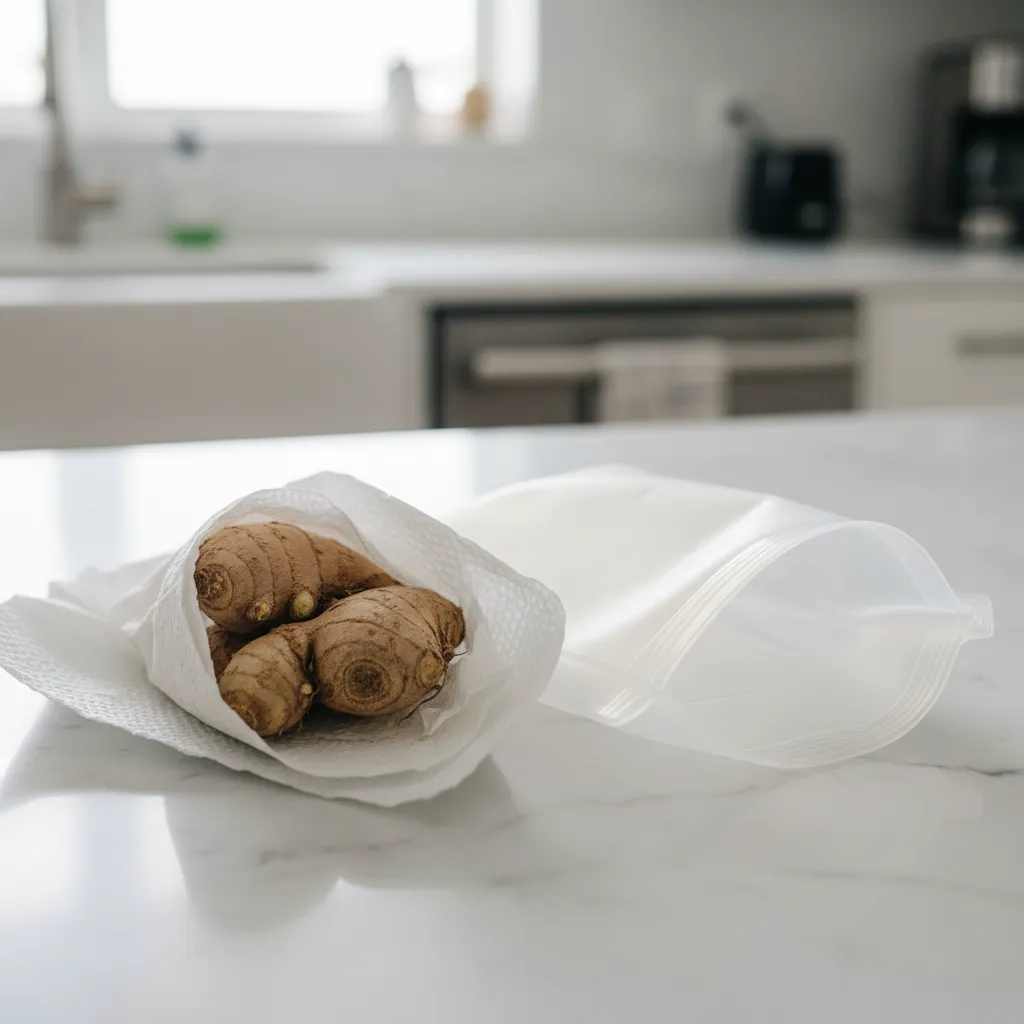
This method is the gold standard for home cooks who use ginger weekly. It maintains the firm texture needed for precise knife work.
By wrapping the root, you create a humidity buffer. The paper absorbs excess moisture that leads to mold while preventing the skin from shriveling.
This balance keeps the flesh juicy and crisp. It ensures your aromatic root is ready for a spicy stir-fry dinner at a moment’s notice.
Proper storage is the first step to a flavorful meal.
We recommend this technique if you plan to use the ginger within three to four weeks. It requires minimal effort and delivers consistent results.
Ingredients
- 1 large hand of fresh ginger (approx. 4-6 oz)
- 2 sheets of premium paper towels
- 1 resealable freezer-safe plastic bag
Instructions
- Do not peel the ginger. Leave the skin intact to protect the flesh.
- Pat the ginger dry if it feels damp. Moisture is the enemy here.
- Wrap the entire ginger root snugly in the paper towel. Ensure no surface is exposed.
- Place the wrapped bundle inside the resealable bag.
- Press out as much air as possible before sealing the bag tightly.
- Store in the crisper drawer of your refrigerator for up to one month.
- Check weekly. If the towel feels damp, replace it with a dry one immediately.
If you have a piece of ginger that has been cut, blot it dry with a paper towel before storing.
Food Network Kitchen, How to Store Ginger
Using a paper towel is significantly better than tossing the root loose in the drawer. Unprotected ginger will shrivel and lose its potency quickly.
If you notice the cut end darkening slightly, simply slice that thin layer off before using. The rest of the root will remain vibrant and zesty.
This method is also ideal for other aromatics. You can apply the same logic to keep herbs fresh, similar to storing fresh herbs for weeks.
Root Revival Tips
- The weekly swap: Make it a habit to check your ginger bundle once a week. If the paper towel feels damp, replace it immediately with a dry sheet to stop mold in its tracks.
- Trim to refresh: If you notice the exposed end of a cut piece darkening, don’t toss the root. Simply slice off a thin layer to reveal the vibrant and juicy flesh underneath.
- Beyond ginger: This moisture-buffering technique is versatile. Use the same paper towel and bag method to extend the life of fresh herbs or lemongrass in your crisper drawer.
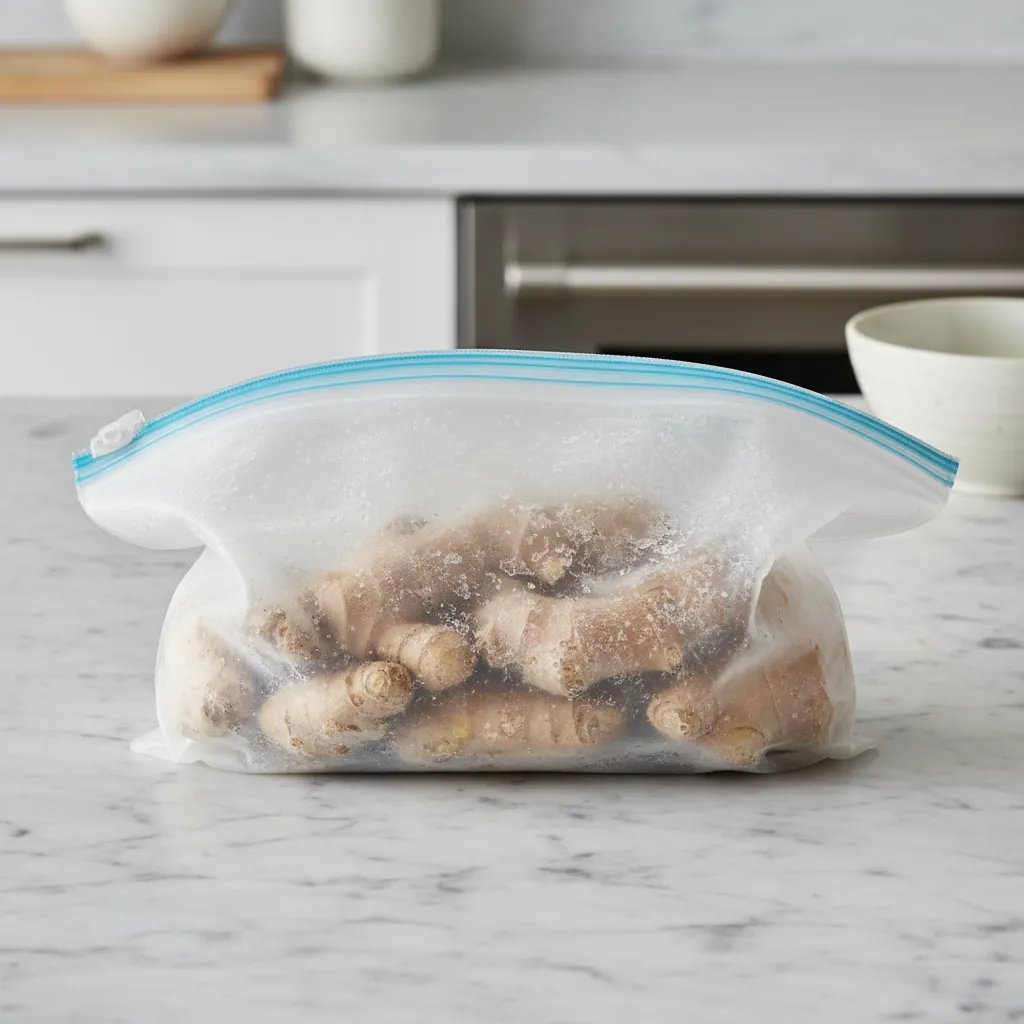
Submerge in Spirits: Best for Long-Term Storage and Cocktail Infusions
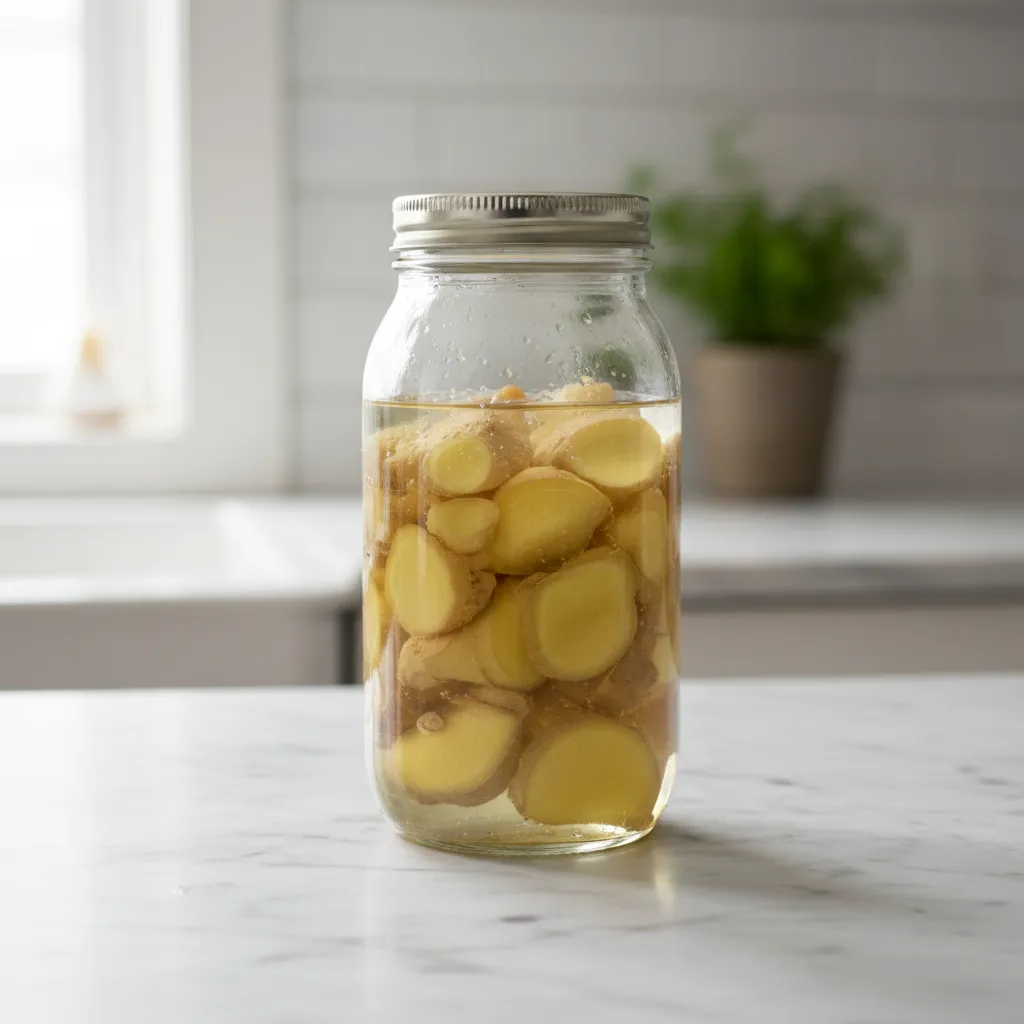
This method is a favorite among professional chefs. It keeps the rhizome crisp while creating a flavorful byproduct.
If you hate shriveled skins, this solution is for you. Submerging ginger in alcohol creates an anaerobic seal. This blocks air and prevents mold.
The texture remains firm and easy to grate. Plus, you get a spicy infusion to use in cocktails or sauces later.
Preserve the root, gain a liqueur. Two ingredients, infinite flavor possibilities.
Choosing Your Spirit
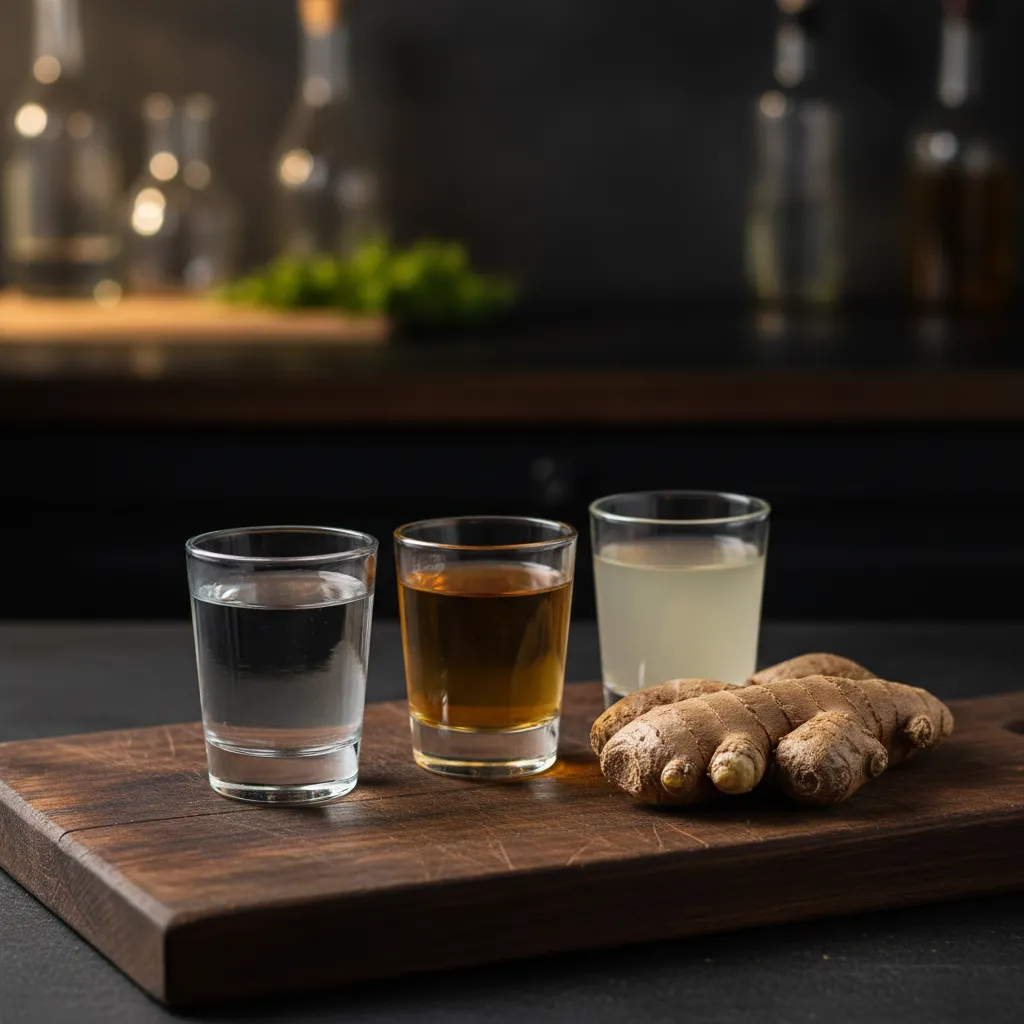
The liquid you choose matters. It dictates the final flavor of both the root and the infusion.
| Spirit Type | Flavor Profile | Best Culinary Use |
|---|---|---|
| Vodka | Neutral, clean, sharp | Cocktails, savory dressings |
| Dry Sherry | Nutty, complex, rich | Stir-frys, Asian marinades |
| Sake | Mild, slightly sweet | Steaming liquids, light sauces |
| Rice Vinegar | Tart, acidic (Pickling) | Sushi rice, dipping sauces |
Ingredients
- 1 large hand of fresh ginger (firm and smooth)
- 1-2 cups of Dry Sherry, Vodka, or Sake (enough to cover)
Instructions
- Peel the ginger root completely using a spoon or peeler.
- Slice the ginger into 1-inch chunks or thick coins.
- Place the ginger pieces into a sterilized glass jar.
- Pour your chosen spirit over the ginger until fully covered.
- Seal the lid tightly and store in the refrigerator.
This method keeps ginger fresh for several months. When you need some, simply fish out a piece with a clean fork.
The remaining liquid becomes a potent extract. You can add a splash of this spicy vodka to 20 Easy Summer Drinks Everyone Loves.
If you chose sherry, the nutty aroma pairs perfectly with savory dishes. It adds depth to sauces without extra salt.
Peeled ginger will keep indefinitely in the refrigerator if you cover it with dry sherry or vodka… The ginger will flavor the sherry, which is a nice bonus.
The Editors, Fine Cooking
Always check the liquid level occasionally. Ensure the ginger stays submerged to prevent spoilage at the top.
If you prefer a non-alcoholic approach, you might consider vinegar. This turns the ginger into a pickle suitable for salads.
You can use the pickled ginger slices to add zest to 20 Citrus-Infused Dishes to Brighten Your Meals.
Remember that alcohol will alter the ginger’s flavor slightly. It softens the heat but adds a boozy note.
Chef’s Secret Stash
- Don’t toss the liquid! As the ginger sits, it infuses the spirit. Use the ginger-spiked vodka in Moscow Mules or the sherry in stir-fry sauces for an instant flavor upgrade.
- Hygiene matters. Always use a clean fork, never your fingers, to fish out pieces to prevent bacterial growth, and remember to top off the jar with fresh spirits if the liquid level drops.
- Going alcohol-free? Swap the spirits for rice vinegar to create a quick pickle that adds a zesty punch to sushi rice or salad dressings.
Pickle in Vinegar: Best for Sushi Sides and Zesty Salad Additions

Pickling ginger transforms the fiery root into a delicate and tangy treat known as gari. It preserves the flavor while softening the sharp heat.
This method is perfect if you love sushi nights or want a zesty kick in your meals. It is a time-honored technique that keeps ginger crisp for months.
The acidity of the vinegar acts as a natural preservative. It stops bacteria from growing and maintains the texture of the ginger slices.
You can use this preserved ginger as a palate cleanser or a condiment. It also adds a bright pop of flavor when chopped into fresh salad recipes.
If you enjoy preserving food, this process is similar to other techniques found in a beginner guide to fermenting vegetables.
Pickling ginger captures its fiery soul in a bottle, turning raw heat into a sweet, tangy crunch that wakes up the palate.
Using young ginger is ideal for this recipe. It has thinner skin and a naturally pink hue that intensifies when it hits the acidic brine.
Ingredients
- 10 oz fresh young ginger (peeled)
- 1 1/2 tsp sea salt (divided)
- 1 cup rice vinegar (unseasoned)
- 1/3 cup granulated sugar
Instructions
- Slice the ginger as thinly as possible using a mandoline or sharp knife. Toss with 1 tsp salt and let sit for 30 minutes.
- Squeeze the liquid out of the ginger slices firmly. Blanch the slices in boiling water for 1 minute, then drain and cool.
- Combine vinegar, sugar, and remaining 1/2 tsp salt in a saucepan. Heat until the sugar dissolves completely.
- Place the ginger in a sterilized jar. Pour the hot vinegar brine over the ginger until fully submerged. Cool and refrigerate.
The ginger will be ready to eat in about 24 hours. However, the flavor improves significantly after waiting a few days for the brine to penetrate.
Choosing the right vinegar changes the flavor profile. While rice vinegar is traditional, you can experiment with others for different results.
| Vinegar Type | Flavor Profile | Best Use |
|---|---|---|
| Rice Vinegar | Mild, slightly sweet | Traditional sushi ginger |
| Apple Cider Vinegar | Fruity, strong tang | Zesty salads and slaws |
| White Vinegar | Sharp, crisp acidity | Long-term storage pickles |
If you can find young ginger, which is usually available in Asian markets during the summer, it makes for the most tender pickled ginger.
Namiko Chen, Just One Cookbook
Store your jar in the refrigerator at all times. Always use a clean utensil to remove slices to prevent contamination and spoilage.
If you notice the liquid becoming cloudy or developing an off smell, discard it immediately. Proper hygiene ensures your ginger stays safe.
Pickle Pro Hacks
- To achieve that melt-in-your-mouth restaurant texture, use a mandoline to create paper-thin slices. This maximizes surface area, allowing the brine to soften the fibers quickly and evenly.
- Can’t find young ginger with pink tips? Simply add a small slice of red radish or beet to the jar to naturally achieve that signature rosy blush without using artificial food dyes.
- Save your leftover ginger brine! It acts as a pre-made flavor bomb for zesty salad dressings, unique cocktail mixers, or as a quick marinade for grilled seafood and tofu.
Ginger Rescue Guide: How to Rehydrate Dried Roots and Spot Spoilage
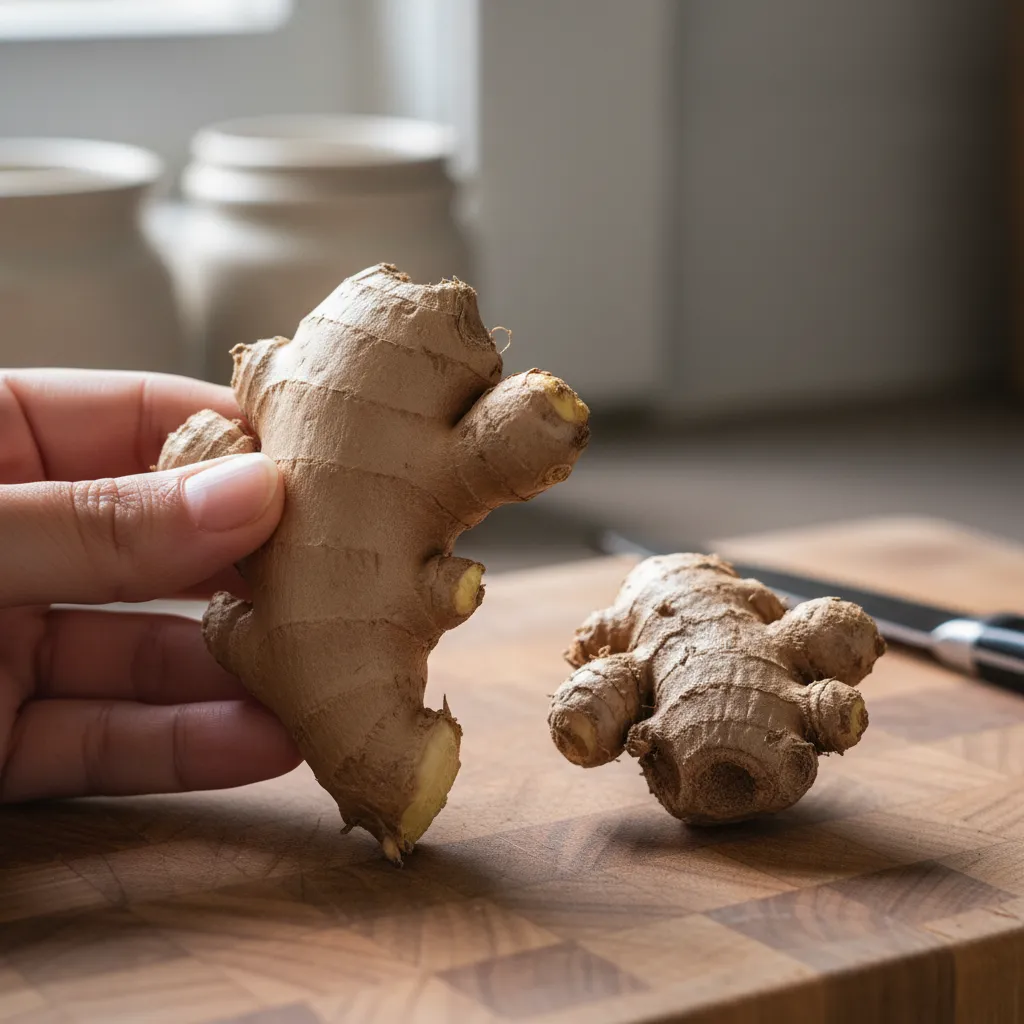
We have all been there. You reach into the crisper drawer and find a forgotten knob of ginger. It looks sad, wrinkled, and slightly shrunken.
Before you toss it in the compost, take a closer look. Slightly shriveled skin does not always mean the root is dead. It is often just thirsty.
Just as you might learn how to store fresh herbs for weeks to keep them vibrant, you can often revive ginger using simple hydration techniques.
Chef’s Rescue Notes
- The Ice Bath Soak: Place your shriveled ginger in a bowl of ice-cold water for 2 to 4 hours. This rehydrates the fibers, making the root firm enough to peel with a spoon.
- Freezer Grating: If the root remains slightly soft after soaking, pop it in the freezer. Frozen ginger is much easier to grate into a fine paste without the stringy mess.
- The Snap Test: To check for true spoilage, try to snap a small piece off. If it is mushy or shows dark, damp spots, it is time to compost it.
The Boiling Water Rescue Method
If your ginger is firm but has wrinkled skin, it has lost moisture. This method works well for roots that are dehydrated but not spoiled.
The goal is to plump up the cells with hot water. This makes peeling easier and restores the juice for grating or slicing.

Ingredients
- 1 piece shriveled ginger root (must be firm, not mushy)
- 2 cups boiling water
Instructions
- Place the ginger root in a heat-proof bowl.
- Pour the boiling water over the ginger until it is fully submerged.
- Let it sit for 15 to 20 minutes depending on the size of the root.
- Remove the ginger and pat it dry with a clean towel.
- Use immediately or store in the fridge for up to 3 days.
Great cooking isn’t just about fresh ingredients, it is about knowing how to rescue the flavors you already have.
Kitchen Rescue Secrets
- Use the edge of a metal spoon to gently scrape off the skin after soaking; it’s much safer and more efficient than a vegetable peeler.
- Check the ginger for soft spots or mold before starting; this method only works on firm, dehydrated roots, not spoiled ones.
- Save the remaining soaking water to use as a mild ginger stock for boiling rice or making a quick herbal tea.
When to Toss: Identifying Spoilage
While rehydration works for dry roots, it cannot fix rot. You must be able to spot the difference between dry ginger and spoiled ginger.
Using spoiled ginger can ruin a dish faster than using the wrong liquid in a stock vs broth debate. Trust your senses.
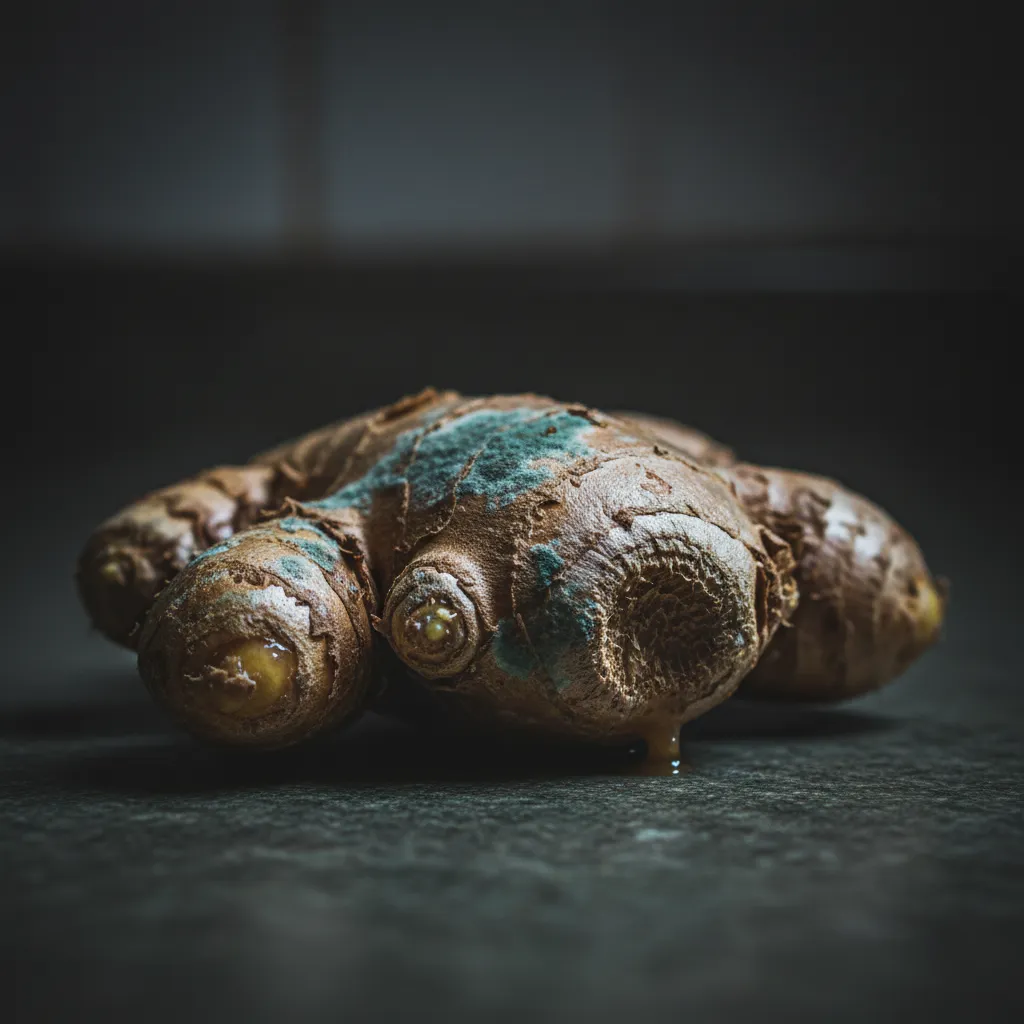
Use this checklist to determine if your ginger is past the point of no return. If you see any of these signs, discard the root immediately.
- Mushy Texture: If the root feels soft or squishy when squeezed, the internal structure has broken down.
- Mold Growth: Look for blue, green, or black spots on the skin or cut ends. Do not cut it off; spores spread deep.
- Grey Rings: When cut, the flesh should be yellow. A dark grey ring indicates the root is rotting from the inside out.
- Fermented Smell: Fresh ginger smells spicy and peppery. A sour or alcoholic smell means it has fermented.
Fresh ginger should be firm to the touch and the skin should be smooth and unwrinkled. If it’s soft or wrinkled, it’s old.
Elise Bauer, Simply Recipes
If you are unsure, slice a small piece off the end. The flesh should look vibrant and moist. If it looks dry and woody, it is safe but flavorless.
However, if it oozes liquid or smells odd, it belongs in the bin. Safety always comes first in the kitchen.
The Freshness Factor
- Always do the snap test; fresh ginger should break with a clean, crisp sound rather than bending or feeling rubbery.
- Avoid storing ginger in sealed plastic bags, as trapped moisture is the number one cause of mold and soft spots.
- If you find a small soft spot, check the rest of the root immediately; if the texture is spongy anywhere else, it is time to toss the whole piece.
Keeping the Zest Alive
Storing ginger doesn’t have to result in shriveled roots. Freezing is the chef’s secret to always having that spicy kick on hand.
Whether you toss the whole knob in a bag or prep flavor bombs, you are locking in vibrant aromatics for your next culinary creation.
Say goodbye to food waste and hello to effortless stir-fries. Your future self will thank you when dinner is ready in a flash.
From the Chef’s Pantry: Q&A
No, you can freeze it with the skin on. The frozen skin is paper-thin and unnoticeable when grated directly into hot dishes.
Frozen ginger stays fresh and potent for up to six months. Keep it in an airtight container or heavy-duty bag to prevent freezer burn.
We don’t recommend refreezing thawed ginger. It changes the texture and makes the root mushy. Only take out exactly what you need.
Absolutely. Freezing preserves the essential oils better than refrigeration, keeping that sharp, spicy flavor intact for your recipes.