
Table of Contents
- The “Safe & Smooth” Method: Heat-Treated Classic Sugar Cookie Fudge
- Holiday “Santa’s Snack” Fudge with Red and Green Sprinkles
- Cinnamon-Dust Snickerdoodle Cookie Dough Fudge
- White Chocolate Cranberry Sugar Cookie Fudge Variation
- Critical Tips: Preventing Seized Chocolate and Gritty Texture
- The Sweetest Finish to Your Kitchen Adventure
- Curiosities from the Countertop
Welcome to the art of confectionery where we transform simple ingredients into a nostalgic masterpiece. Sugar cookie fudge captures the essence of a freshly baked batch of cookies; yet it offers a silky, melt-in-your-mouth texture that only professional tempering can achieve.
This treat is perfect for busy parents and aspiring chefs alike because it yields gourmet results with minimal effort.
Creating a safe and creamy base requires a keen eye for detail and a passion for flavor. By utilizing heat-treated flour and high-quality white chocolate, we ensure every bite is both luscious and secure for your family.
I will guide you through the process of achieving that perfect set, balancing sweetness with a hint of salt to elevate the overall profile.
This recipe is more than just a dessert; it is a celebration of culinary joy shared with loved ones. Whether you are a beginner or a seasoned home cook, these techniques will help you master the delicate balance of texture and taste.
Let us step into the kitchen and create a confection that looks as beautiful as it tastes.
The “Safe & Smooth” Method: Heat-Treated Classic Sugar Cookie Fudge
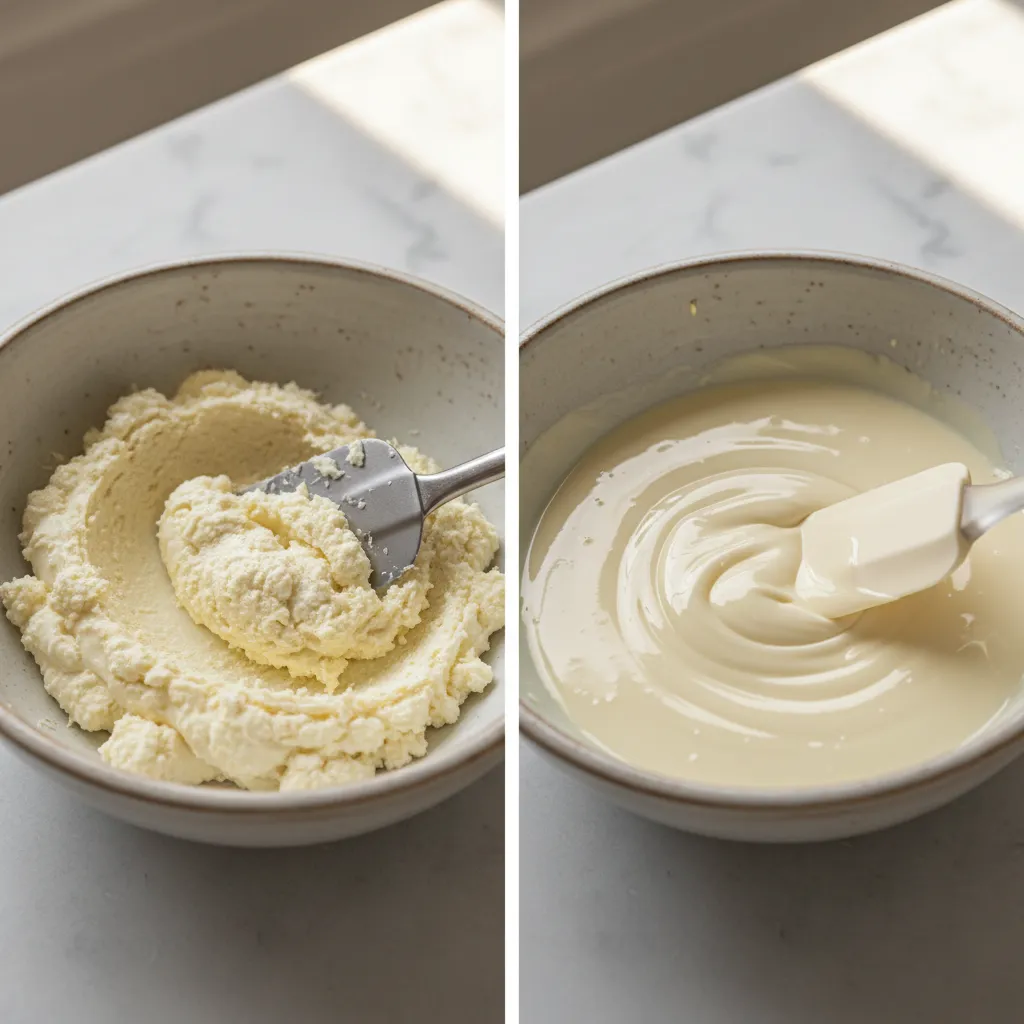
Creating the perfect sugar cookie fudge requires a balance of safety and flavor. Many home cooks forget that raw flour can pose a health risk.
Most commercial flour is raw and hasn’t been treated to kill bacteria. This “Safe & Smooth” method eliminates that worry completely.
By briefly baking your flour before adding it to the mixture, you ensure the final treat is wholesome. This step also enhances the flavor profile.
It imparts a subtle, toasted nuttiness that deepens the sugar cookie taste. Your palate will appreciate the complex layers of vanilla and butter.
The secret to guilt-free cookie dough fudge is a little heat and a lot of love.
If you enjoy the nostalgia of classic chocolate chip cookies, you will adore this texture. It mimics that beloved dough consistency safely.
Baker’s Top Secret
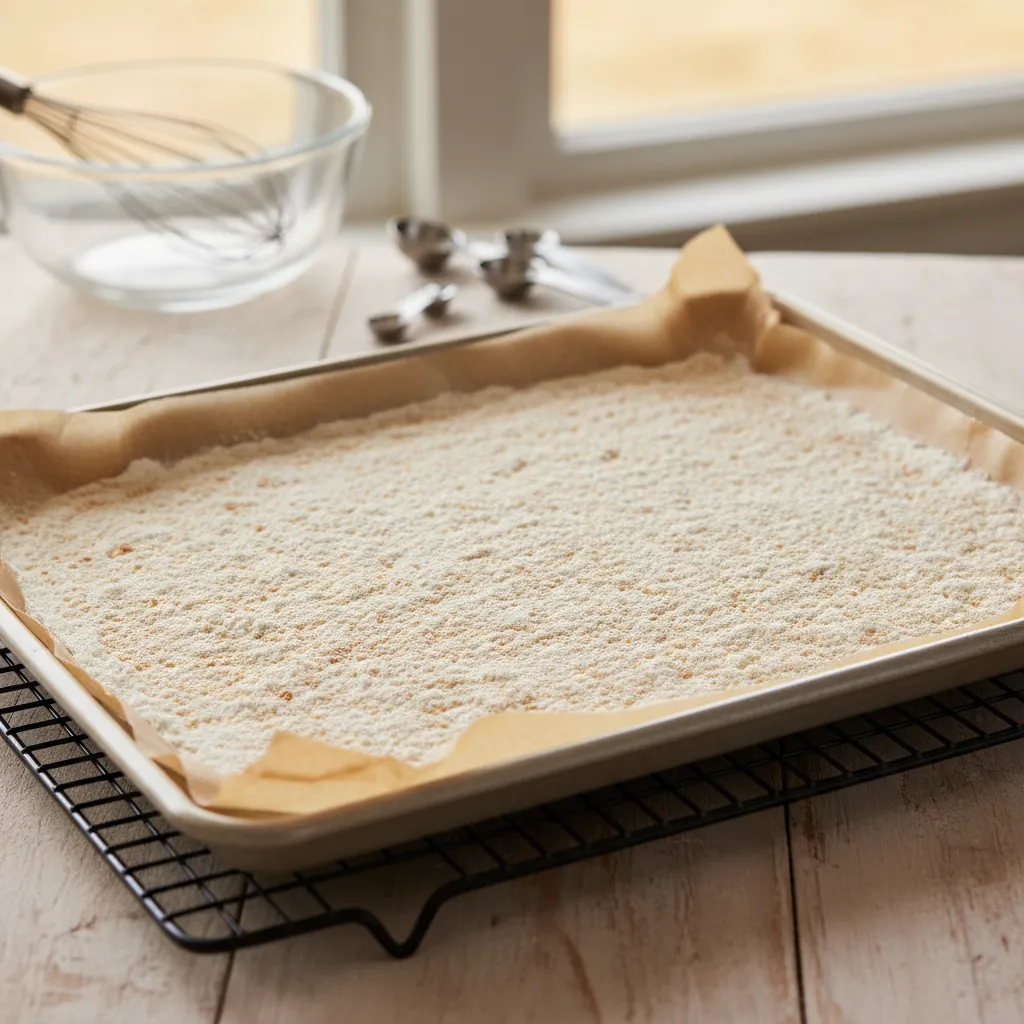
- To ensure total safety, spread your flour on a baking sheet and toast at 350°F for 5 minutes. Use a food thermometer to check that it reaches 160°F.
- Heat-treating often causes flour to clump together. Always sift the flour after it has cooled to keep your fudge silky smooth and lump-free.
- Patience is key! Let the flour cool completely before mixing. Adding hot flour to your butter and sugar will melt the fats prematurely and ruin that authentic cookie dough texture.
Why Heat-Treating Matters
Heat-treating flour is a critical step for any no-bake dessert that mimics batter. It neutralizes potential pathogens like E. coli or Salmonella.
This process is quick and requires zero special equipment. You simply need an oven and a baking sheet to achieve a safe ingredient.
Flour doesn’t look like a raw food, but most flour is raw. That means it hasn’t been treated to kill germs that cause food poisoning.
Centers for Disease Control and Prevention, Say No to Raw Dough
Beyond safety, this technique prevents the gritty texture often found in raw mixes. The heat helps the flour particles absorb moisture better.
The result is a silky, artisanal mouthfeel that melts on the tongue. It turns a simple sweet into a luxurious experience.
| Feature | Raw Flour Fudge ❌ | Heat-Treated Fudge ✅ |
|---|---|---|
| Safety | Risk of bacteria | Bacteria neutralized |
| Texture | Often gritty or grainy | Smooth and velvety |
| Flavor | Starchy, raw aftertaste | Nutty, cooked flavor |
| Digestibility | Can cause bloating | Gentle on the stomach |
Heat-Treat Hacks
- Short on time? You can microwave flour in a microwave-safe bowl in 30-second intervals (stirring in between) until it reaches 165°F to kill bacteria without preheating the oven.
- Heating flour releases moisture which can create clumps; always sift your flour after it cools to ensure your final dough is perfectly smooth.
- Make a big batch ahead of time! Heat-treat a full bag of flour and store it in an airtight container so you are ready to whip up safe-to-eat treats instantly.
Classic Heat-Treated Sugar Cookie Fudge Recipe
This recipe uses the “Safe & Smooth” technique to create a decadent treat. It captures the essence of fresh-baked sugar cookies without the oven time.
Ensure you have your mise en place ready before starting. The chocolate mixture sets quickly, so speed is essential for a smooth finish.
For those who love sweet treats that are easy to share, this is a winner. It travels well and looks stunning in a gift box.
Ingredients
- 3 cups white chocolate chips (high quality)
- 14 oz sweetened condensed milk (one standard can)
- 1 cup all-purpose flour
- 1/2 cup dry sugar cookie mix (store-bought or homemade blend)
- 2 tbsp unsalted butter, cubed
- 1 tsp pure vanilla extract
- 1/4 cup holiday sprinkles (plus extra for garnish)
- Pinch of sea salt
Instructions
- Preheat your oven to 350°F (175°C). Spread the 1 cup of flour on a baking sheet lined with parchment paper.
- Bake the flour for 5 to 7 minutes. It should smell faintly nutty but not burnt. Let it cool completely.
- Line an 8×8 inch square baking pan with parchment paper or foil. Lightly grease the lining with butter.
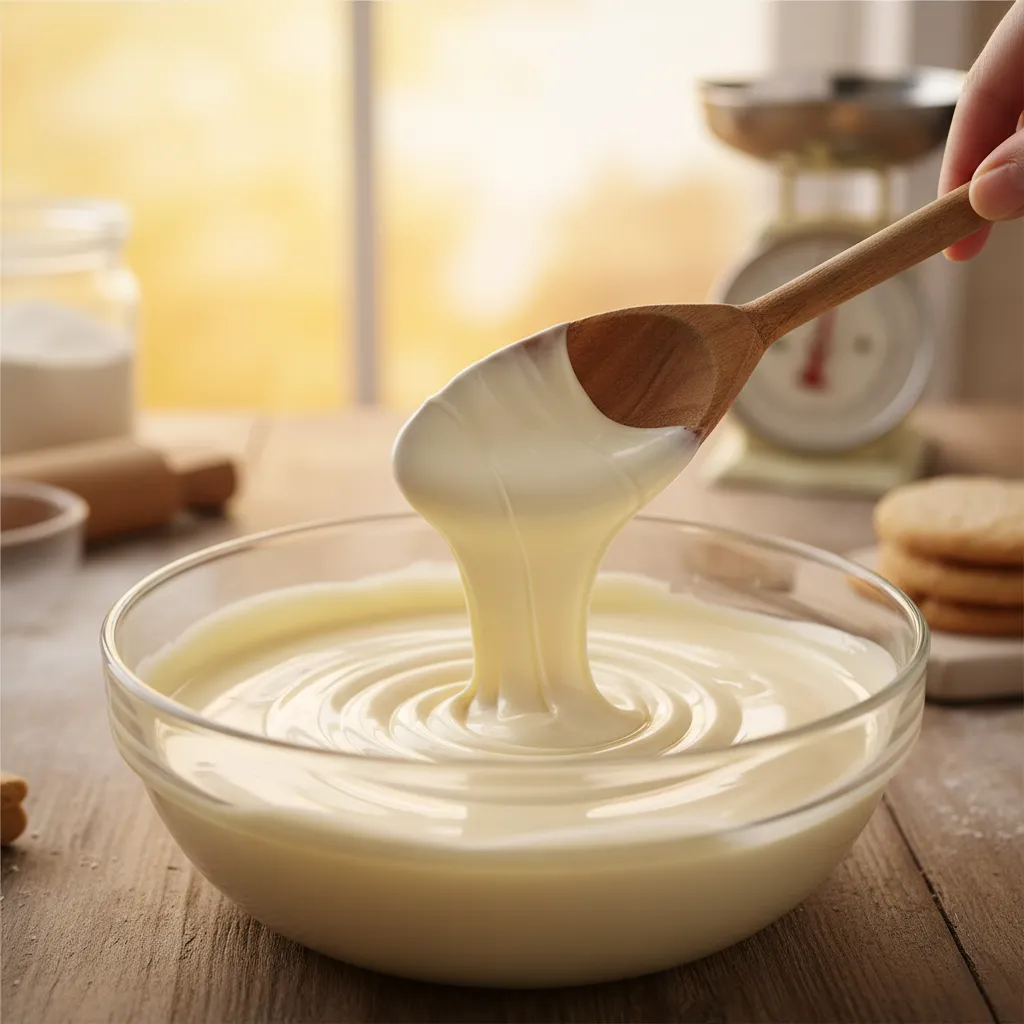
- In a large saucepan, combine the white chocolate chips, sweetened condensed milk, and cubed butter.
- Heat over low heat, stirring constantly until the mixture is fully melted and smooth. Do not let it boil.
- Remove from heat. Quickly whisk in the vanilla extract, salt, cooled flour, and dry sugar cookie mix.
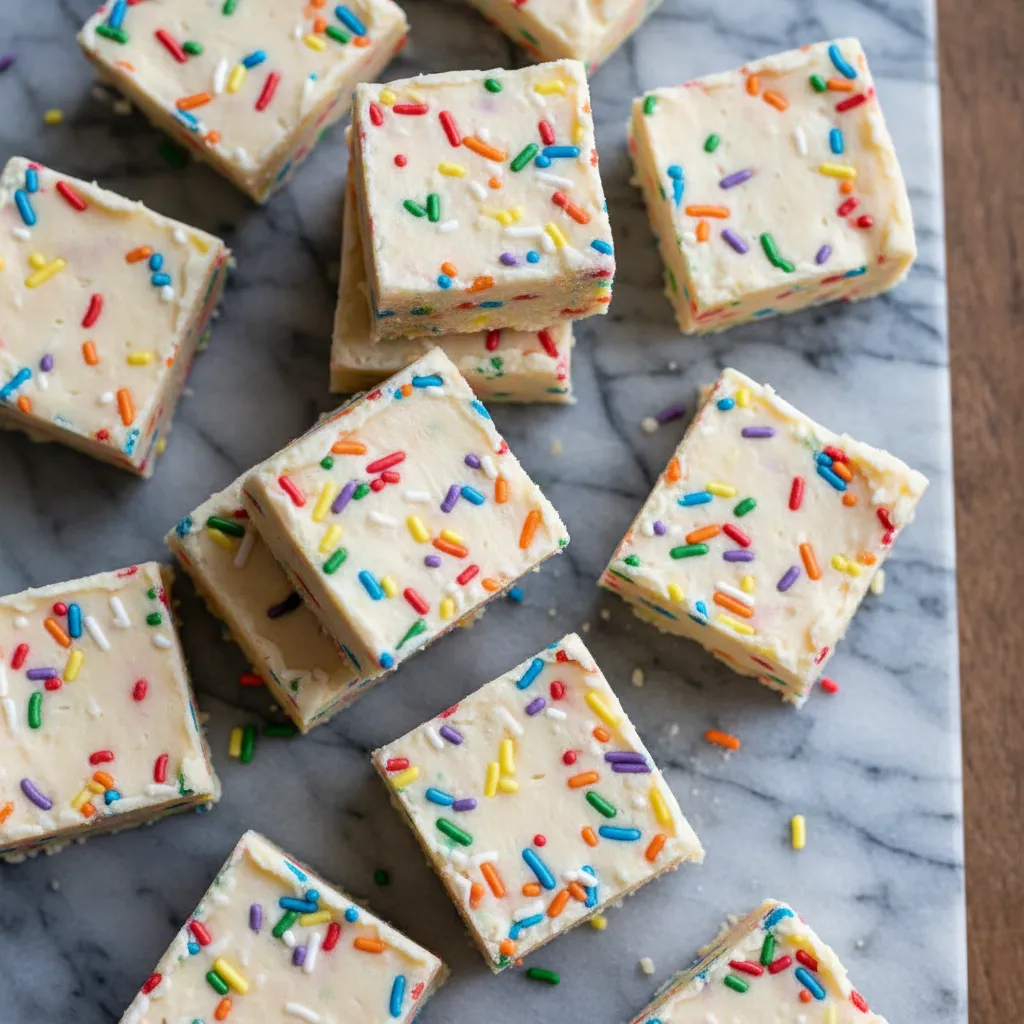
- Stir vigorously until the mixture is uniform and thick. Gently fold in the 1/4 cup of sprinkles.
- Pour the fudge into the prepared pan. Smooth the top with a spatula and top with extra garnish sprinkles.
- Refrigerate for at least 2 hours until firm. Lift out using the parchment liner and slice into squares.
The Sweet Scoop
- Short on time? You can heat-treat your flour in the microwave instead of the oven. Heat it in a microwave-safe bowl on high for 30-second intervals, stirring between each, until the temperature reaches 160°F.
- To achieve perfectly sharp edges when slicing, wipe your knife with a warm, damp cloth between every single cut. This prevents the sticky fudge from dragging and keeps your squares looking professional.
- Prevent your colorful sprinkles from bleeding into the white chocolate by waiting about 60 seconds after combining the wet and dry ingredients before folding them in. The mixture should be warm, not hot.
Holiday “Santa’s Snack” Fudge with Red and Green Sprinkles
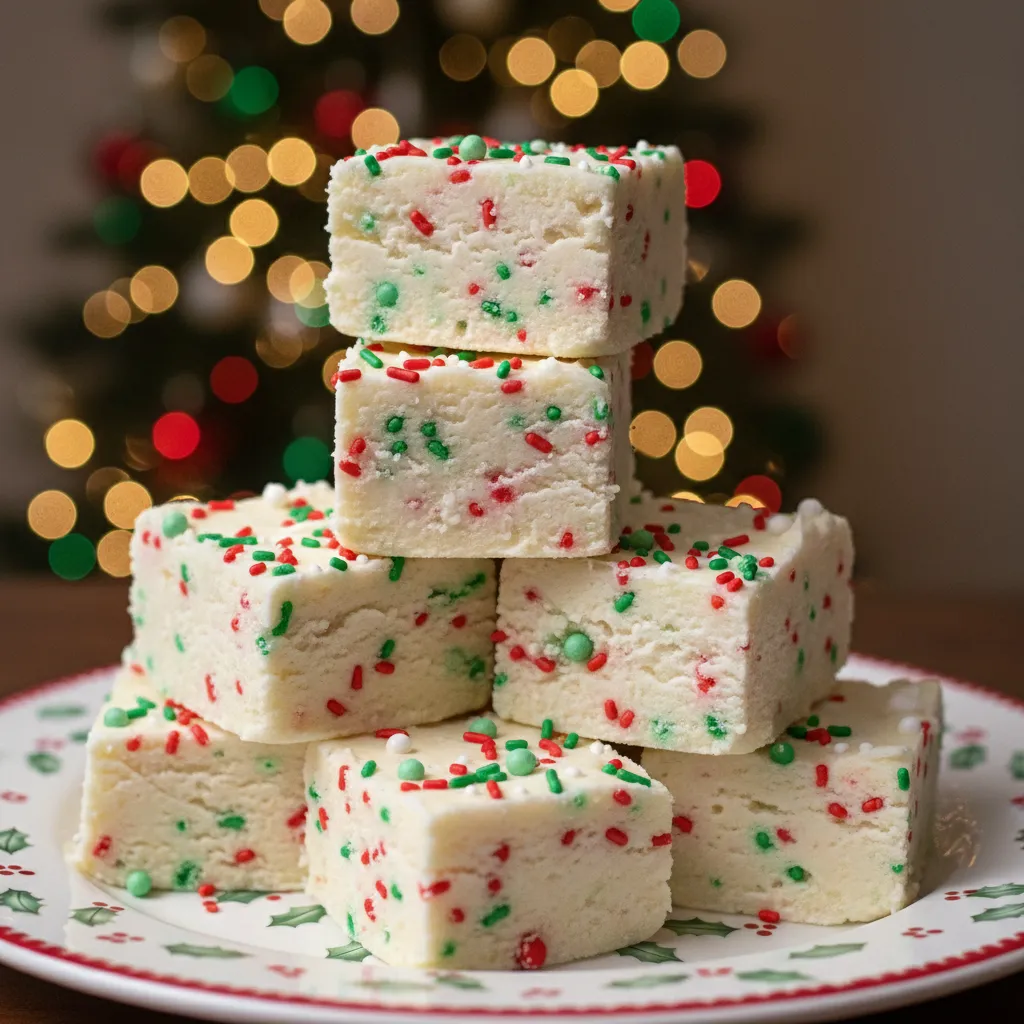
This festive treat captures the magic of Christmas Eve in a single bite. It combines the nostalgia of sugar cookies with the creamy texture of fudge.
We call it “Santa’s Snack” because it is effortless to whip up before the big night. The vibrant red and green sprinkles add a joyful pop of color.
If you are assembling a holiday dessert board, these squares look stunning sitting next to classic spiced treats. They pair perfectly with an Easy Homemade Gingerbread Cookies Recipe.
Holiday baking isn’t just about the sweets; it is about the memories made in a warm, vanilla-scented kitchen.
Ingredients
- 3 cups high-quality white chocolate chips
- 14 oz can sweetened condensed milk
- 1/2 cup dry sugar cookie mix (heat-treated for safety)
- 2 tbsp unsalted butter, cubed
- 1 tsp pure vanilla extract
- 1/2 cup festive red and green sprinkles, divided
Instructions
- Line an 8×8 inch square baking pan with parchment paper. Leave an overhang on the sides for easy removal later.
- Combine white chocolate chips, sweetened condensed milk, and butter in a microwave-safe bowl.
- Microwave in 30-second intervals. Stir vigorously between each burst until completely smooth and melted.
- Fold in the dry sugar cookie mix and vanilla extract until fully combined. The mixture will thicken quickly.
- Gently stir in 1/4 cup of the sprinkles. Do not overmix, or the colors might bleed into the white fudge.
- Pour the mixture into the prepared pan. Smooth the top with a spatula to create an even layer.
- Press the remaining 1/4 cup of sprinkles onto the top surface gently.
- Refrigerate for at least 2 hours until firm. Lift out using the parchment paper and slice into small squares.
White chocolate is notoriously temperamental. Because it contains milk solids and sugar but no cocoa solids, it can burn easily if heated too quickly.
Kelli Foster, The Kitchn
When selecting decorations for this fudge, texture matters. Some sprinkles dissolve fast, while others provide a satisfying crunch.
Here is a quick guide to choosing the best festive toppings for your fudge mixture.
| Sprinkle Type | Best Use | Texture Profile |
|---|---|---|
| Jimmies | Mixing inside the fudge | Soft and melt-in-your-mouth |
| Nonpareils | Topping garnish only | Crunchy and prone to bleeding |
| Quins (Sequins) | Top or Mix-in | Slight crunch, holds shape well |
| Sanding Sugar | Dusting on top | Sparkly and gritty texture |
For a complete holiday spread, consider serving these alongside warm beverages. They melt delightfully on the tongue after a sip of coffee.
You can even browse 15 Healthy Homemade Coffee Creamer Recipes to elevate your coffee game to match this rich dessert.
North Pole Kitchen Secrets
- To heat-treat your dry cookie mix at home, spread it on a baking sheet and bake at 350°F for 5 minutes. Allow it to cool completely before mixing it in to ensure the chocolate sets correctly.
- For bakery-perfect squares, run your knife under hot water and wipe it dry before slicing. Wipe the blade clean between every cut to prevent the fudge from dragging and smearing.
- White chocolate seizes instantly if it touches water. Ensure your bowl and spatula are completely dry before melting, as even a tiny drop of liquid can turn the mixture grainy and unusable.
Cinnamon-Dust Snickerdoodle Cookie Dough Fudge

Imagine the soft, chewy center of a snickerdoodle cookie without the need for an oven. This fudge captures that exact comfort.
The base is creamy and rich, mimicking the texture of raw dough. We use heat-treated flour to ensure the “dough” flavor is authentic yet safe.
A generous dusting of cinnamon sugar provides a gentle crunch. It contrasts beautifully with the smooth, buttery consistency of the fudge.
Snickerdoodle fudge is the cozy hug your tastebuds didn’t know they needed.
The secret ingredient here is a pinch of cream of tartar. It gives the fudge that signature tangy bite found in classic snickerdoodle cookies.
If you adore warm, spiced flavors, you might also love our Easy Homemade Gingerbread Cookies Recipe.
This recipe comes together quickly but requires chilling time. Make sure you clear a spot in your refrigerator before you begin.
White chocolate is the most fragile of all chocolates; it burns the easiest. It should be melted very slowly over low heat.
The Spruce Eats, How to Melt White Chocolate
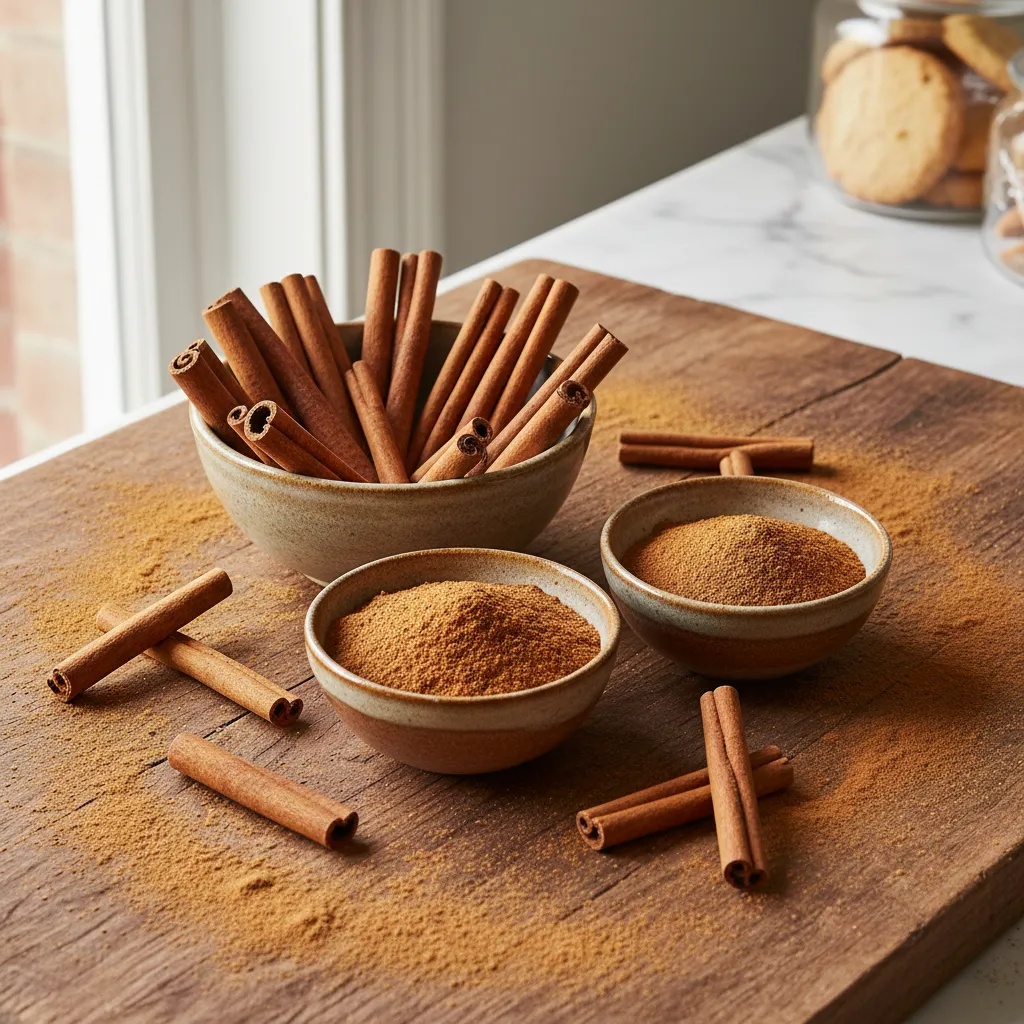
Choosing the right cinnamon can elevate this simple dessert. Here is a quick guide to help you select the best spice for your palate.
| Cinnamon Variety | Flavor Profile | Best For |
|---|---|---|
| Saigon (Cassia) | Spicy, bold, and intense sweet heat. | Rich fudge and heavy batters. |
| Ceylon (True) | Floral, delicate, and subtly sweet. | Light dustings and fruit dishes. |
| Korintje | Smooth, balanced, and classic woody notes. | Standard baking and general use. |
Ingredients
- 2 1/2 cups white chocolate chips (high quality)
- 14 oz sweetened condensed milk (one standard can)
- 1 cup all-purpose flour, heat-treated
- 1/4 cup unsalted butter, cubed
- 1 tsp vanilla extract
- 1/2 tsp cream of tartar
- 1 tbsp granulated sugar (for topping)
- 1 tsp ground cinnamon (for topping)
Instructions
- Prepare the Pan: Line an 8×8 inch square baking pan with parchment paper. Leave an overhang on the sides for easy removal later.
- Mix Topping: In a small bowl, stir together the granulated sugar and ground cinnamon. Set this mixture aside for the garnish.
- Melt Base: Combine white chocolate chips, condensed milk, and butter in a large microwave-safe bowl. Heat in 30-second intervals.
- Stir Gently: Stir well between each heating interval until the mixture is completely smooth and glossy. Do not overheat.
- Incorporate Flour: Sift the heat-treated flour and cream of tartar into the melted chocolate mixture. Stir vigorously to remove lumps.
- Add Vanilla: Fold in the vanilla extract until fully combined. The mixture will become thick and dough-like in texture.
- Pour and Set: Press the fudge evenly into the prepared pan. Smooth the top with a spatula. Sprinkle immediately with the cinnamon sugar.
- Chill: Refrigerate for at least 2 hours until firm. Lift out using the parchment paper and slice into small squares.
To heat-treat flour: Spread flour on a baking sheet and bake at 350°F (175°C) for 5 minutes. Allow it to cool completely before using.
These squares are very rich. Small portions are best for serving. They pair wonderfully with a hot cup of coffee or cold milk.
Store leftovers in an airtight container in the fridge. They will stay fresh and delicious for up to two weeks, if they last that long!
For a lighter treat to balance this indulgence, check out our guide on 7 Cold Pressed Juice Recipes for Skin.
Fudge Perfection Tips
- Microwave shortcut: If you want to avoid turning on the oven, you can heat-treat the flour in the microwave. Heat it in a bowl for 30-second intervals, stirring in between, until it reaches an internal temperature of 165°F.
- Get clean cuts: Fudge can be sticky even when set. Run a sharp knife under hot water and wipe it dry with a towel before slicing; the heat helps glide through the mixture for bakery-perfect edges.
- Check the label: For the smoothest melt, look for white chocolate that lists cocoa butter as a primary ingredient. Cheaper “almond bark” or generic chips often rely on oils that can affect the final texture.
White Chocolate Cranberry Sugar Cookie Fudge Variation
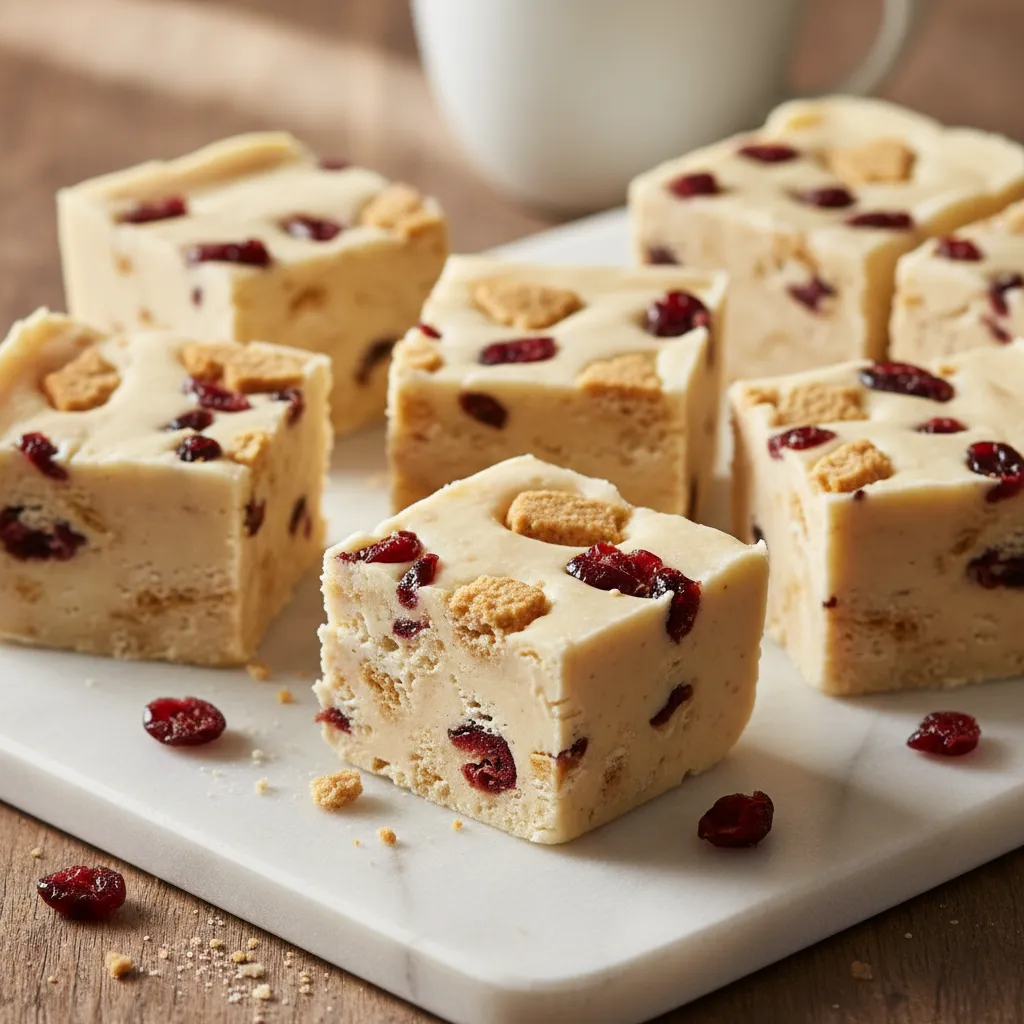
This elegant variation brings a sophisticated twist to your standard fudge repertoire. The tartness of cranberries cuts through the rich sweetness.
White chocolate provides a creamy canvas that highlights the zesty fruit notes. It creates a balance that appeals to both adults and children.
Tart cranberries and creamy white chocolate create the ultimate festive bite for your holiday platter.
Using high-quality white chocolate is essential for the best texture here. Lower quality chips often contain oils that prevent a smooth melt.
If you enjoy exploring tart and sweet fruit combinations, you might also appreciate these 15 Cranberry Salad Recipes with Jello and Fresh Cranberries.
Visually, the ruby-red specks against the ivory fudge make this a stunning gift. It looks professional but requires minimal effort to assemble.
Ingredients
- 3 cups high-quality white chocolate chips
- 14 oz sweetened condensed milk (one standard can)
- 1 cup sugar cookie mix (heat-treated) or crushed baked cookies
- 3/4 cup dried cranberries, roughly chopped
- 1 tsp vanilla bean paste or extract
- 1/4 tsp sea salt
- Zest of 1 orange (optional for citrus notes)
Instructions
- Line an 8×8 inch baking pan with parchment paper, leaving an overhang on the sides for easy removal later.
- Combine the white chocolate chips and sweetened condensed milk in a large heat-proof bowl.
- Melt in the microwave in 30-second intervals, stirring vigorously between each burst until completely smooth.
- Stir in the vanilla extract, sea salt, and orange zest if using. Do not overmix at this stage.
- Gently fold in the sugar cookie mix (or crumbs) and the chopped dried cranberries until evenly distributed.
- Pour the mixture into the prepared pan and smooth the top with a spatula. Press extra cranberries on top if desired.
- Refrigerate for at least 2 to 3 hours until the fudge is firm to the touch.
- Lift the fudge out using the parchment paper and cut into small 1-inch squares using a sharp knife.
White chocolate is very delicate and can easily overheat, causing it to seize or become lumpy.
Ghirardelli Chocolate Company, Baking Tips & Techniques
Chopping the dried cranberries is a crucial step that many beginners skip. Smaller pieces ensure you get a burst of flavor in every single bite.
This fudge is quite rich, so cutting small squares is recommended. A little goes a long way when serving this decadent treat.
For a festive touch, you can drizzle extra melted white chocolate over the set fudge. It adds texture and makes the presentation pop.
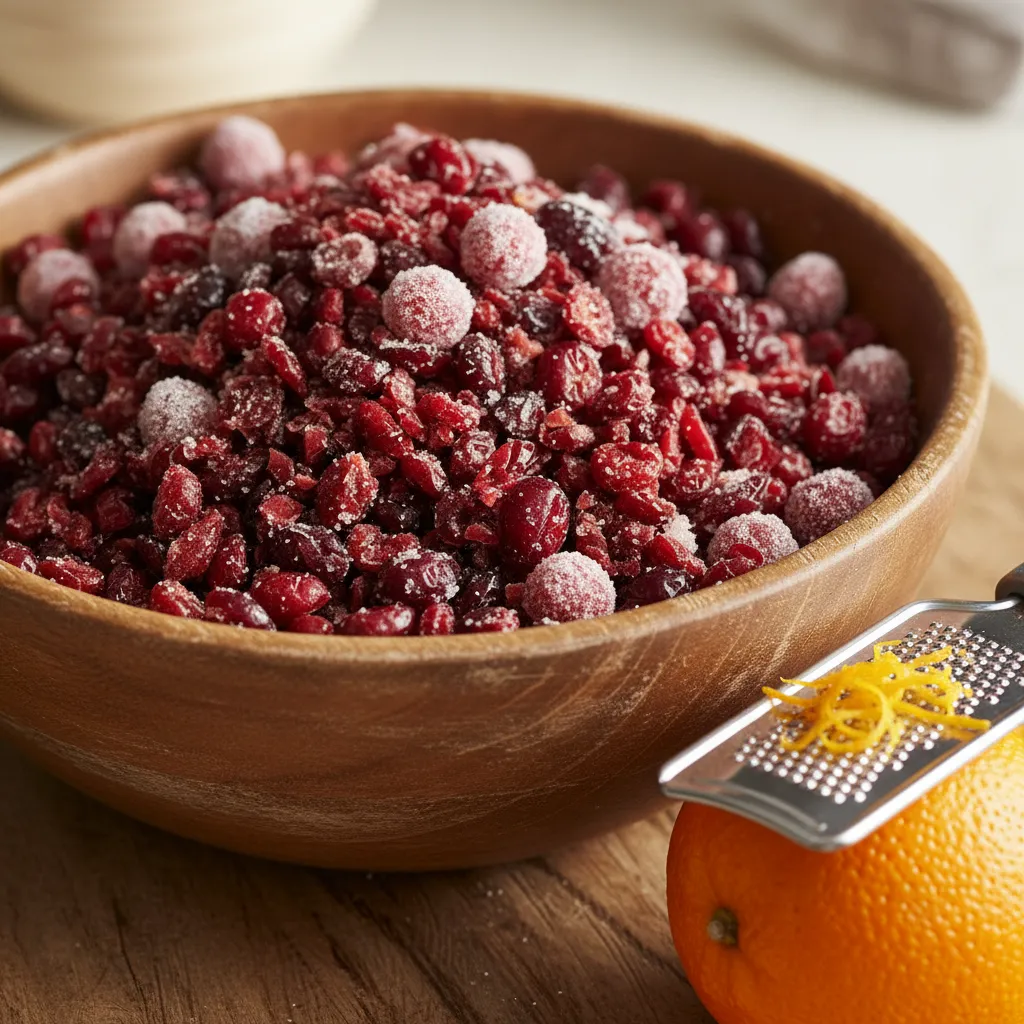
Cranberry Preparation Guide
The texture of your fruit impacts the final mouthfeel of the fudge. Use this guide to choose the right preparation method for your palate.
| Preparation Style | Texture Impact | Best For |
|---|---|---|
| Roughly Chopped | Chewy, distributed bites | Balanced flavor in every square |
| Whole Dried | Large, chewy pockets | Rustic look and intense tartness |
| Soaked & Drained | Plump, softer bite | Softer fudge texture (shelf life reduces) |
| Freeze-Dried | Crispy crunch | Adding texture contrast without moisture |
Store this variation in an airtight container in the refrigerator. The white chocolate stays firmer when chilled, keeping the squares neat.
Fudge Perfection Tips
- Clean cuts every time: To prevent the sticky cranberries from tearing your fudge when slicing, run a sharp knife under hot water and wipe it dry between every cut.
- Safety first: If using raw sugar cookie mix instead of baked crumbs, spread the dry mix on a baking sheet and bake at 350°F for 5 minutes to heat-treat the flour before adding it to the mixture.
- Sticky fruit hack: If your cranberries clump together while chopping, lightly toss them in a teaspoon of the sugar cookie mix to keep the pieces separate for even distribution.
Critical Tips: Preventing Seized Chocolate and Gritty Texture
Achieving that melt-in-your-mouth consistency is the holy grail of fudge making. A grainy texture can ruin even the most flavorful batch.
White chocolate is notoriously temperamental compared to dark chocolate. It contains more milk solids and sugar, making it prone to scorching.
True fudge perfection lies in the gentle heat and the driest of spoons.
The Smooth Operator
- Ban the water! Ensure every utensil and bowl is completely dry before starting; even a microscopic drop of moisture will cause your chocolate to seize into an unworkable lump.
- Treat white chocolate delicately. Use short bursts in the microwave (15-20 seconds) and stir frequently to avoid scorching the sensitive milk solids.
- If your chocolate starts to look slightly grainy or stiff, try whisking in a teaspoon of coconut oil or butter to help restore the glossy texture.
The Science of Seizing: Water is the Enemy
Seizing happens when a tiny amount of moisture comes into contact with melting chocolate. The sugar turns into syrup and clumps the cocoa particles.
This transforms your silky mixture into a gritty, stiff paste instantly. It is heartbreaking to watch, but it is entirely preventable.
Always ensure your bowls and spatulas are completely dry before starting. Even steam from a double boiler can cause this reaction if you are not careful.
Chocolate seizes when a small amount of moisture is introduced… turning it into a paste. To fix it, you need to add more liquid.
King Arthur Baking Company, How to Melt Chocolate
Kitchen Rescue
- Always wipe the bottom of your bowl as soon as you lift it from the double boiler to prevent any stray condensation from dripping into your chocolate.
- If disaster strikes and your chocolate seizes, whisk in a tablespoon of boiling water or warm cream at a time; it sounds counterintuitive, but more liquid helps the sugar and cocoa particles move freely again.
- Switch to a silicone spatula instead of a wooden spoon, as wood can retain hidden moisture that can trigger a grainy reaction.
Banishing the Gritty Texture
Grittiness often comes from undissolved sugar crystals or overheated milk solids. This ruins the creamy experience we crave in holiday sweets.
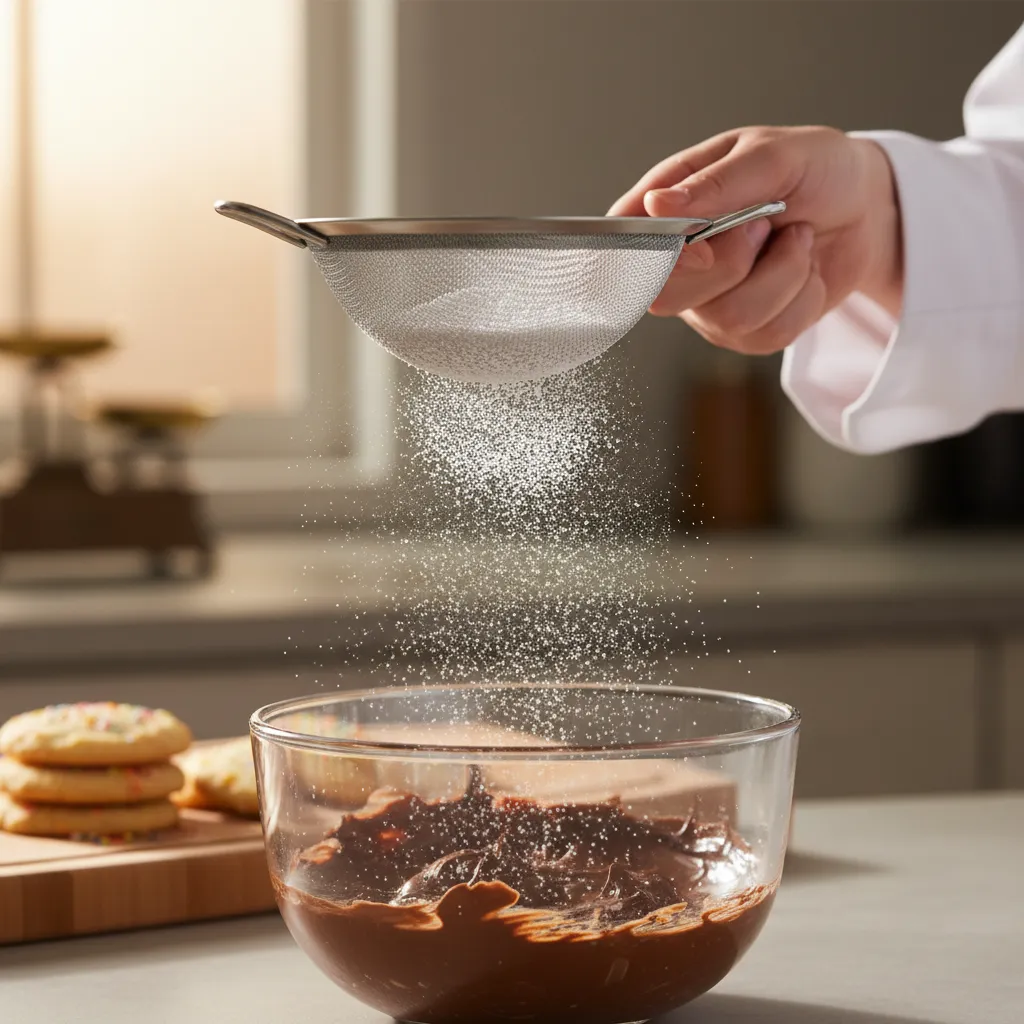
If your recipe calls for powdered sugar, you must sift it first. This removes hard lumps that refuse to melt into the butter and chocolate mixture.
Cook your sugar and milk mixture until the sugar fully dissolves. Rub a drop between your fingers, carefully, to test for any remaining graininess.
If you enjoy baking chocolate chip cookies, you know that texture is paramount. The same rule applies here for a luxurious bite.
Troubleshooting Common Fudge Disasters
Even experienced cooks face challenges with white chocolate fudge. Here is how to identify and solve the most common texture issues quickly.
| Problem | Likely Cause | The Fix |
|---|---|---|
| Seized (Stiff/Dry) | Water contact or steam | Whisk in 1 tbsp warm heavy cream or butter. |
| Grainy Mouthfeel | Undissolved sugar | Gently reheat and stir constantly until smooth. |
| Oily Separation | Overheating the mix | Remove from heat and stir vigorously to emulsify. |
| Too Soft/Sticky | Under-cooked syrup | Reheat to 234°F (soft ball stage) or chill longer. |
Maintaining a low heat is essential. White chocolate burns at a much lower temperature than dark chocolate, leading to a lumpy mess.
If you are looking for more sweet treats to serve alongside your fudge, texture variety is key on any dessert platter.
Essential Tools Checklist
Having the right mise en place prevents panic during the melting process. Gather these items before you turn on the stove.
- Rubber Spatula: Scrapes the sides efficiently to prevent burning.
- Candy Thermometer: Essential for precise sugar syrup temperatures.
- Heavy-Bottomed Pot: Distributes heat evenly to avoid hot spots.
- Sieve: Critical for removing lumps from dry ingredients.
The Smoothness Strategy
- Use a candy thermometer to ensure your syrup reaches exactly 234°F for the perfect set without the grit.
- If the mixture looks oily, remove it from the heat immediately and stir vigorously to re-emulsify the fats.
- Always sift your powdered sugar through a fine-mesh sieve to eliminate stubborn lumps before they hit the pan.
The Sweetest Finish to Your Kitchen Adventure
Mastering this sugar cookie fudge recipe adds a safe, delicious weapon to your dessert arsenal. The texture is simply unbeatable.
Remember, taking that extra moment to heat-treat your flour elevates the flavor from good to gourmet. It ensures every bite is worry-free.
Whether you’re gifting these squares or hoarding them for a movie night, the creamy vanilla notes are sure to satisfy.
So, grab your spatula and let the magic happen. Your kitchen is about to smell like pure happiness. Enjoy every bite!
Curiosities from the Countertop
Store your fudge in an airtight container at room temperature for up to two weeks. For longer freshness, refrigerate it for up to a month.
Absolutely! Almond flour adds a lovely nuttiness and makes the recipe gluten-free. It generally doesn’t require heat-treating, saving you a step.
If your fudge won’t set, it likely had too much liquid or wasn’t cooked long enough. Pop it in the fridge to firm up, or serve it as a spoonable treat.
Fold sprinkles in at the very end so they don’t melt. Using “jimmies” works best as they hold their shape and color in the warm mixture.