Table of Contents
- 1. The Interactive Sourdough Starter Symptom Checker
- 2. Distinguishing Between Dark Hooch and Surface Mold
- 3. Decoding Scents: From Chemical Acetone to Sour Vinegar
- 4. Troubleshooting Sluggish Growth with New Feeding Ratios
- 5. Balancing Temperature and Water Quality for Success
- Mastering Your Living Culture
- Sourdough Secrets & Solutions
There is nothing quite like the golden, crackling crust of a fresh loaf of sourdough cooling on your counter.
This living tradition begins with a vibrant starter, a simple mix of flour and water that transforms into a bubbling powerhouse of flavor and nutrition.
When your starter is thriving, it yields bread with a perfect tang and an airy crumb that delights every guest at your table.
However, even the most passionate home cooks encounter moments of doubt when their liquid gold seems sluggish or develops an unusual scent.
You might find yourself staring at a jar that refuses to rise, wondering where the fermentation went wrong.
These challenges are simply part of the journey toward mastering this ancient craft; every stumble is a chance to learn more about the science of bread.
This troubleshooting guide is designed to be your nurturing companion in the kitchen, offering clear solutions to revive your starter and restore its vitality.
Whether you are a busy parent or an aspiring chef, these expert fixes will ensure your sourdough remains a resilient source of joy.
Let us transform those frustrations into the foundation for your best artisan loaves yet.
1. The Interactive Sourdough Starter Symptom Checker
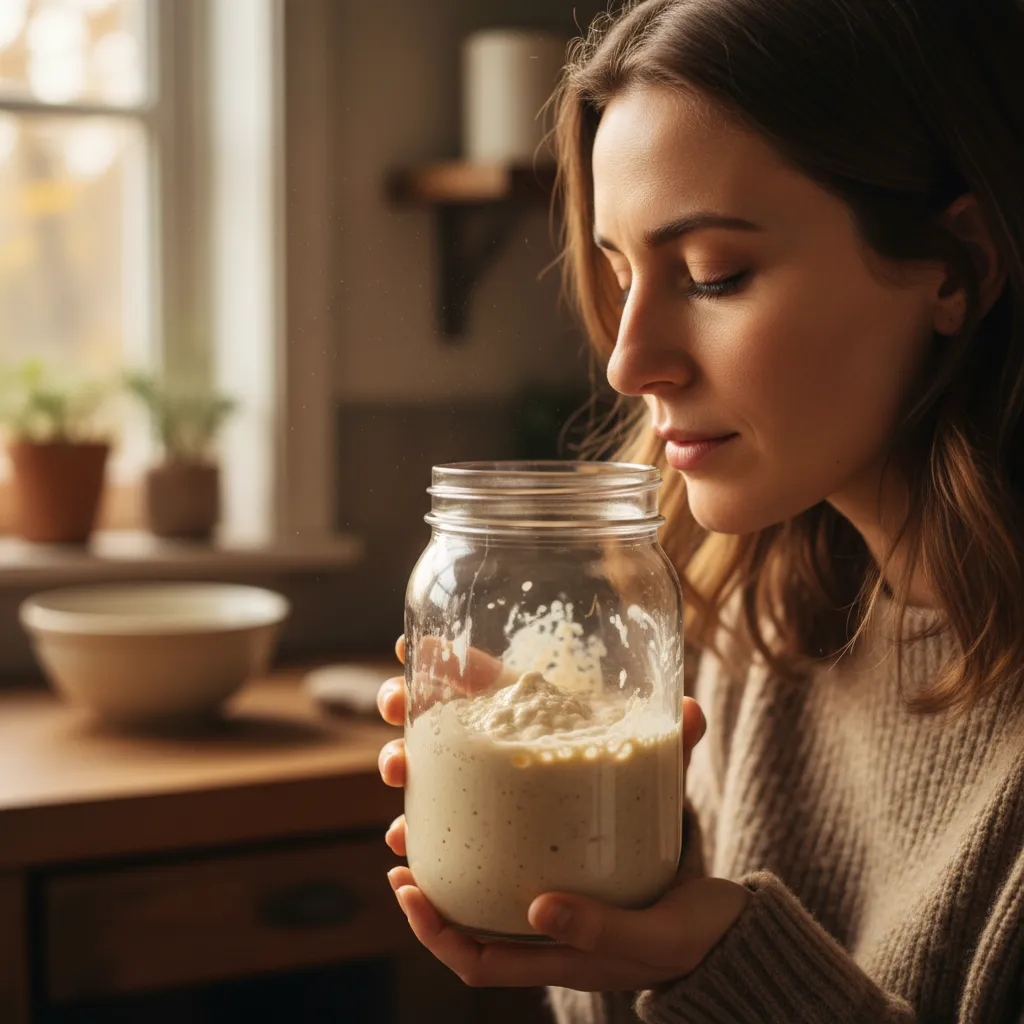
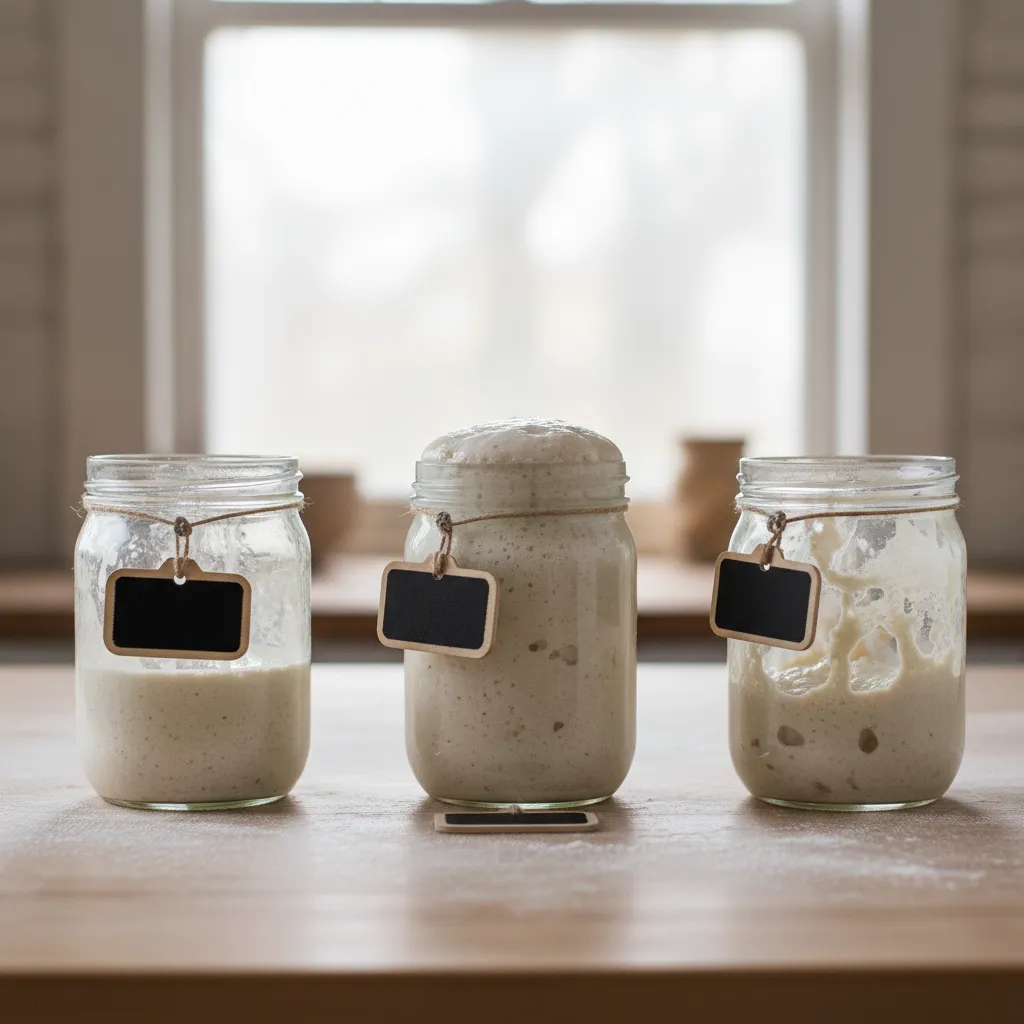
Troubleshooting a sourdough starter feels like decoding a secret language. Your culture communicates through bubbles, liquid layers, and distinct aromas.
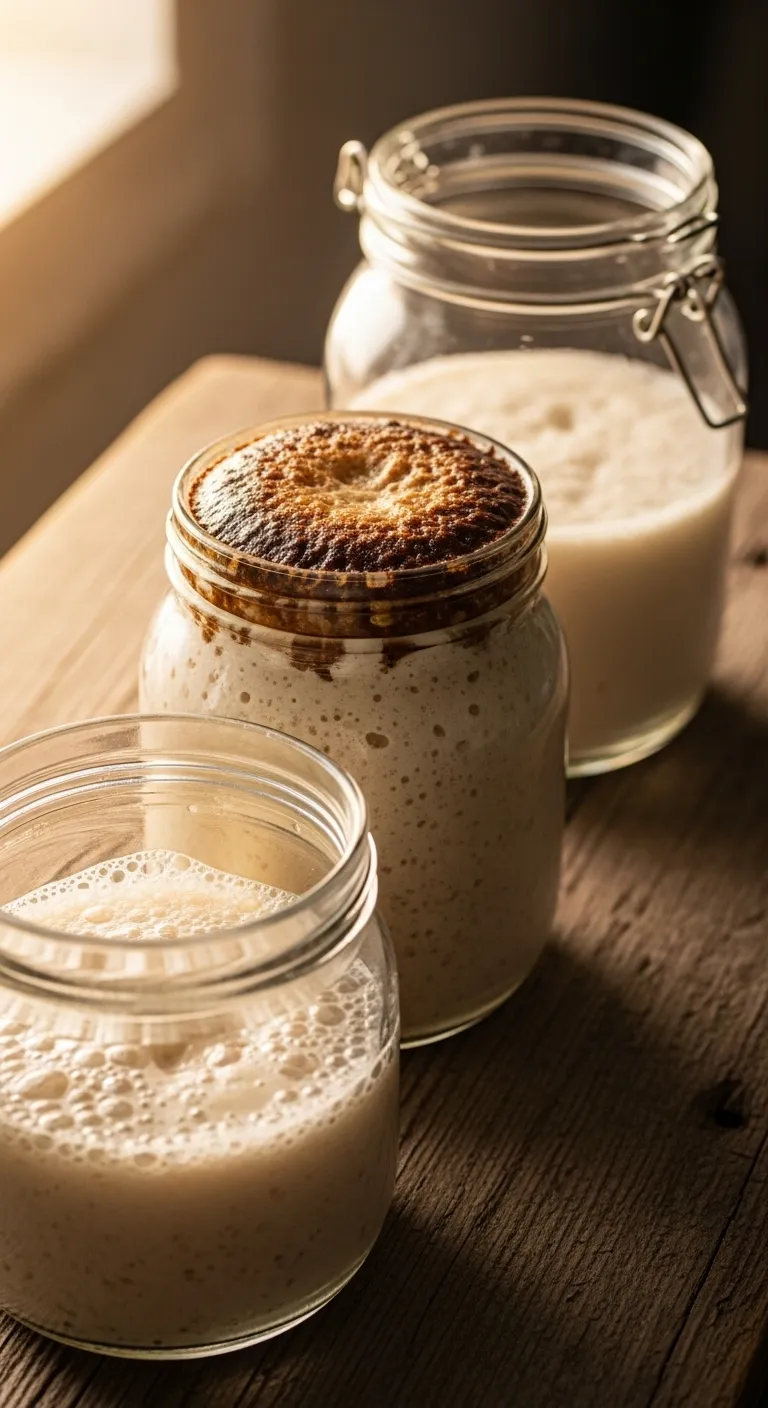
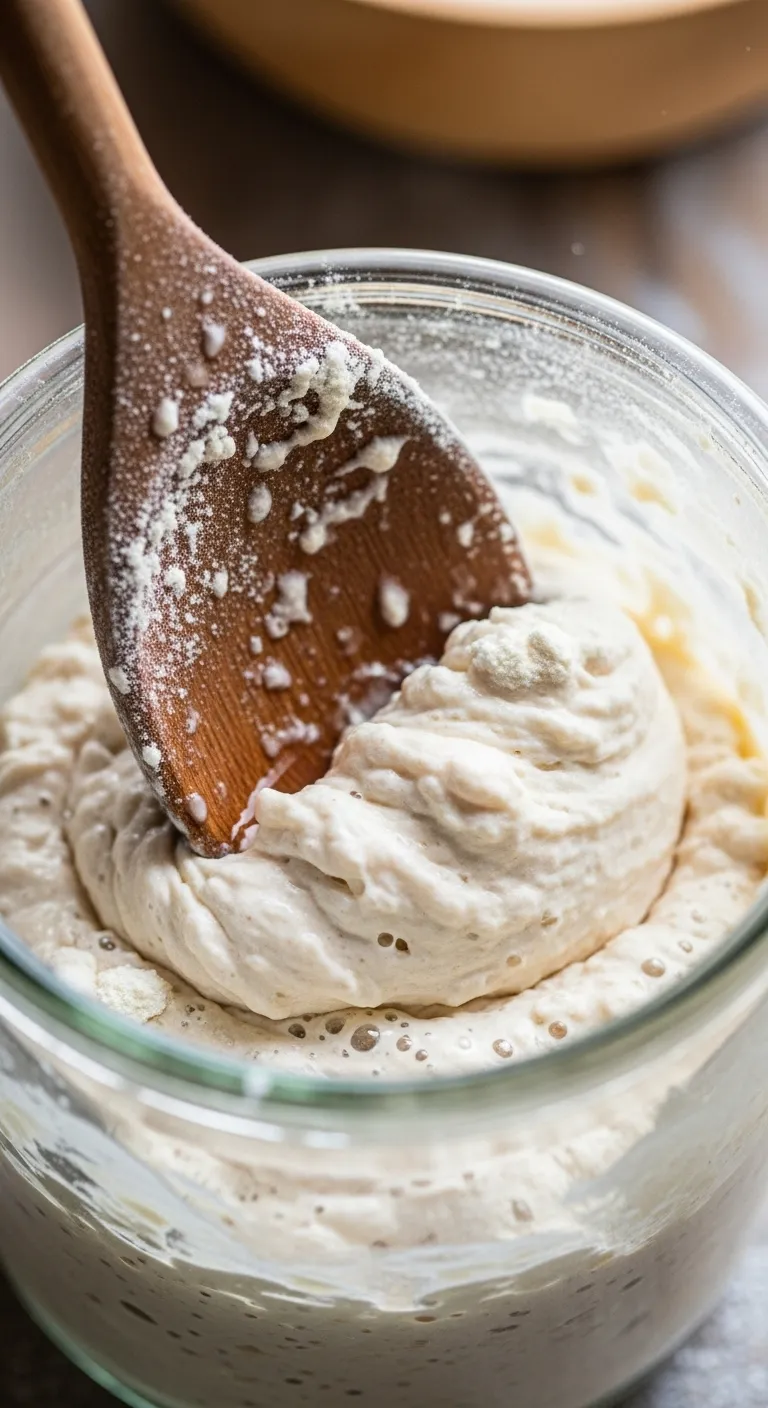
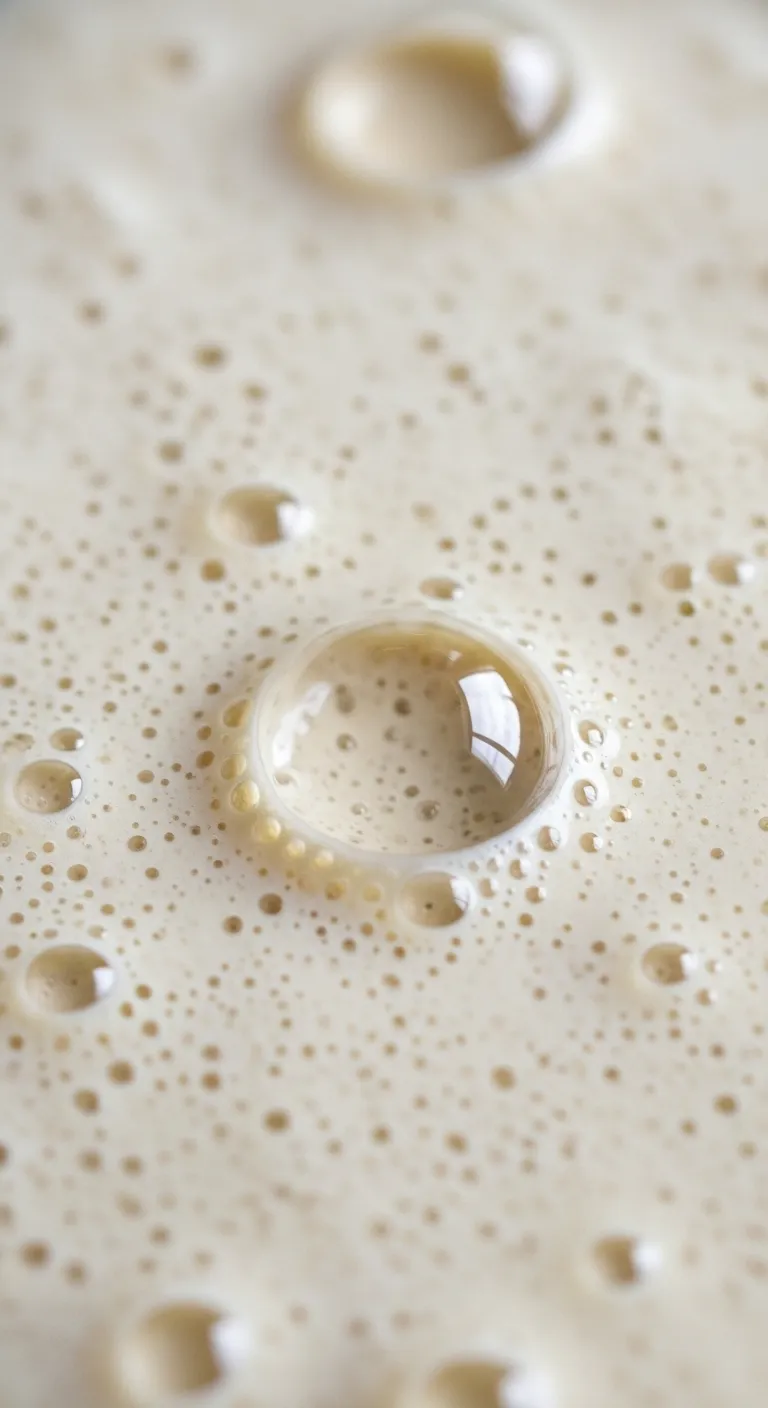
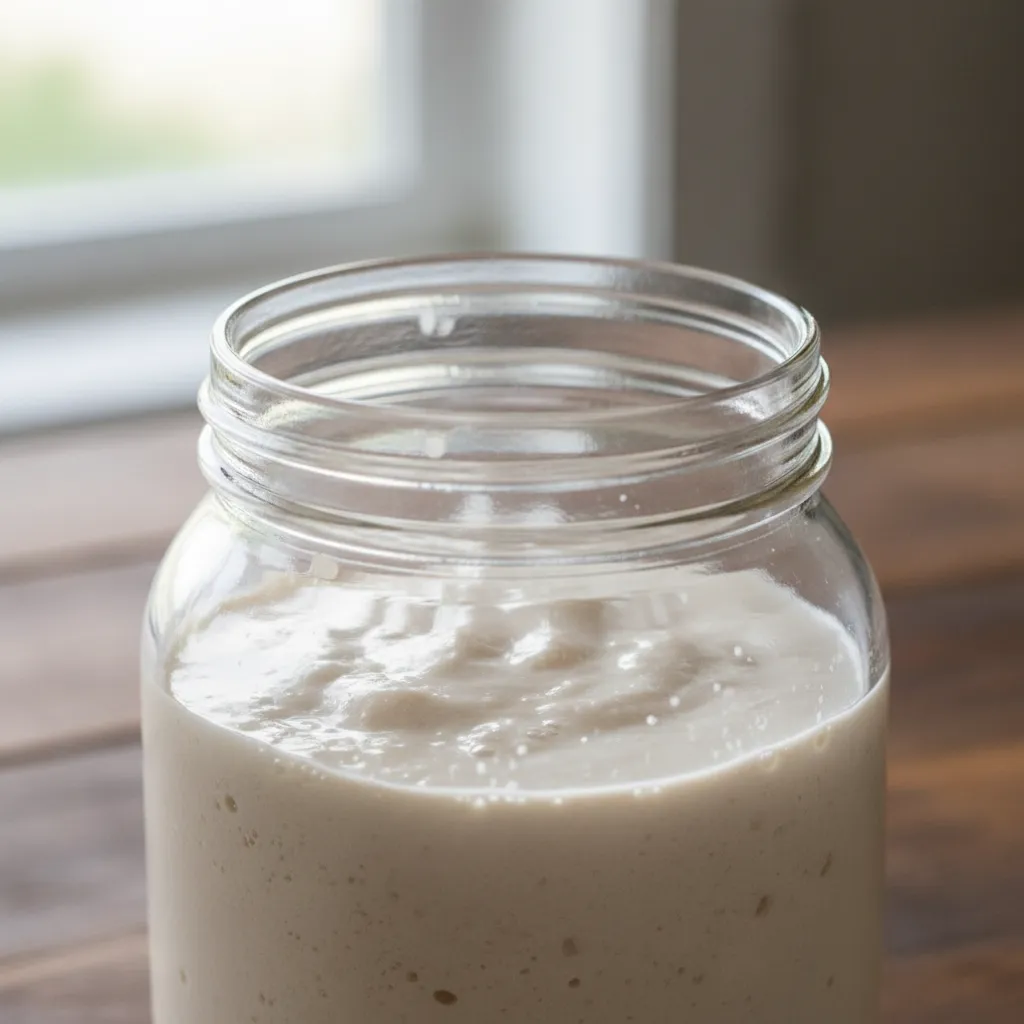
A healthy starter should look like a frothy mousse and smell zesty and clean. If your jar looks different, do not panic. Most issues are easy to fix with a few adjustments.
Your sourdough starter is a living ecosystem that thrives on consistency, warmth, and high-quality flour.
Interpreting Visual Red Flags
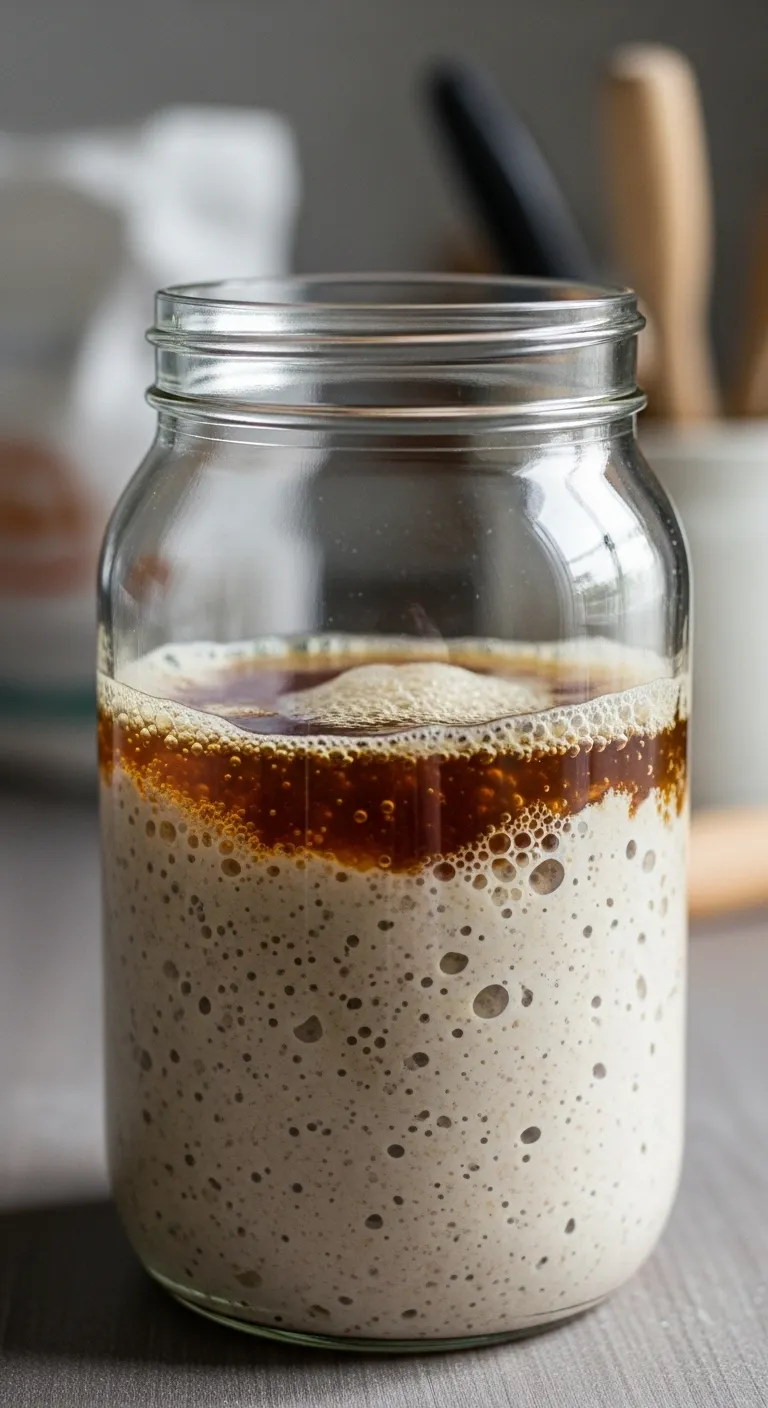
Check the surface of your jar daily. Is there a dark, watery liquid? This is called hooch, and it is a clear sign that your yeast is starving for fresh flour.
If you see fuzzy white, green, or pink patches, that is mold. Sadly, mold means you must discard the entire batch. Bacteria can also cause orange streaks, which are unsafe for consumption.
A flat, smooth surface suggests dormancy. This often happens if the water was too cold or the environment is chilly. Always use filtered water to avoid chlorine, which can harm the yeast.
| Symptom | Diagnosis | Is it Fixable? |
|---|---|---|
| Clear/Dark Liquid | Hungry (Hooch) | ✅ Yes |
| Small Bubbles | Weak Fermentation | ✅ Yes |
| Fuzzy Growth | Mold Infestation | ❌ No |
| Acetone Smell | Underfed Yeast | ✅ Yes |
Deciphering Aroma Profiles

Your nose is a powerful tool for fermentation. A mature starter should have a pleasant, tangy scent that often reminds bakers of Greek yogurt or a mild vinegar.
If it smells like nail polish remover, your starter is exhausted. This sharp scent occurs when the yeast produces excessive alcohol esters due to a lack of food.
A foul, putrid, or “gym locker” smell is a bad sign. This indicates that unwanted bacteria have taken over. If the smell persists after a fresh feeding, it is best to start a new culture.
Hooch is just the liquid byproduct of the yeast’s fermentation process. It’s a sign that your starter is hungry and needs to be fed.
Editorial Team, King Arthur Baking
The Emergency Revival Feeding
If your starter shows signs of hunger or dormancy, a revival feeding is necessary. This concentrated feeding boosts the yeast population quickly.
Before you begin, ensure your jar is clean. You can use any leftover healthy starter in sourdough discard recipes to reduce kitchen waste.
Ingredients
- 2 tbsp active sourdough starter (discard the rest)
- 1/2 cup unbleached all-purpose flour
- 1/2 cup whole wheat or rye flour
- 1/2 cup filtered water (lukewarm, 80°F)
Instructions
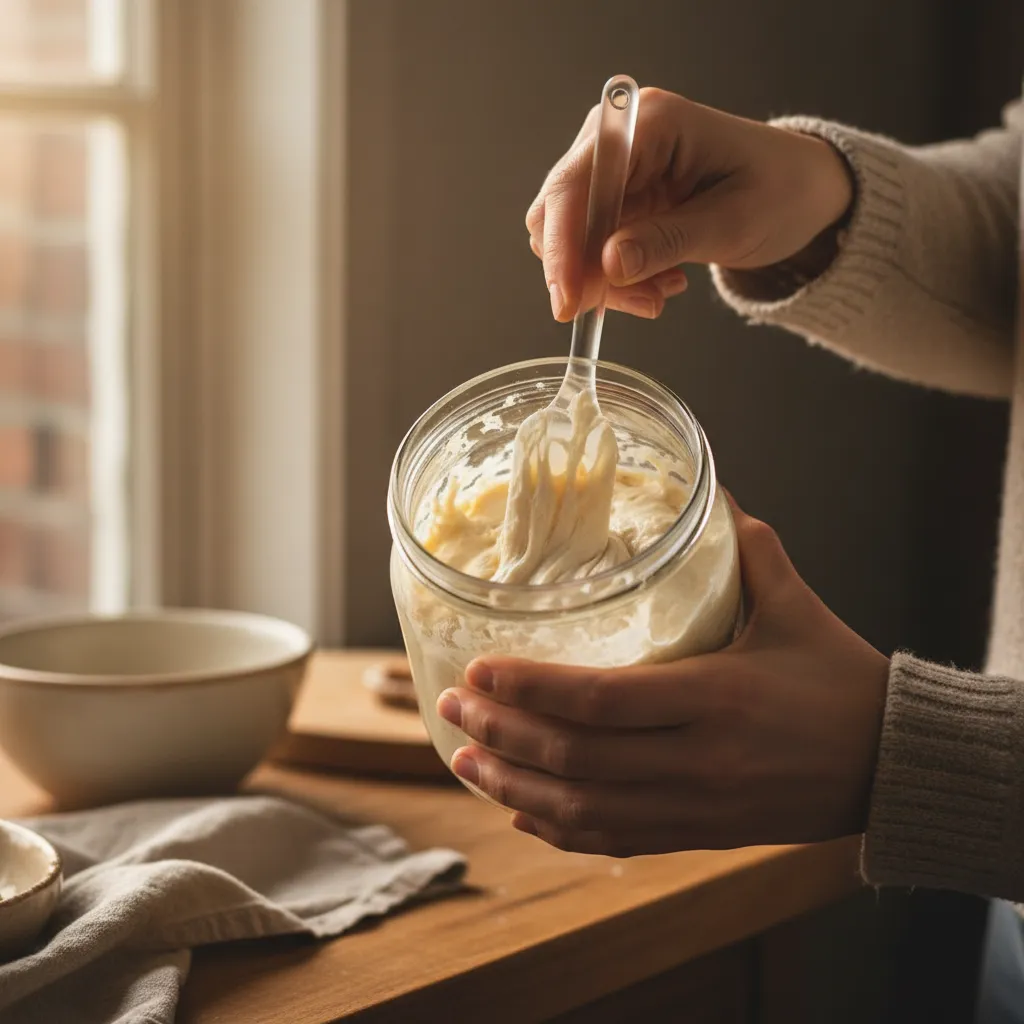
- Place the 2 tablespoons of starter into a clean glass jar.
- Add both types of flour to the jar for a nutrient boost.
- Pour in the lukewarm water and stir until no dry flour remains.
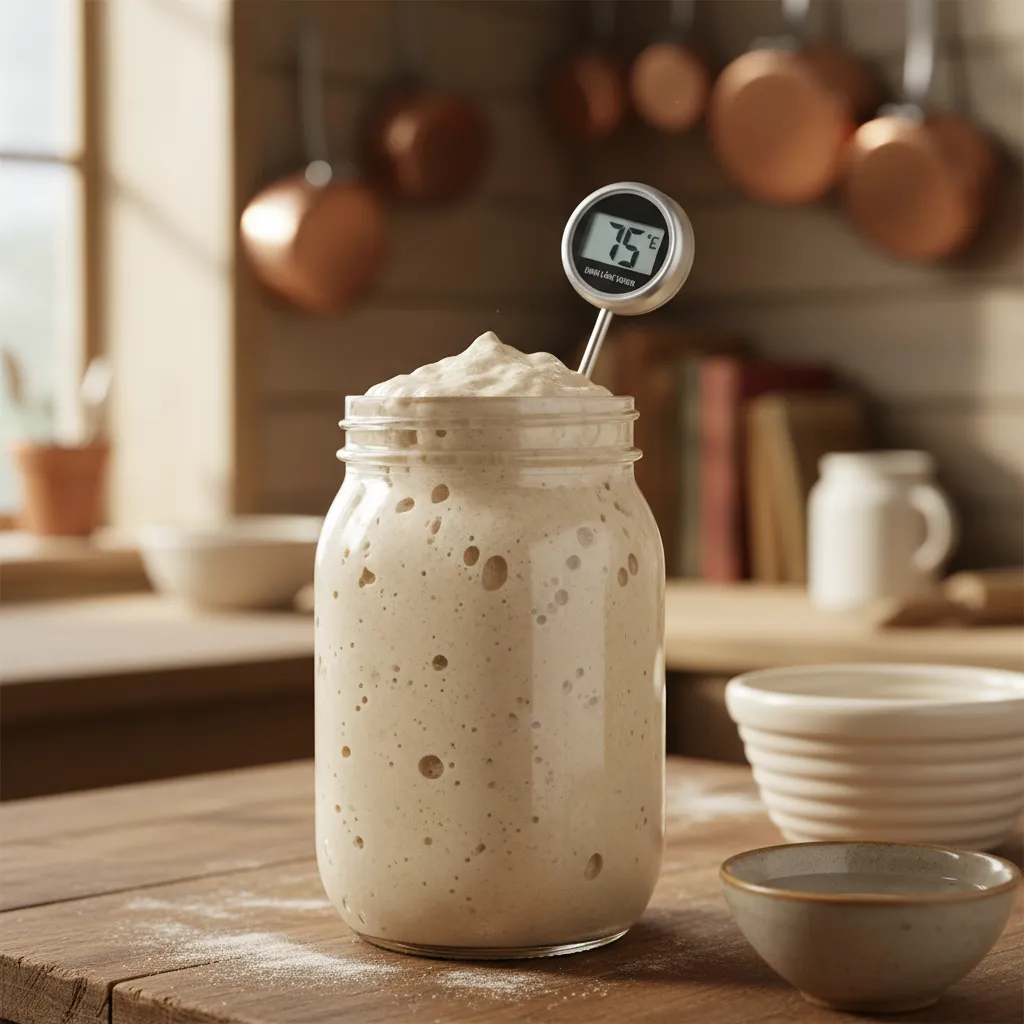
- Cover loosely with a lid or a clean cloth and a rubber band.
- Leave the jar in a warm spot, around 75 degrees Fahrenheit, for 12 hours.
- Check for bubbles and ensure the starter has doubled in size before using it for sourdough focaccia recipes or bread.
Monitor the starter over the next few days. If it doubles within six hours of feeding, it is healthy. Consistent warmth is the key to maintaining this biological balance.
Master Baker’s Secrets
- Mark your jar with a rubber band at the starter’s level after feeding; this allows you to track visually when it has doubled and reached its peak activity.
- If your tap water is heavily treated, let it sit out for 24 hours or use filtered water to prevent chlorine from inhibiting your yeast’s growth.
- To prevent frequent hooch buildup during busy weeks, store your starter in the refrigerator and transition to a weekly feeding schedule.
2. Distinguishing Between Dark Hooch and Surface Mold
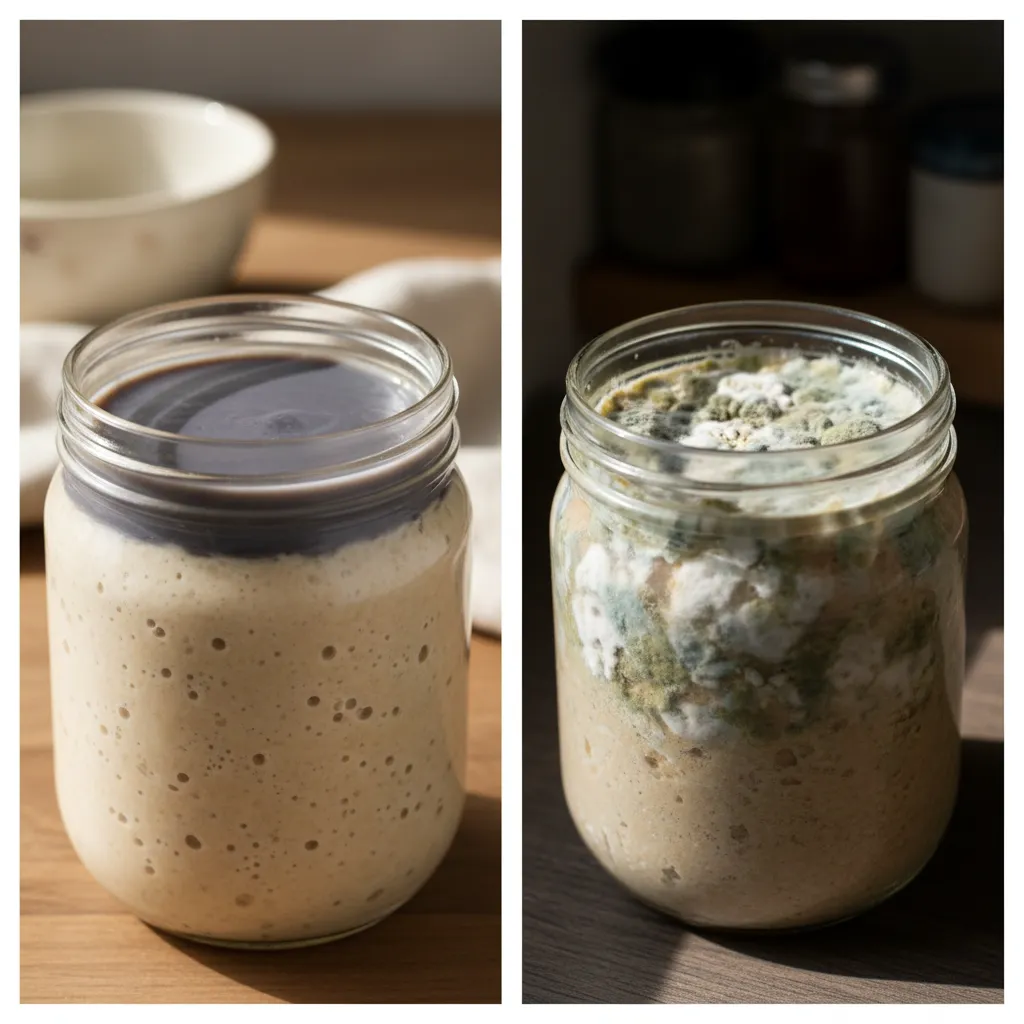
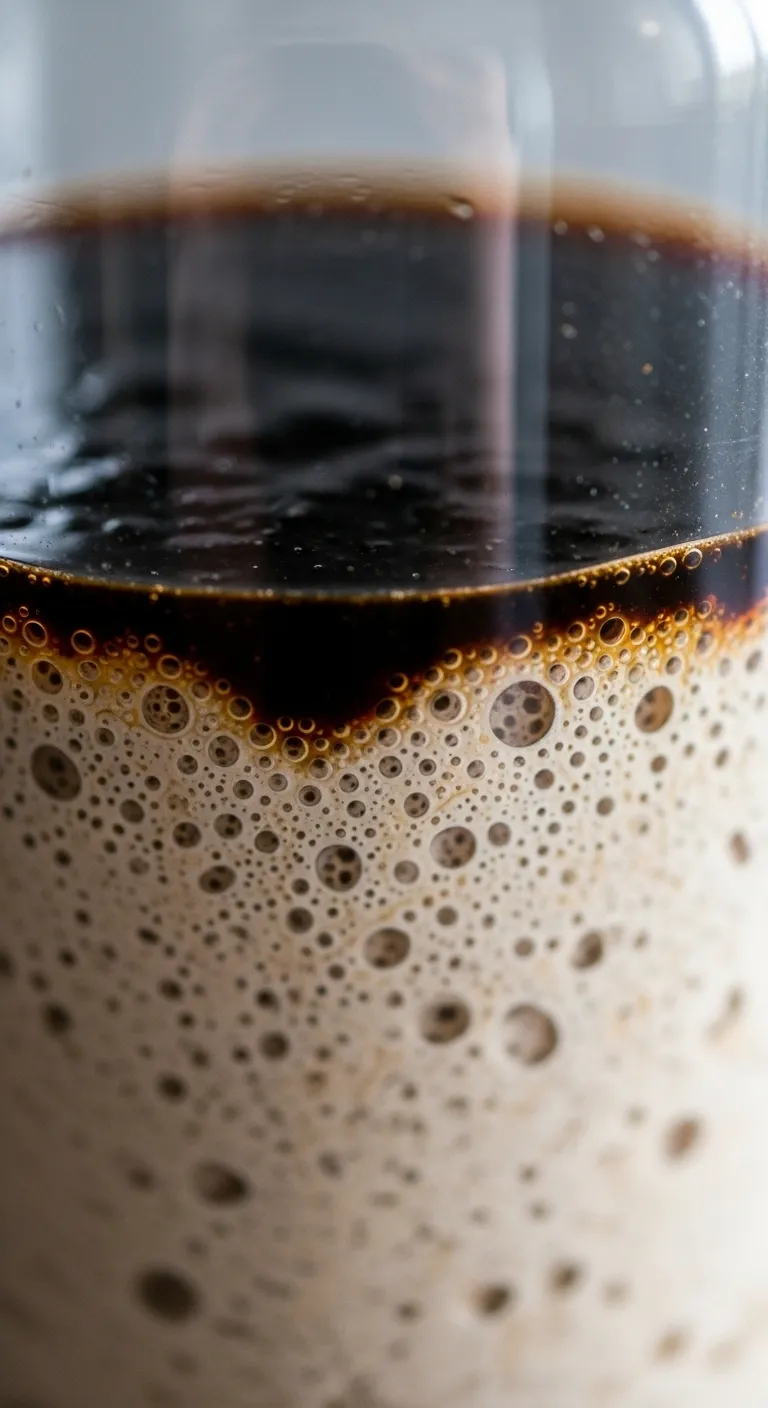
Finding a dark liquid on your sourdough starter can be alarming. It often signals that your artisanal culture is simply hungry for more flour and water.
This liquid is called hooch, and it is a natural byproduct of fermentation. It typically appears when the yeast has consumed all available nutrients in the jar.
Mold is a different matter entirely. Identifying the visual cues between these two occurrences is the most important skill for a sourdough baker.
Identifying Sourdough Hooch
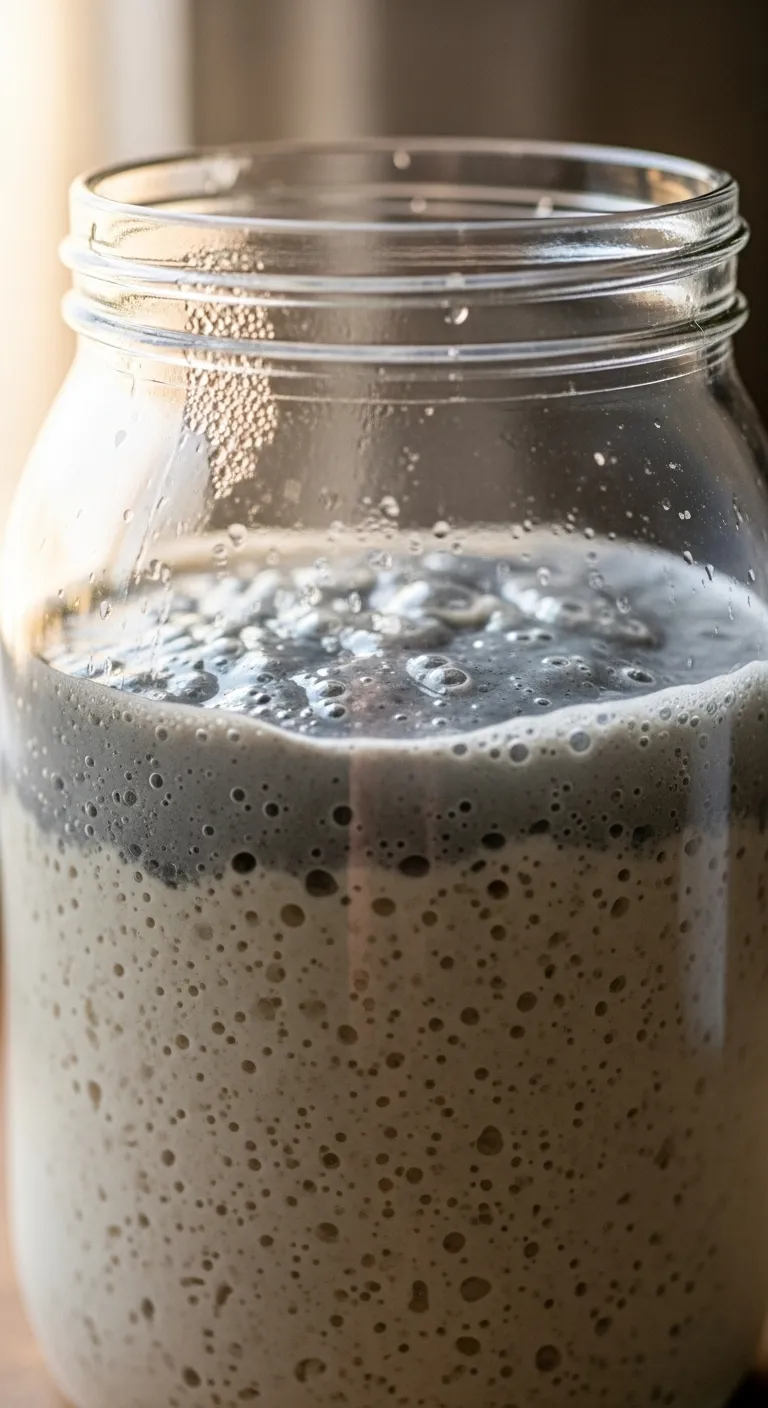
Hooch is a thin, watery liquid. It can be clear, grey, or even black. It usually smells like a strong infusion of alcohol or sharp vinegar.
This liquid forms an organic seal that protects the culture from outside contaminants while the yeast rests. It is a sign of a mature, active fermentation process.
- Texture: Always a liquid, never fuzzy.
- Location: Usually pools on the top of the starter.
- Solution: Stir it back in for a savory, tangy flavor or pour it off for a milder palate.
Hooch is just the liquid that accumulates on top of your starter when it has run out of food… it is not a sign of failure, it’s just a sign that your starter is hungry.
Elaine Boddy, Foodbod Sourdough
Warning Signs of Sourdough Mold
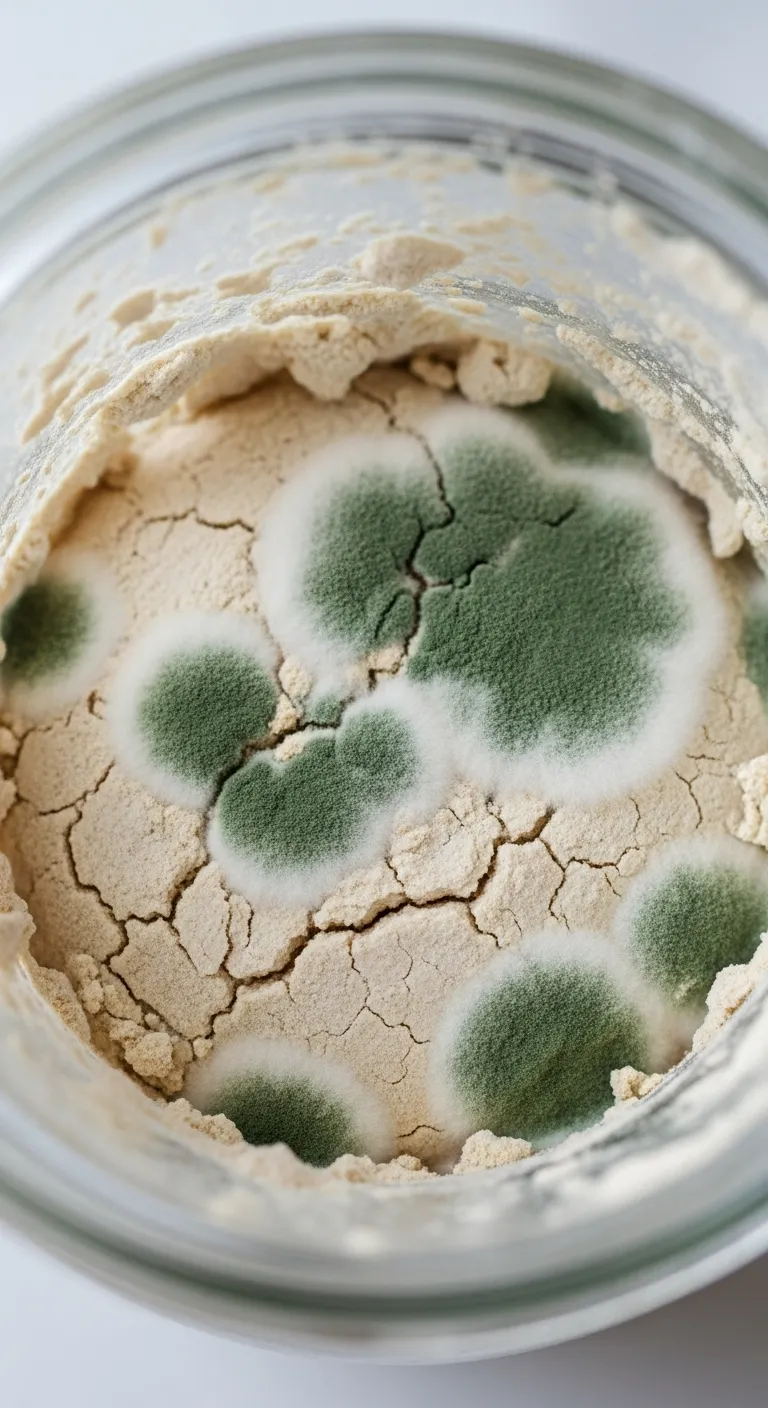
Mold is rarely liquid. It appears as fuzzy or hairy patches. These spots may be white, green, black, or even bright pink, indicating the presence of dangerous bacteria.
If you see any “fuzz” on the surface or the jar walls, the starter is compromised. Toxic mold can produce harmful spores, so do not attempt to save the culture.
Research indicates that sourdough cultures with a pH below 4.0 are significantly more resistant to mold contamination than those with higher alkalinity.
| Feature | Sourdough Hooch | Surface Mold |
|---|---|---|
| Consistency | Thin liquid | Fuzzy or velvety |
| Color | Clear, grey, or black | White, pink, green, or orange |
| Smell | Boozy or vinegary | Musty or rotting |
| Action | Feed the starter | Discard immediately |
Hooch is a cry for food, but mold is a final goodbye. Knowing the difference will save your sourdough journey.
To prevent mold, always keep the sides of your jar clean. Using your active culture in sourdough discard recipes ensures you maintain a fresh, healthy supply.
If your starter is safe but just hungry, do not worry. You can quickly get back to baking quick sourdough focaccia recipes once the culture is revived.
Baker’s Senses: The Sniff & Sight Check
- Use a rubber spatula to scrape down the internal walls of your jar after every feeding; dried starter residue on the glass is the most common breeding ground for unwanted surface mold.
- Perform a nose test to be certain of the culture’s health; if the aroma is sharp, boozy, or vinegary, it is safely hooch, but a musty or rotting scent is a definitive sign the batch must be discarded.
- If you prefer a milder flavor profile in your bread, pour off the dark hooch rather than stirring it back in, as this liquid contains the most concentrated acidity and sourness.
3. Decoding Scents: From Chemical Acetone to Sour Vinegar
Your nose is a powerful diagnostic tool for your culture. It tells you exactly when the microbes are thriving or struggling. A wholesome starter should remind you of toasted grain or mild fruit.
If the smell changes, it is simply a signal from the yeast. Understanding these shifts helps you maintain an artisanal quality in your bread. It is a sensory bridge between the cook and the culture.
A sour smell is a sign of life, but a chemical scent is a cry for food.
The Acetone Warning
If you catch a whiff of nail polish remover, do not panic. This is a common signal that your starter has run out of food. The yeast is simply producing concentrated alcohol esters.
This occurs when the fermentation cycle finishes too quickly. It often happens in warm kitchens or if the feeding ratio is too low.
This practice is similar to the safety protocols found in our beginner guide to fermenting vegetables.
A sourdough starter that smells like nail polish remover or acetone is simply very hungry and needs to be fed.
Maurizio Leo, The Perfect Loaf
To fix this, increase the amount of fresh flour you provide. A larger meal slows down the fermentation process, ensuring the yeast stays satisfied until your next scheduled feed.
The Sharp Vinegar Tang
When the lactic acid bacteria dominate, you get a sharp, vinegary punch.
This acetic acid buildup happens when the starter stays at room temperature too long. It can make your bread taste overly tart.
While some enjoy this profile, too much acidity weakens the gluten. If the smell is overwhelming, your starter needs a refreshing series of feeds.
This process balances the pH and restores the sweet, yeasty aroma.
| Scent Profile | What It Means | Quick Fix |
|---|---|---|
| Acetone | Total Hunger | Double Feeding |
| Sharp Vinegar | Acid Buildup | Discard More |
| Mild Yogurt | Active/Healthy | Bake Now |
Regular maintenance prevents these extreme shifts. Currently, many bakers use a 1:2:2 ratio to keep scents balanced. This provides enough organic fuel for the microbes to flourish without stress.
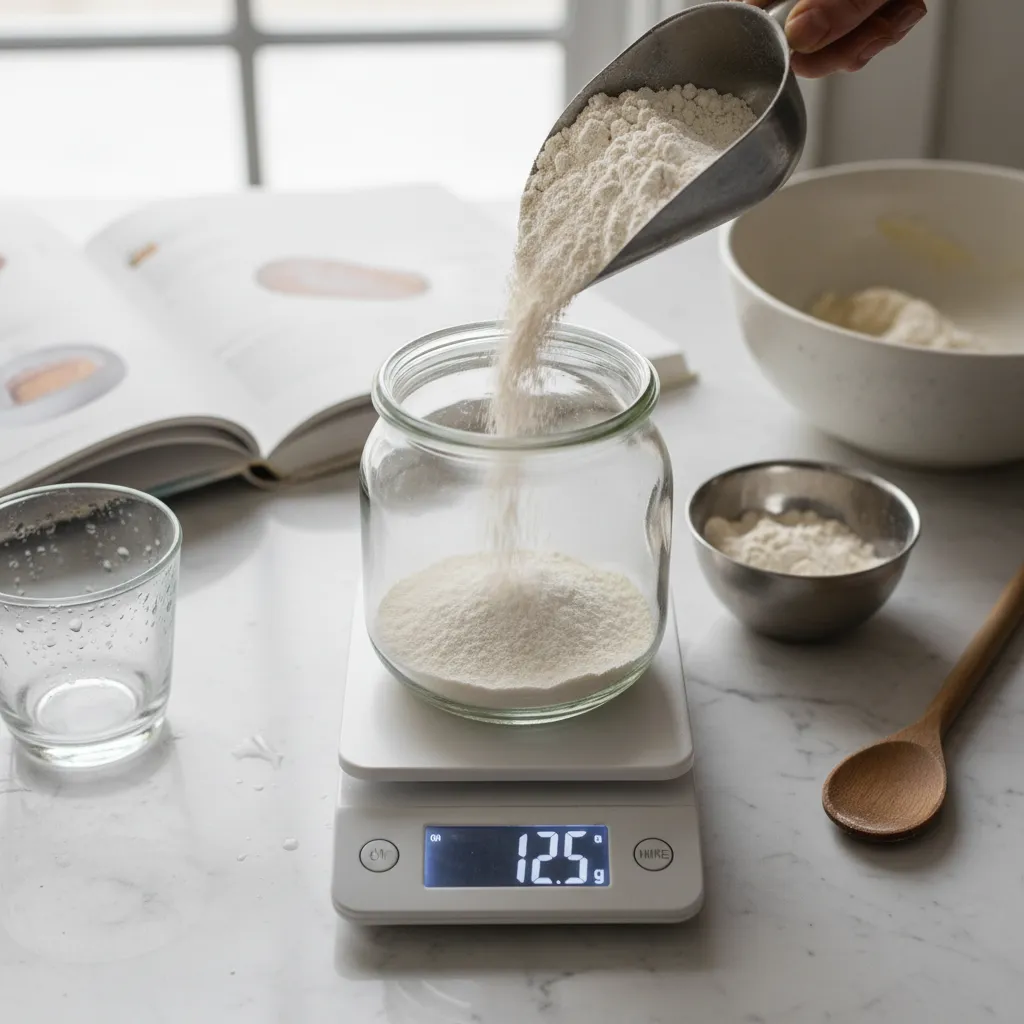
Ingredients
- 25 grams active sourdough starter
- 50 grams organic bread flour
- 50 grams filtered room-temperature water
Instructions
- Discard all but 25 grams of your existing starter, placing it into a clean jar.
- Add 50 grams of flour and 50 grams of water to the container.
- Stir vigorously until no dry clumps of flour remain in the mixture.
- Cover loosely and let it sit at room temperature for six hours.
- Smell the starter again to check for a sweet, creamy transition.
Repeat this process if the chemical scent persists. Within two feedings, the aroma should return to a pleasant, nutty zest. Consistency is the key to mastering these living cultures over time.
The Scent Master’s Toolkit
- If you encounter a persistent acetone smell, try increasing your feeding frequency to twice daily. This prevents the yeast from reaching a state of total exhaustion where chemical esters are most prominent.
- To curb an overly sharp vinegar tang, ensure you are discarding at least 80% of your starter before each feed. This process physically removes the excess acetic acid buildup that causes the harsh aroma.
- Use a clean jar every few feedings. Dried starter on the rim can harbor different bacteria that produce off-smells, which might confuse your nose when trying to diagnose the health of the core culture.
4. Troubleshooting Sluggish Growth with New Feeding Ratios
Adjusting your feeding ratios is a culinary dance. It requires patience and a keen eye for your bubbly culture as it evolves.
If your starter seems sluggish after a big feed, do not panic. It simply has more food to digest than it did before.
A 1:1:1 ratio means equal parts starter, flour, and water. This is the standard for daily maintenance and quick activity.
Patience is the most important ingredient in every sourdough jar.
Understanding Dilution and Growth
Moving to a 1:5:5 ratio provides a massive feast. This helps reduce acidity and strengthens the yeast over several days.
Many bakers think their starter has died after a large feed. In reality, the yeast is just working through a much larger pile of flour.
Statistics show that a 1:1:1 ratio peaks nearly 50 percent faster than a 1:5:5 ratio under identical temperature conditions.
This slower pace is actually beneficial. It allows for better gluten development and a more complex flavor profile in your bread.
Learn more about the science of microbes in our beginner guide to fermenting vegetables for deeper insights into preservation.
| Ratio Type | Starter Strength | Estimated Peak Time |
|---|---|---|
| 1:1:1 (Standard) | Maintenance | 4 to 6 hours |
| 1:2:2 (Growth) | Moderate | 6 to 9 hours |
| 1:5:5 (Strength) | High Power | 10 to 14 hours |
The temperature of the environment and the ratio of the ingredients directly influence the rate of fermentation.
Dr. Marisa Bunning, Colorado State University Extension
Ingredients
- 20g active sourdough starter
- 100g unbleached bread flour
- 100g filtered room temperature water
Instructions
- Place the starter in a clean glass jar and weigh it carefully.
- Add the water and stir until the mixture is milky and smooth.
- Mix in the flour until no dry clumps remain in the jar.
- Cover loosely and track the growth over the next 12 hours.
If you find yourself baking frequently, you might prefer the speed of a 1:1:1 ratio. It keeps the cycle moving quickly.
For those who bake once a week, a 1:10:10 ratio stored in the fridge can be a lifesaver. It prevents the starter from becoming too acidic between uses.
Consistency is key when troubleshooting growth issues. Always use a scale to ensure your ratios are precise and repeatable.
While waiting for your starter to peak, you might enjoy browsing these 20 chocolate chip cookies for a quicker baking fix.
The Baker’s Edge
- Mark your jar with a rubber band at the initial level to easily track the volume increase during those long, high-ratio fermentation cycles.
- If your kitchen is cool, use lukewarm filtered water (around 85°F) to give the yeast a helpful head start when transitioning to a 1:5:5 ratio.
- Avoid the temptation to feed again early; a sluggish-looking starter often just needs more patience and consistent warmth to reach its peak.
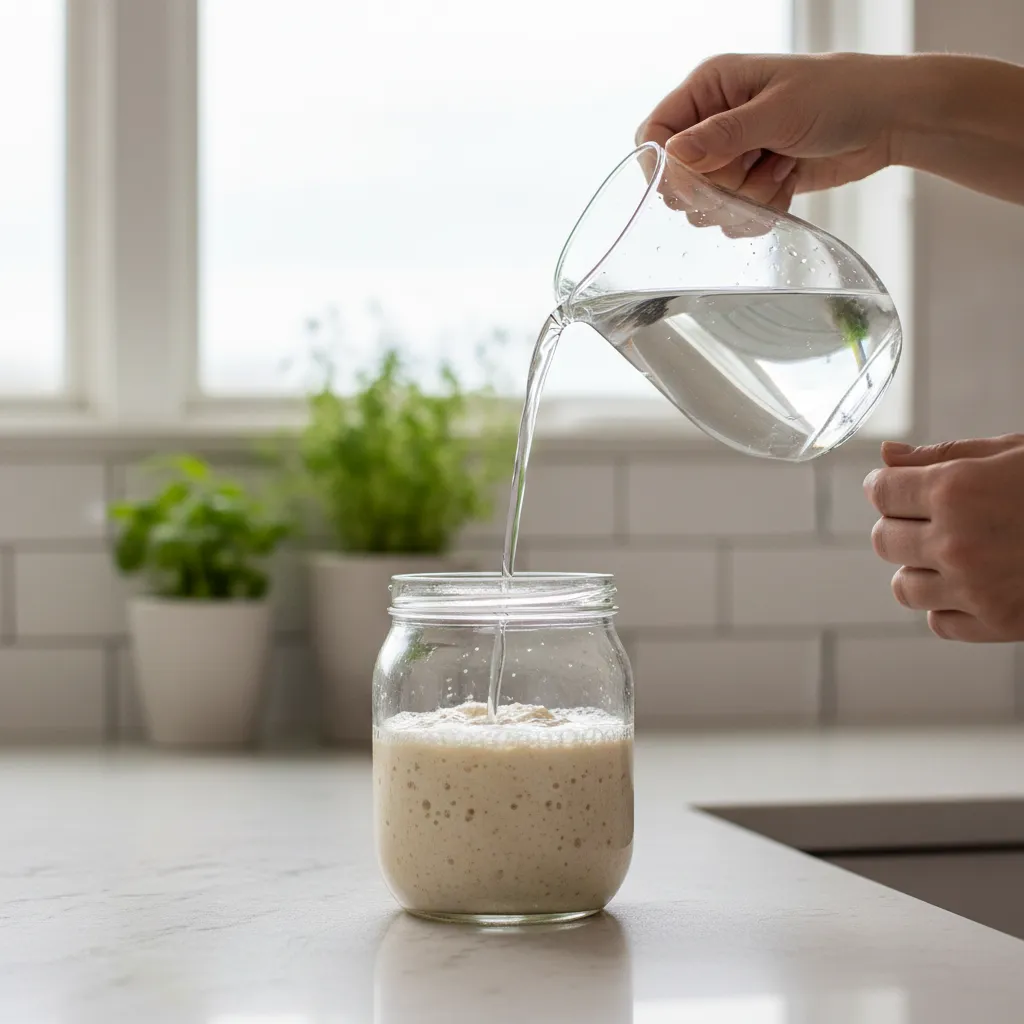
5. Balancing Temperature and Water Quality for Success
Think of your sourdough starter as a delicate living ecosystem. Temperature and water quality act as the weather and soil for your wild yeast.
If these factors are off, even premium flour cannot save your culture. Maintaining a stable environment ensures a consistently bubbly, active fermentation.
Precision is just as important here as it is when you are making perfect chocolate chip cookies for your family.
Your sourdough starter is a living reflection of its environment. Keep it warm and hydrated with absolute purity.
Impact of Temperature on Fermentation
Temperature dictates the metabolic rate of your yeast and bacteria. Cold environments lead to sluggish growth, while excessive heat can permanently damage the culture.
Most home kitchens fluctuate throughout the day. Finding a consistent “sweet spot” is the secret to a predictable baking schedule and a savory aroma.
If your water is heavily chlorinated, it can potentially harm the microorganisms in your starter.
Eric Rusch, Breadtopia
Statistics show that yeast activity roughly doubles with every 15-degree Fahrenheit increase. However, this growth peaks and eventually plateaus before the heat becomes lethal.
| Temperature Range | Microbial Activity | Effect on Flavor |
|---|---|---|
| 60°F to 65°F | Very Sluggish | Mild, less acidic |
| 70°F to 80°F | Ideal/Active | Balanced and zesty |
| 85°F to 95°F | Hyper-Active | Sharp, vinegary notes |
| Above 105°F | Risk of Death | Yeasty or off-flavors |
The Role of Water Quality
Chlorine is frequently added to tap water to eliminate harmful bacteria. Unfortunately, it can also inhibit the beneficial wild yeast in your sourdough vessel.
If your starter seems stalled despite perfect temperatures, your water might be the culprit. Using filtered or dechlorinated water provides a wholesome foundation for growth.
High mineral content in “hard water” can actually benefit yeast. However, chemical treatments like chloramine stay in the water longer and require more care to remove.
Building healthy kitchen habits, much like simple dinner planning, starts with understanding your basic ingredients.

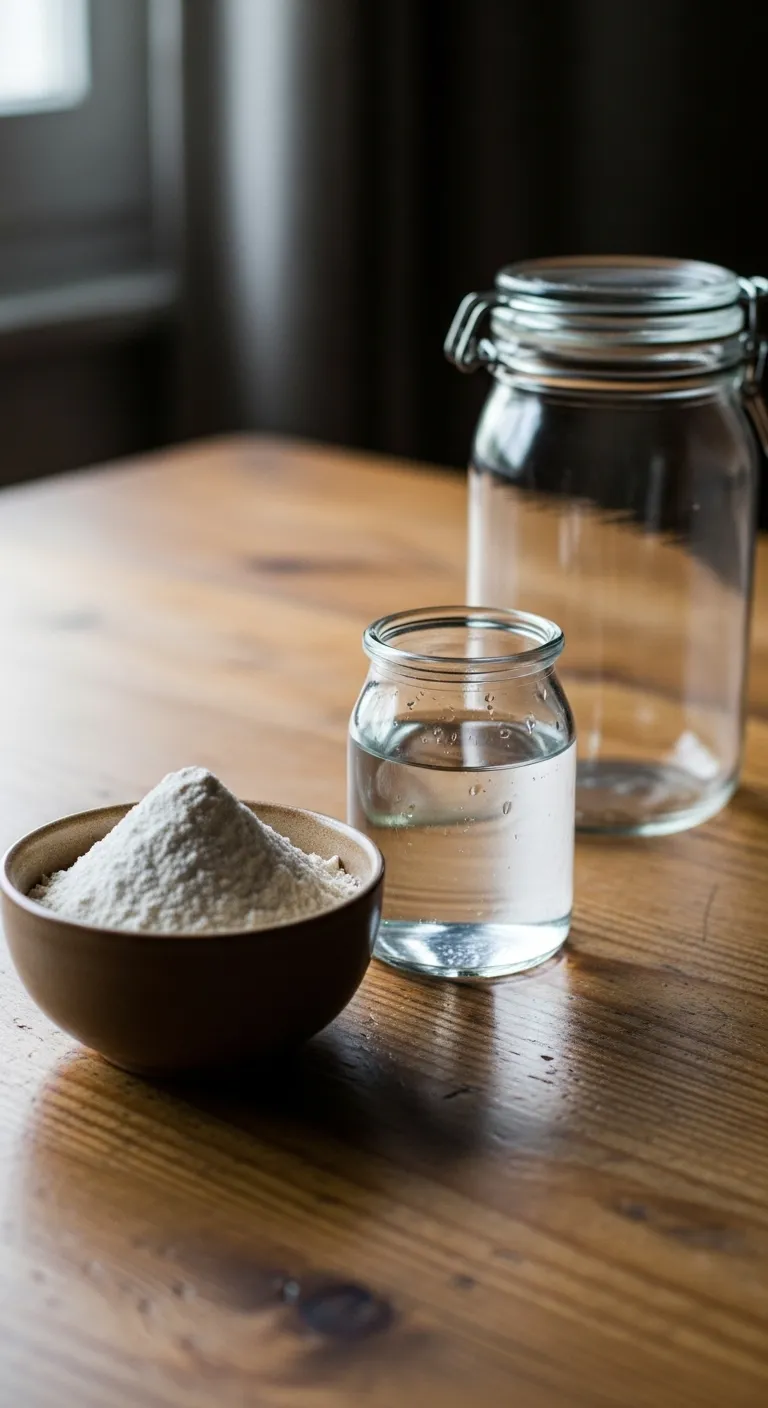
Ingredients
- 1 quart municipal tap water
- 1 large glass pitcher or wide-mouth jar
Instructions
- Fill your clean glass pitcher with a quart of tap water.
- Leave the pitcher on the counter uncovered for 24 hours.
- Allow the chlorine gases to evaporate naturally into the air.
- Use this room-temperature water for your next scheduled feeding.
- Store any remaining water in a sealed jar for future use.
If you use a charcoal filter, you can skip the waiting period. Always ensure the water is not hot to the touch before mixing it with your flour.
Maintaining this balance creates a resilient culture. A happy starter rewards you with an artisanal rise and a complex, umami-rich crust every time you bake.
Pro Baker Secrets
- If your kitchen is cool, store your jar inside a turned-off oven with just the light on to maintain a cozy, consistent 75-78°F.
- To remove chlorine instantly without the 24-hour wait, use a charcoal-based water filter or boil the water and let it cool to room temperature before feeding.
- Always use a digital probe thermometer to check your water temperature; aim for lukewarm (around 80°F) to give your yeast an immediate boost during colder months.
Mastering Your Living Culture
Your sourdough journey is a dance with wild yeast. By learning to read its cues, you transform simple flour and water into a living legacy of flavor.
Most issues are just calls for more food or warmth. Keep feeding and watching; soon your kitchen will smell of golden, fresh-baked bread.
Do not let a little hooch discourage you. With patience and these troubleshooting tools, you are well on your way to mastering the art of the perfect loaf.
Sourdough Secrets & Solutions
Tap water often contains chlorine, which can weaken your yeast. Use filtered or bottled water to ensure your starter stays strong and active.
If the starter is kept on the counter, feed it daily. If kept in the refrigerator, once a week is sufficient. Regular feeding prevents a sharp acetone smell from developing.
Orange or pink streaks indicate harmful bacteria. Unlike hooch, this cannot be fixed. Discard the starter and sanitize your jar immediately.
Your environment might be too cold, or your flour may lack sufficient protein. Move the jar to a warmer spot or use bread flour to give the yeast a necessary boost.