Table of Contents
- 1. Smooth Buttercream One-Tier Cakes: Sizing Chart For 10 To 50 Guests
- 2. Semi-Naked Two-Tier Cakes: Exact Texture Terminology For Your Baker
- 3. Minimalist Sugar Floral Adornments For A Pop Of Elegance
- 4. Budget-Friendly Luxury Faux Tiers For Intimate Settings
- 5. DIY Micro-Wedding Cakes: The Ultimate Safe Transport Guide
- The Sweetest Ending to Your Celebration
- Curiosities for Your Cake Baking Journey
Planning an intimate celebration allows for a focus on pure quality and exquisite detail.
A small wedding cake is not just a dessert; it is a centerpiece of love that brings everyone to the table.
We will explore how to achieve professional results with simple, elegant designs that taste as heavenly as they look.
Creating these masterpieces requires a balance of precision and passion.
Whether you are a beginner or an experienced baker, the secret lies in high-quality ingredients and a steady hand.
You do not need a massive kitchen to produce a cake that captures the essence of a unique story.
These fifteen ideas prioritize both stunning presentation and balanced nutrition.
By focusing on refined textures and seasonal flavors, you can provide a memorable experience for every guest.
Let us dive into these expert techniques to elevate your baking and celebrate the simple joy of a shared, sweet moment.
1. Smooth Buttercream One-Tier Cakes: Sizing Chart For 10 To 50 Guests
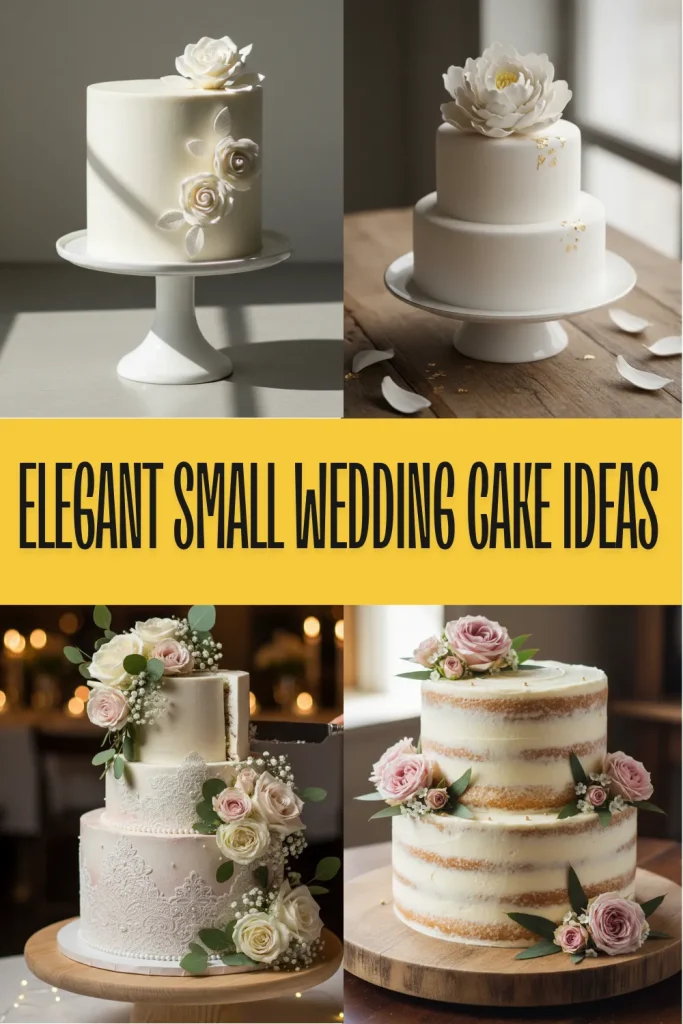
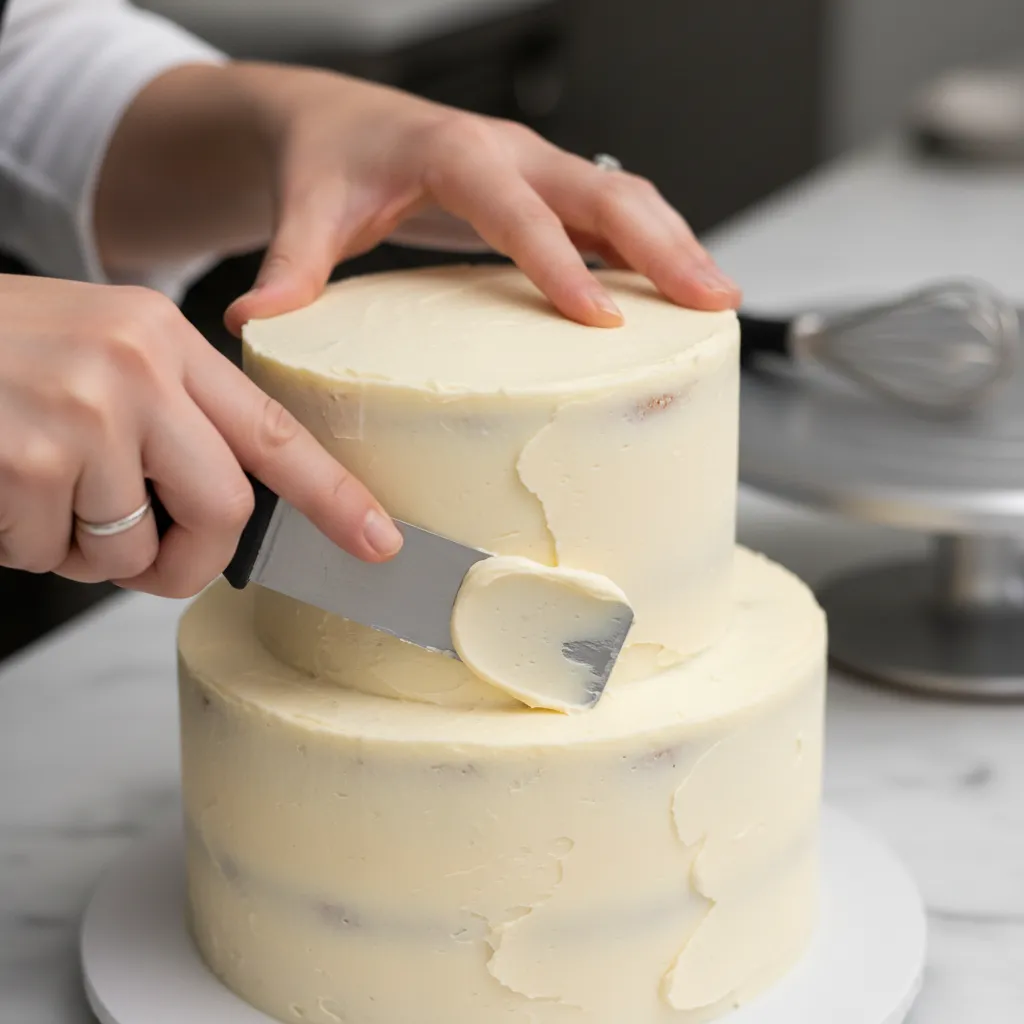
A smooth buttercream one-tier cake is a canvas for artisanal elegance. It offers a minimalist aesthetic that delights the modern palate.
Whether you choose a wholesome organic vanilla or a rich chocolate infusion, sizing is crucial. A small wedding requires exact portions.
Knowing how to feed your guests ensures no one leaves hungry. This simple chart helps you calculate perfect cake portions for your big day.
| Cake Size (Round) | Estimated Servings | Small Wedding Suitability |
|---|---|---|
| 6-inch Tier | 12 Portions | ❌ Too small for 50 guests |
| 8-inch Tier | 24 Portions | ✅ Perfect for 20 guests |
| 10-inch Tier | 38 Portions | ✅ Ideal for 35 guests |
| 12-inch Tier | 56 Portions | ✅ Excellent for 50 guests |
For formal events, standard wedding cake servings are exactly 1 inch wide by 2 inches deep by 4 inches high to ensure consistent slices.
Wilton Baking Experts, Wilton Cake Baking and Serving Guide
A beautifully smooth one-tier wedding cake proves that true elegance is found in sweet simplicity.
Artisanal Baker’s Secrets
- For pristine, elegant slices that maintain your cake’s minimalist aesthetic, dip your knife in hot water and wipe it completely dry between every single cut.
- To effortlessly achieve the standard 1x2x4 inch wedding portions from a round tier, skip the traditional pie wedges. Instead, cut the cake in a grid pattern to ensure consistent sizing for your guests.
- If your intimate celebration is outdoors, ask your baker for a Swiss or Italian meringue buttercream. They offer a beautifully smooth canvas and hold their shape significantly better in warm weather.
Silky Swiss Meringue Buttercream
If you prefer a fruity base, our strawberry cake recipes pair beautifully with this buttercream. The bright flavors balance the rich frosting.
To achieve that flawless artisanal finish, you need a stable, emulsified frosting. This gluten-free recipe yields a creamy texture.
Ingredients
- 4 large egg whites (save yolks for leftover egg yolk recipes)
- 1 cup granulated sugar
- 1.5 cups unsalted butter, softened
- 1 tbsp pure vanilla bean paste
- 1 pinch sea salt
Instructions
- Whisk egg whites and sugar over a gently simmering water bath until the sugar dissolves completely.
- Transfer the mixture to a stand mixer and whip on high speed until stiff, glossy peaks form.
- Gradually add softened butter one tablespoon at a time, allowing the mixture to emulsify fully.
- Fold in the vanilla paste and sea salt, mixing on low speed to gently remove any trapped air bubbles.
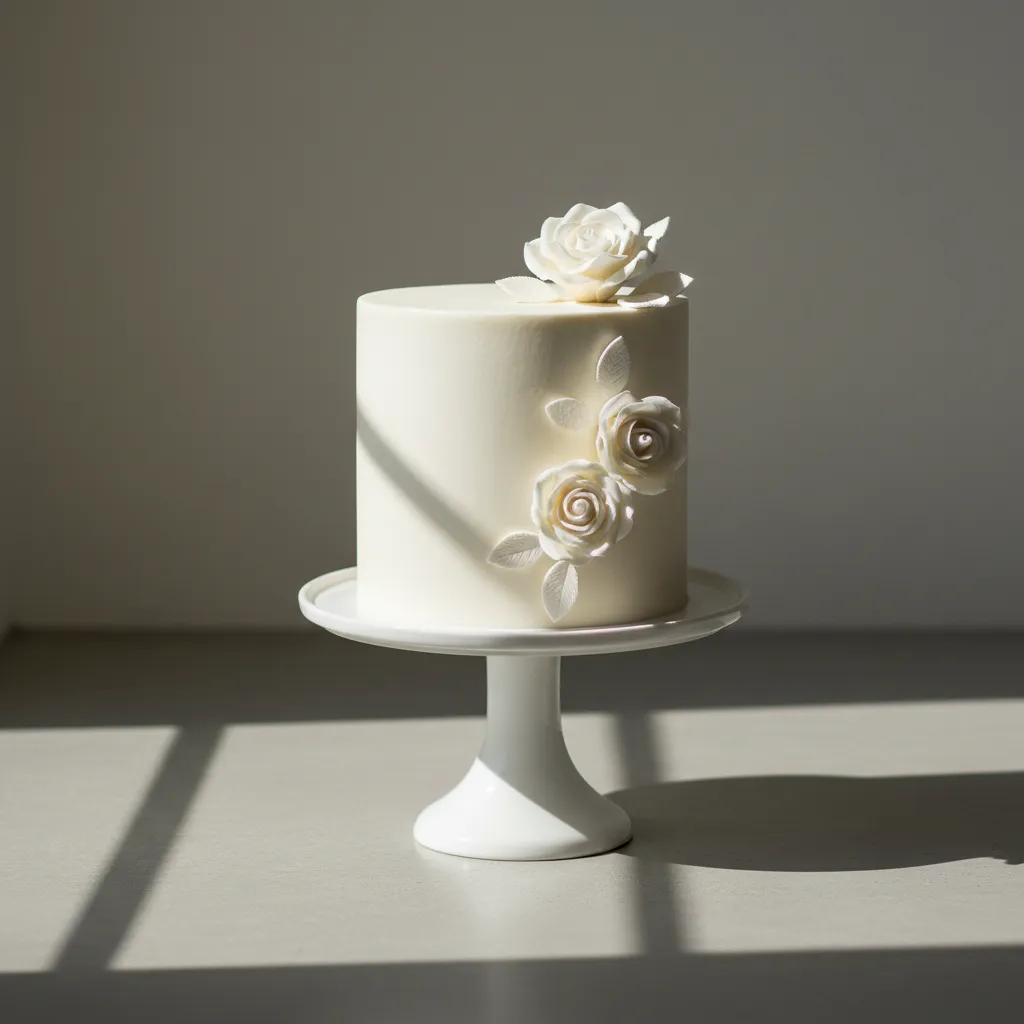
- Use an offset spatula to smooth the buttercream evenly over your chilled, single-tier cake.
Garnish your cake with fresh, food-safe flowers for an elegant touch. Practice good mise en place to ensure a stress-free baking day.
Pro Baker Secrets
- If your buttercream looks curdled or broken after adding the butter, do not panic! Just keep whipping. It is completely normal for it to separate before it emulsifies into a smooth, silky frosting.
- Ensure your butter is at room temperature but not melting. If the meringue is too warm when you add the butter, the frosting will turn soupy. Pop the entire bowl in the fridge for 10 to 15 minutes, then whip again.
- To achieve a flawlessly smooth finish without air bubbles, swap from the whisk to the paddle attachment for the final minute of mixing on the lowest speed.
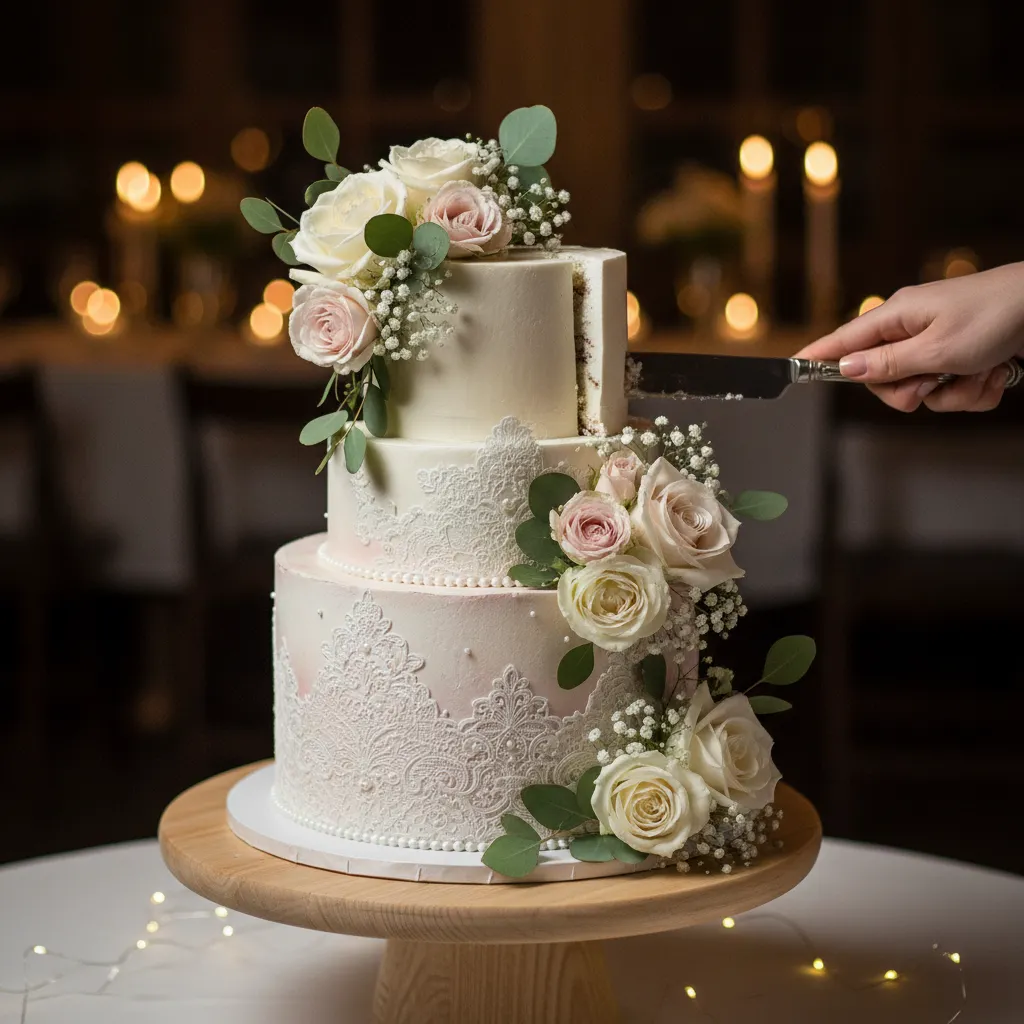
2. Semi-Naked Two-Tier Cakes: Exact Texture Terminology For Your Baker
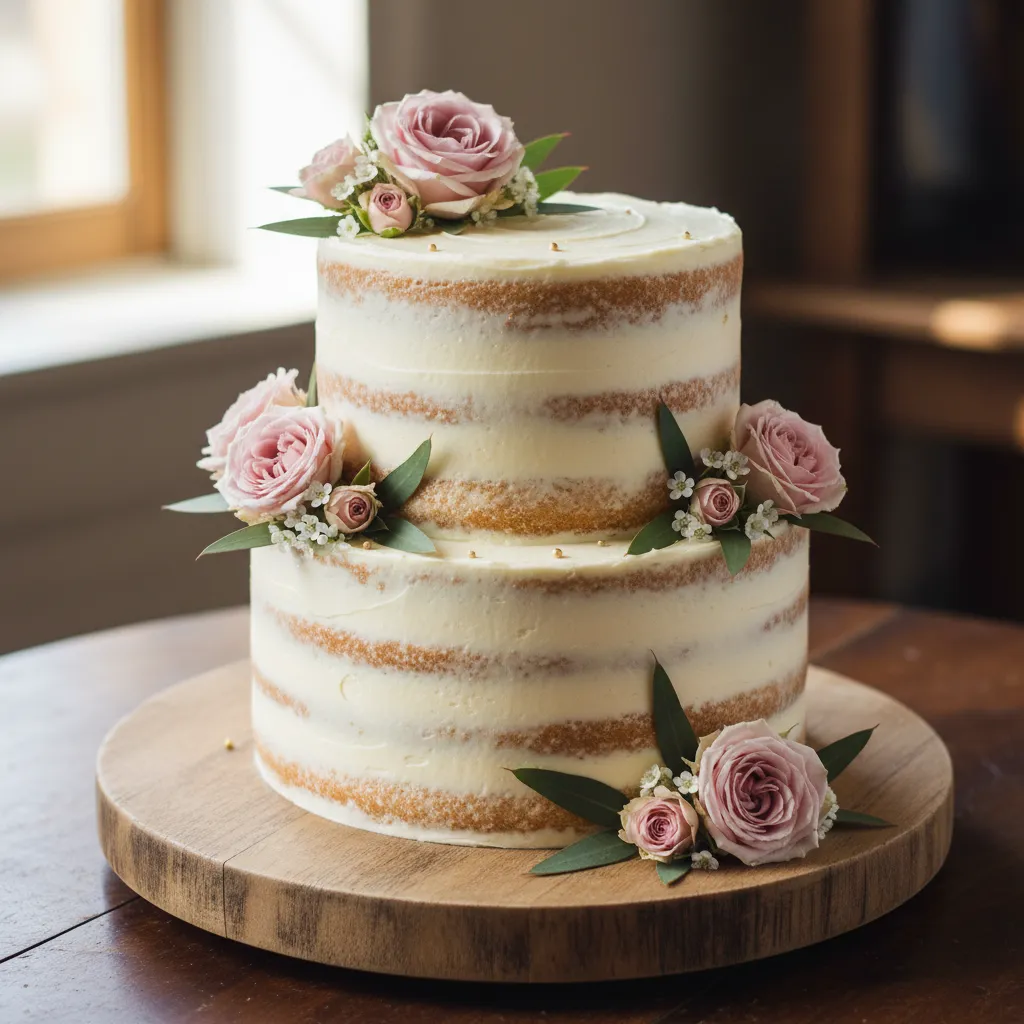
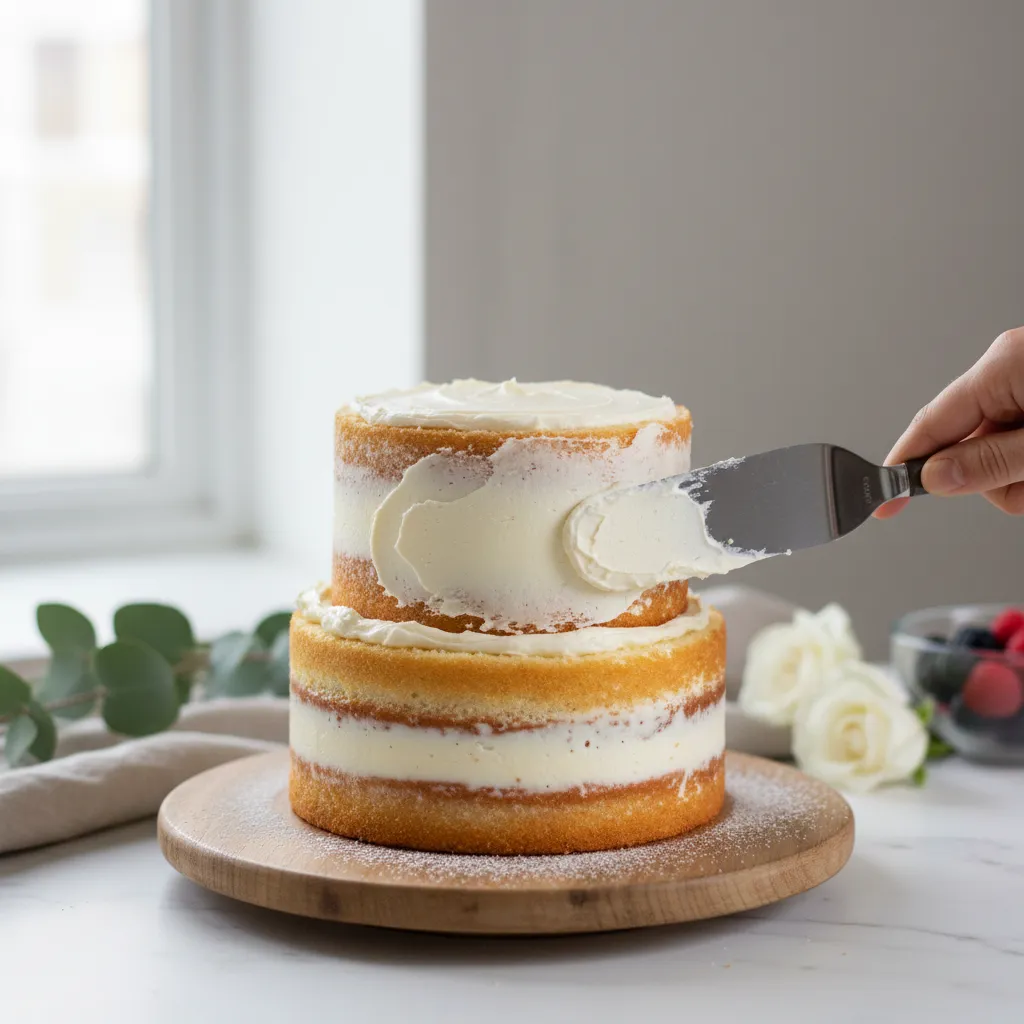
Communicating your vision for a semi-naked cake requires absolute precision. You want a wholesome, rustic look, not an unfinished dessert.
Understanding exact frosting terminology saves you from wedding day disappointment. It ensures your baker captures your aesthetic palate.
Over 45 percent of modern couples choose minimalist designs. This wedding industry data shows a clear preference for lightly frosted tiers.
Elevate this style with simple wildflower cake ideas. Safe edible blooms add a vibrant, organic touch to the translucent frosting layer.
A semi-naked wedding cake perfectly balances rustic charm with artisanal elegance.
Essential Baker Terminology
Use these specific terms when consulting with your pastry chef for clarity. This prevents miscommunication during your cake tasting session.
- The Crumb Coat: A very thin base layer of frosting that traps loose cake crumbs.
- Translucent Scrape: Frosting applied thinly so caramelized baked edges peek through softly.
- Textured Stucco: A slightly thicker rustic application with visible spatula strokes.
- Clean Edge: Sharp top corners with perfectly straight sides for a modern presentation.
We started leaving the sides of our cakes unfrosted because we spent all this time baking the cake and making the fillings, we wanted you to see it.
Christina Tosi, Milk Bar
A vibrant homemade red velvet cake offers stunning visual contrast here. The bright layers look incredible against a white buttercream scrape.
You can practice this delicate scraping technique at home before finalizing your bakery order. It guarantees you understand the desired finish.
Ingredients

- 2 cups finely sifted cake flour
- 1 cup organic granulated sugar
- 1/2 cup unsalted butter, softened
- 1/2 cup wholesome milk
- 3 large eggs, room temperature
- 1 tbsp pure vanilla extract
- 1 batch stable vanilla buttercream
Instructions
- Gather your mise en place before starting to ensure a completely smooth mixing process.
- Preheat your oven to 350 degrees Fahrenheit and grease two six-inch round cake pans.
- Cream the butter and sugar together until the mixture is beautifully pale and fluffy.
- Beat in the eggs one at a time, followed by a delicate vanilla infusion for flavor.
- Alternate folding in the sifted flour and milk. Do not overmix the delicate batter.
- Bake for twenty-five minutes until the cakes are golden-brown and spring back easily.
- Cool completely. Stack the tiers with a thick layer of vanilla buttercream inside.
- Apply a thin crumb coat and use a bench scraper to reveal the delicate cake edges.
The Baker’s Secret
- Bring Visual Aids: Always show your baker reference photos alongside terms like Translucent Scrape to ensure your definitions of exposure match perfectly.
- Temperature Matters: If you are DIY-ing, ensure your cake layers are completely chilled before scraping; a warm cake will crumble and ruin the clean aesthetic.
- Petal Protection: When adding wildflowers, wrap the stems in floral tape or use food-safe picks to prevent moisture from the stems from bleeding into the frosting.
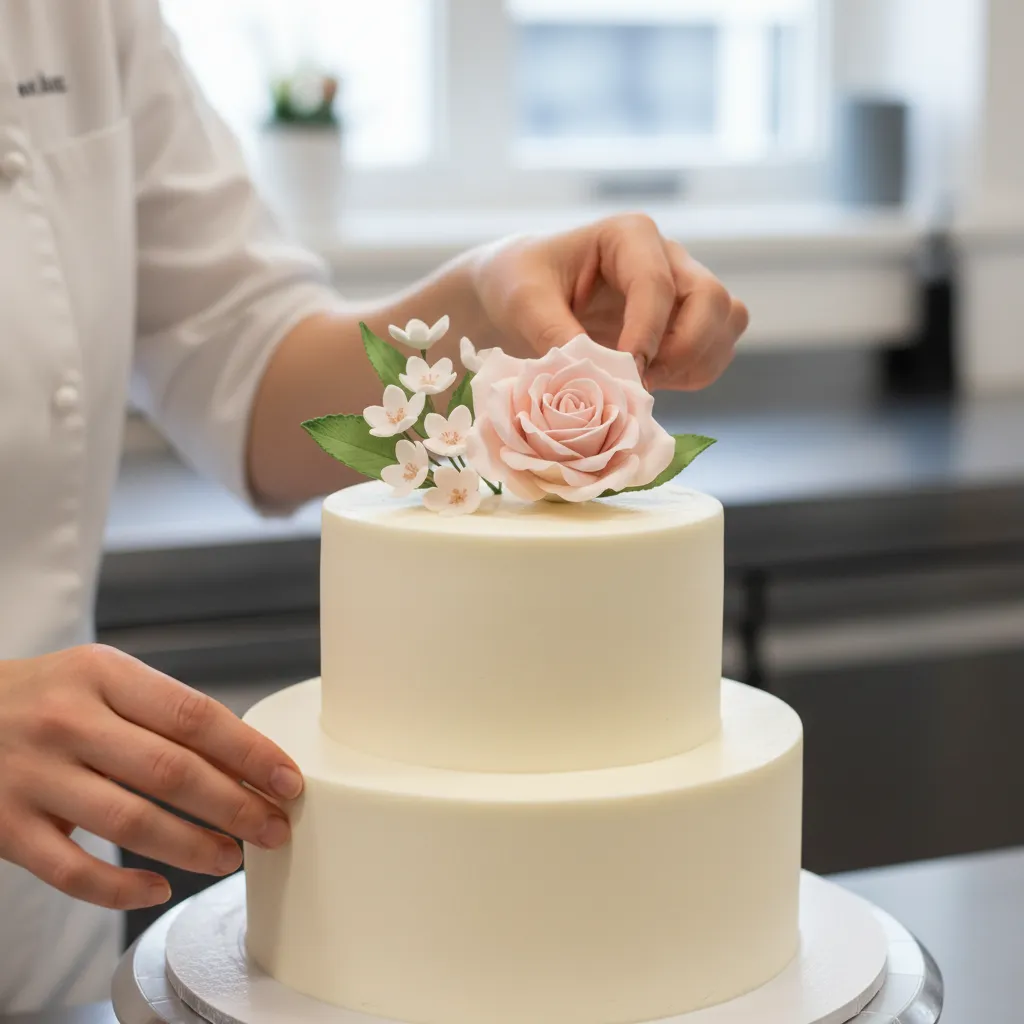
3. Minimalist Sugar Floral Adornments For A Pop Of Elegance
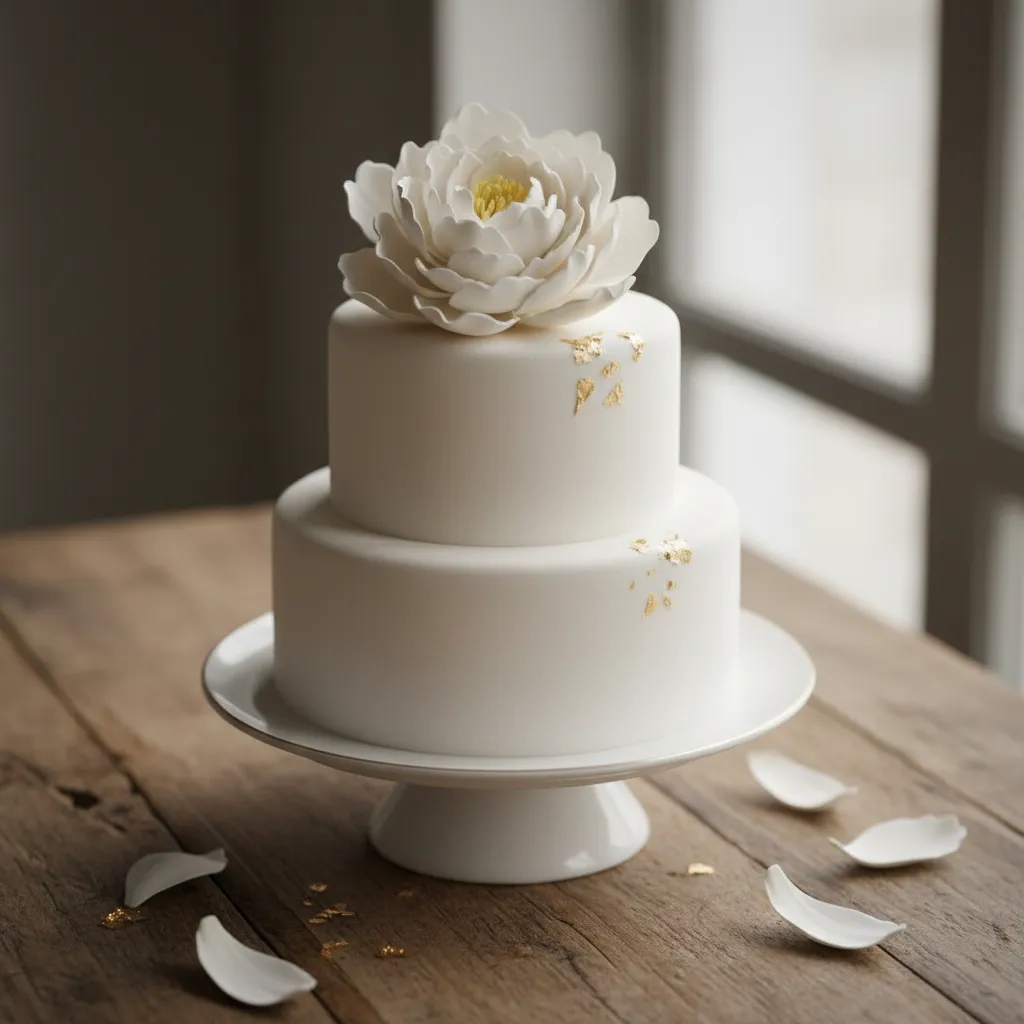
Sugar flowers offer a truly artisanal touch to any small wedding cake. They effortlessly transform a simple tier into a stunning, mouth-watering masterpiece.
The delicate petals look incredibly realistic and elegant. They provide a refined visual texture to your cake without overwhelming the palate.
Unlike fresh blooms, sugar floral adornments are entirely food safe. This ensures your beautiful cake remains wholesome, pristine, and ready to enjoy.
If you prefer a more rustic aesthetic, consider natural options. You can easily incorporate safe edible blooms for a vibrant pop of fresh color.
A single, perfectly crafted sugar flower speaks volumes of elegance, proving that true beauty lies in minimalist details.
Choosing a single statement flower keeps the design modern and clean. A carefully placed sugar peony or an elegant orchid creates a breathtaking focal point.
Sugar flowers are preferred because they are completely food-safe, free from pesticides, and can be kept as a beautiful keepsake long after the wedding.
Betsy Thorleifson, Brides Magazine: Sugar Flowers vs. Fresh Flowers
Benefits of Minimalist Sugar Flowers
Integrating sugar art into your cake design offers numerous practical advantages for a stress-free wedding day.
- Complete Food Safety: Unlike real flowers, sugar paste is edible and completely non-toxic for your guests.
- Weather Resistance: Sugar florals will never wilt or droop during a warm, sunny outdoor reception.
- Artisanal Customization: You can perfectly match the sugar paste to your exact wedding color palette.
- Enduring Keepsakes: With proper storage, these delicate sugar creations can last a lifetime.
Crafting your own plant-based sugar paste is highly rewarding. This simple recipe yields a pliable, smooth fondant perfect for sculpting delicate petals.
Ingredients
- 4 cups organic powdered sugar, sifted
- 1 tbsp aquafaba
- 2 tsp light corn syrup
- 1/2 tsp clear vanilla extract
- 1 pinch fine sea salt
Instructions
- Place the perfectly sifted organic powdered sugar into a large, clean mixing bowl.
- Whisk the aquafaba, corn syrup, vanilla extract, and fine sea salt together in a small dish.
- Create a well in the center of the powdered sugar and carefully pour in the wet mixture.
- Gently fold the ingredients together using a silicone spatula until a shaggy dough begins to form.
- Knead the mixture on a clean surface until it becomes completely smooth and pliable.
- Wrap the artisanal paste tightly in plastic wrap to prevent drying before molding your beautiful flowers.
You can easily substitute the aquafaba with traditional egg whites if you do not require a strictly plant-based recipe.
Always keep your hands lightly dusted with cornstarch while working. This simple mise en place trick prevents the delicate paste from tearing or sticking.
Artisanal Sugar Secrets
- To achieve a lifelike, velvety finish on your sugar petals, hold them briefly over a gentle stream of steam from a tea kettle; this helps set any petal dust and adds a subtle, natural glow.
- For a secure and food-safe placement, always insert your sugar flower stems into a posy pick or a small piece of straw before pushing them into the cake to prevent wires from touching the sponge.
- Enhance the minimalist aesthetic by using tonal variations; choose a petal dust just one shade darker than your fondant to create depth and dimension without losing that clean, modern look.
4. Budget-Friendly Luxury Faux Tiers For Intimate Settings
Intimate celebrations do not mean sacrificing the grand visual of a tall dessert. Faux tiers offer the perfect luxurious solution.
These clever styrofoam bases are decorated to look exactly like real cake. They provide impressive height without the massive price tag.
This budget friendly secret minimizes food waste while maximizing your elegant focal point. Your guests will never know the difference.
Faux tiers give your intimate wedding cake the grand, luxurious height of a royal centerpiece, without the extra cost.
When planning a small reception, you might still want a classic multi tier look for photos. A dummy cake achieves this flawlessly.
If you want the look of a multi-tier cake but only have a few guests, ask your baker to create dummy tiers out of decorated styrofoam.
The Knot Editorial Team, How to Save Money on Your Wedding Cake
You can pair these faux layers with a stunning real top tier. A popular choice is using our easy homemade red velvet cake recipes for the actual cutting layer.
Serve this stunning cake alongside beautiful signature wedding drinks summer non alcoholic cocktail ideas to delight every single guest.
Here are essential tips for blending real and faux tiers perfectly:
- Match The Frosting: Always use the exact same batch of buttercream or fondant on both the foam and the edible layers.
- Hide The Seams: Conceal the transition points using fresh organic florals, elegant piping, or a smooth fondant ribbon.
- Secure The Base: Anchor the lightweight foam dummy to a heavy cake board to prevent it from shifting during display.
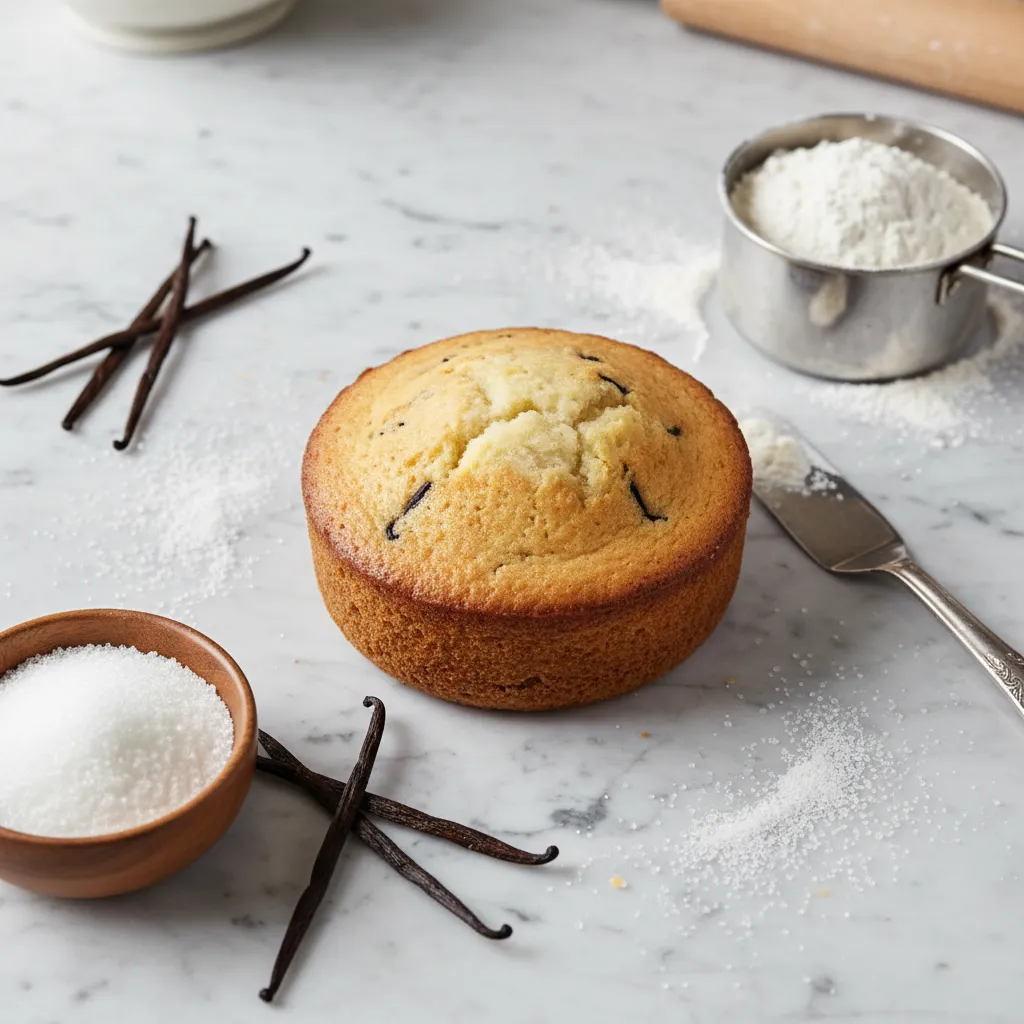
Petite Vanilla Bean Cutting Cake
Couples using dummy cakes still need a delicious top tier for the traditional cutting ceremony. This wholesome recipe is perfect.
Ingredients
- 1.5 cups organic all-purpose flour
- 1 cup granulated sugar
- 0.5 cup unsalted butter, softened
- 0.5 cup whole milk, room temperature
- 2 large eggs, room temperature
- 1 tbsp pure vanilla bean paste
- 1.5 tsp baking powder
- 0.25 tsp sea salt
Instructions
- Preheat your oven to 350 degrees Fahrenheit and line two six-inch round cake pans with parchment paper.
- In a large bowl, cream the softened butter and sugar until pale and fluffy, taking about three minutes.
- Add the eggs one at a time, mixing well after each addition. Gently stir in the rich vanilla bean paste.
- In a separate bowl, whisk together the flour, baking powder, and sea salt.
- Gradually add the dry ingredients to the butter mixture, alternating with the milk until just combined.
- Divide the fragrant batter evenly between the prepared pans and smooth the tops with a baking spatula.
- Bake for 25 to 30 minutes until a toothpick inserted into the center comes out perfectly clean.
- Let the cakes cool in the pans for ten minutes before transferring them to a wire rack to cool completely.
Pro Baker Secrets
- Mark the Edible Tier: Place a tiny, hidden marker like a dot of icing on the back of the cake so you know exactly where to cut into the real cake during the ceremony.
- Weight It Down: Faux tiers are incredibly light. Always use a heavy, sturdy cake base and secure the styrofoam with royal icing so it doesn’t accidentally tip over during transport or display.
- Repurpose for Decor: Since faux tiers do not spoil, you can carefully remove the real top tier and keep the decorated dummy cake as a gorgeous display piece for your post-wedding brunch.
5. DIY Micro-Wedding Cakes: The Ultimate Safe Transport Guide
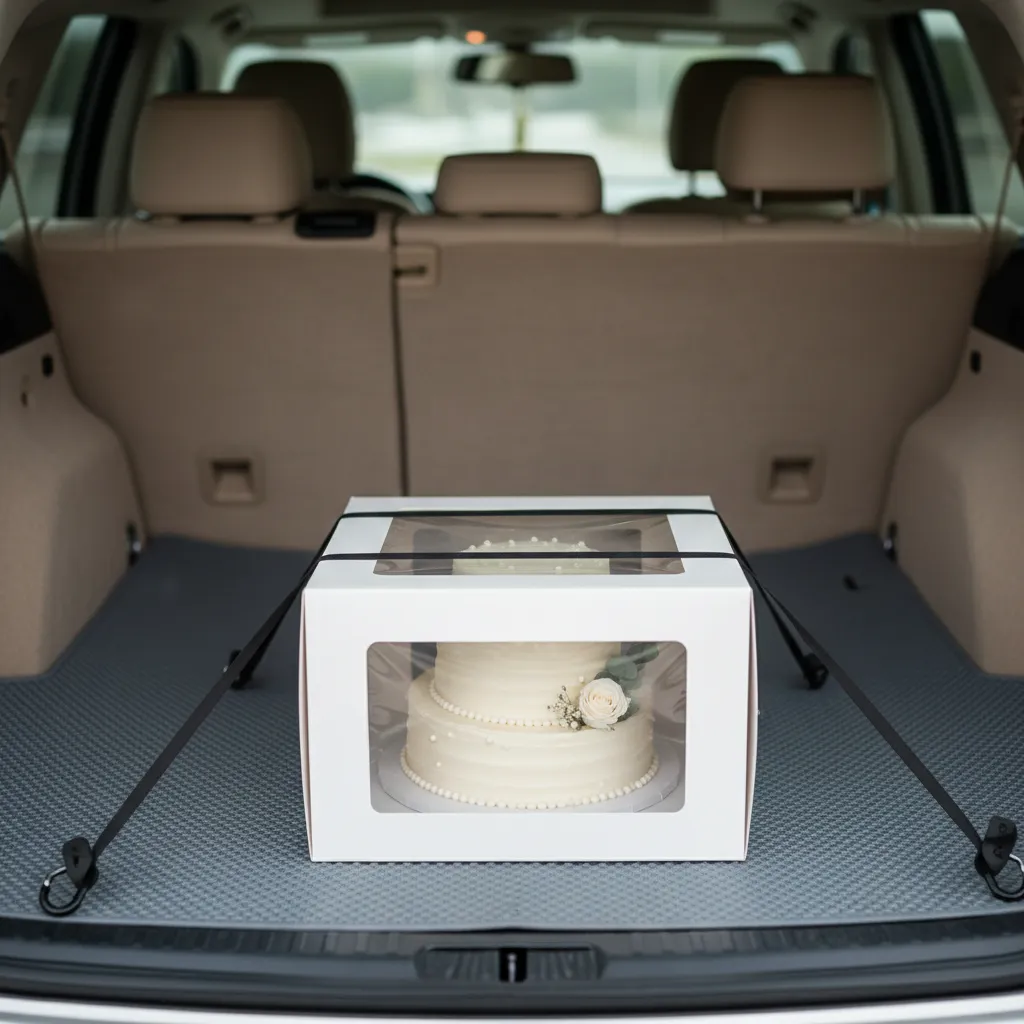
Moving a delicate cake can feel completely terrifying. Your beautiful creation needs careful handling to arrive safely.
The secret to flawless transit is preparation. You must control the temperature and secure the base perfectly.
A chilled cake is a strong cake. Cold buttercream locks layers together, acting like delicious culinary cement.
The most critical rule of cake transport is starting with a cold cake. Chill it overnight so the buttercream is rock solid.
Liz Marek, Sugar Geek Show: Cake Transport Guide
The Golden Rules of Cake Transit
Calculating exact cake box sizes is simple with Flavoryn Recipe Math.
- Keep it Cool: Blast your car air conditioning to maximum power.
- Stay Level: Use the flat floorboard or trunk, never a slanted seat.
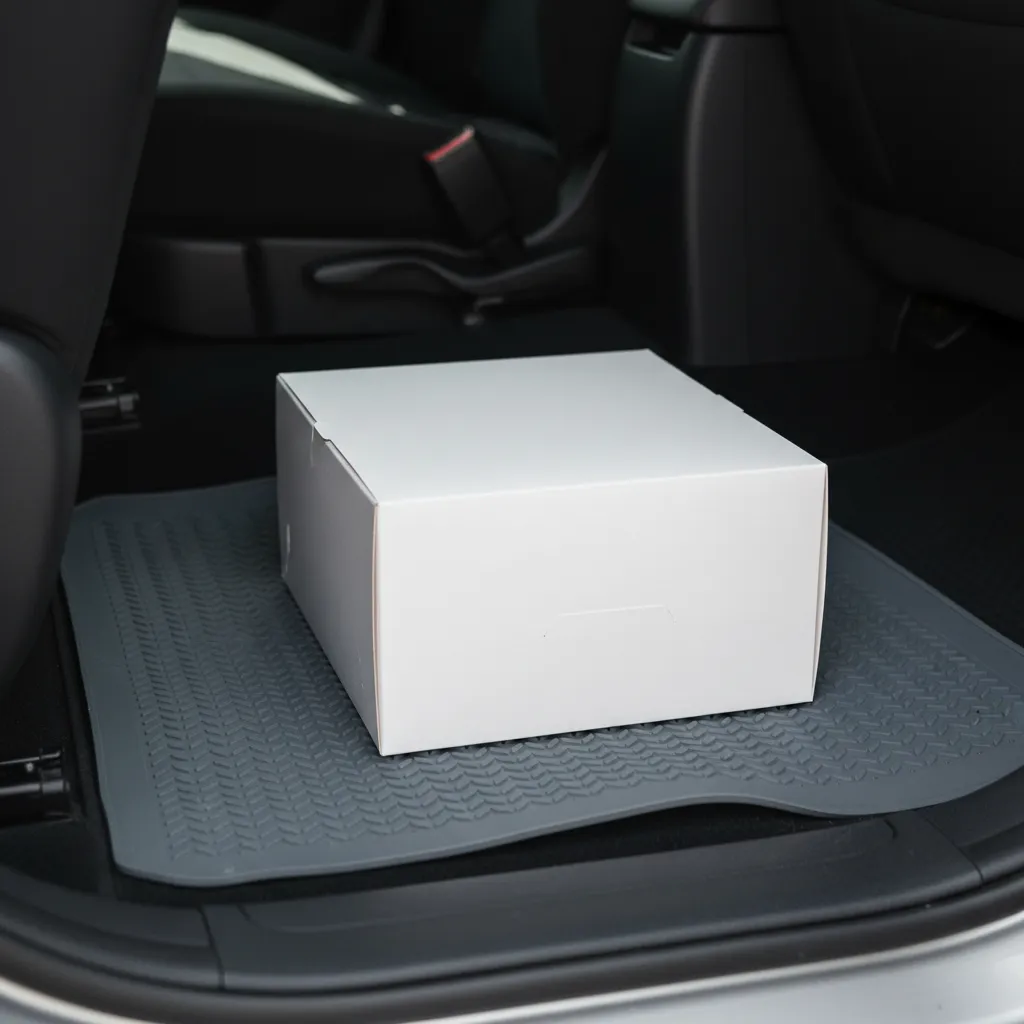
- Prevent Sliding: Place a non-slip yoga mat under the heavy box.
- Drive Smoothly: Avoid sudden stops and take corners very slowly.
A flawless wedding cake delivery is half baking and half careful driving.
Emergency Cake Repair Kit

Even the best drivers hit unexpected bumps. Packing a small repair kit saves the day and ensures peace of mind.
You can fix minor smudges easily once you reach the beautiful wedding venue.
Ingredients
- 1 cup extra matching buttercream
- 2 small offset spatulas
- 1 piping bag with the matching tip
- 4 extra edible floral garnishes
- 1 pair food-safe tweezers
Instructions
- Assess any damage carefully before touching the cake surface.
- Smooth small dents gently using a slightly warm offset spatula.
- Pipe fresh buttercream cleanly over any deep structural scratches.
- Use tweezers to place extra flowers directly over large flaws.
- Step back and ensure the final design looks naturally flawless.
Safe Transport Temperature Guide
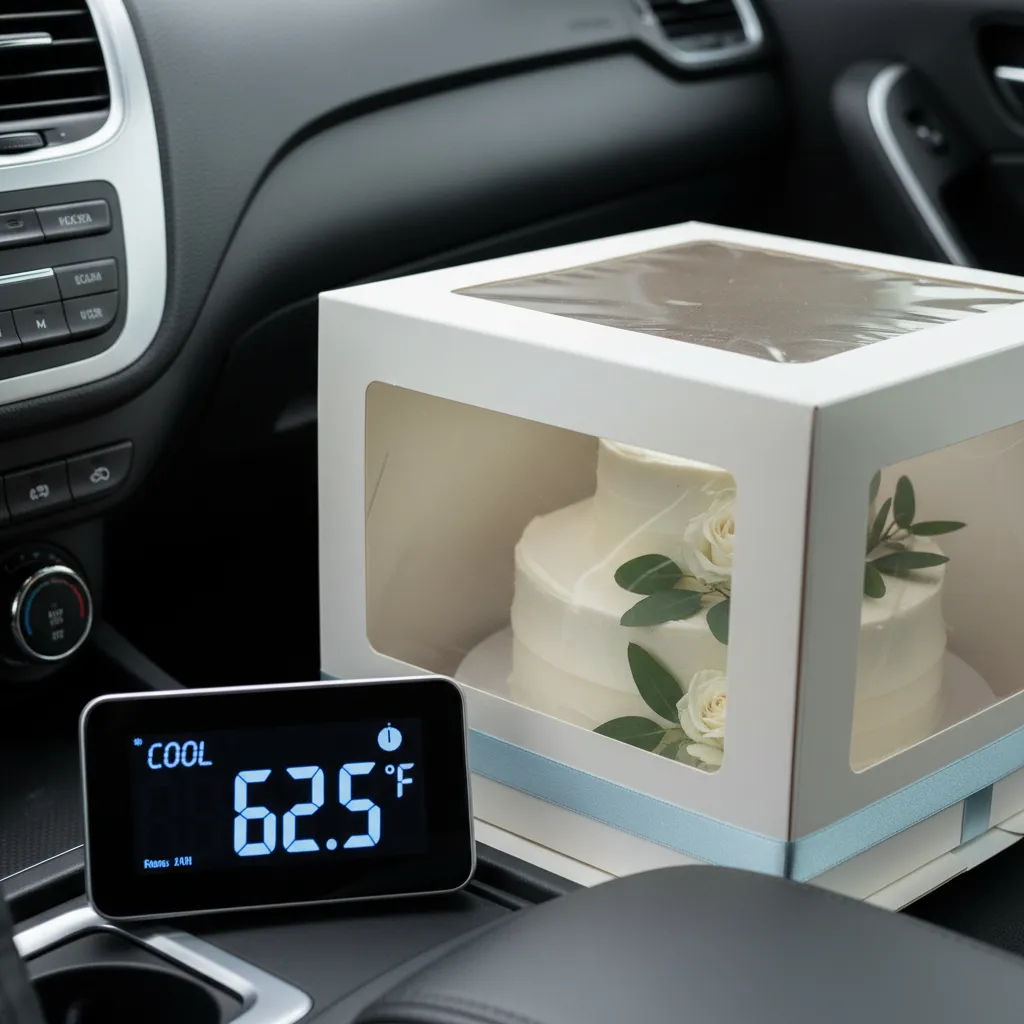
Keep your car climate tightly controlled for absolute structural success.
| Cake Icing Type | Ideal Transit Temp | Max Travel Time |
|---|---|---|
| Swiss Buttercream | 65°F to 68°F | 2 Hours |
| Fondant Covered | 68°F to 70°F | 3 Hours |
| Whipped Cream | Under 40°F | 1 Hour |
Pair your flawless dessert with aesthetic nonalcoholic party drinks for a highly chic vibe.
The Baker’s Secret
- Place a non-slip shelf liner inside your cake box and another under the box on the car floor to create a double-layer grip that prevents sliding.
- For drives longer than 30 minutes, surround the base of the cake box with frozen gel packs wrapped in towels to maintain that critical chilled buttercream structure.
- Always bring a leveling tool or a simple smartphone level app to ensure the spot where you are placing the cake at the venue is perfectly flat.
The Sweetest Ending to Your Celebration
Crafting a small, elegant wedding cake is a joyful journey. It brings a deeply personal touch to your beautiful day, celebrating both flavor and intimacy.
Remember, simplicity often makes the most stunning statement. A smooth Swiss meringue buttercream and a beautiful single tier will wow your lucky guests.
Whether you choose a bright strawberry base or rich vanilla, bake with love. Share each mouth-watering slice and savor the sweetest start to your marriage!
Curiosities for Your Cake Baking Journey
You can bake the cake layers up to a month ahead and freeze them tightly wrapped. Frosting with buttercream is best done a day or two before the wedding.
Chill the cake until the buttercream is completely firm. Place it in a sturdy cake box with a non-slip mat on a flat surface in your car, away from heat.
Absolutely! Just ensure you choose organic, food-safe flowers. Avoid toxic blooms, and wrap the stems in floral tape before gently pressing them into the cake.
Avoid cutting traditional wedges. Instead, cut straight lines across the cake, about an inch apart, and slice those long pieces into elegant, neat rectangles.