
Table of Contents
- Edible Flower Safety First: Sourcing Pesticide-Free Blooms and Identifying Toxic Varieties
- The 5-Minute Upgrade: Pressing Fresh Pansies onto Store-Bought White Cakes
- The Meadow Look: Styling Naked Cakes with Chamomile Stems and Lavender
- Textured Art: How to Create Simple Wildflowers Using a Palette Knife
- The Boho Sprinkle: Using Dried Petal Confetti for a Quick Floral Finish
- A Garden of Sweet Endings
- Floral Curiosities & Kitchen Questions
Imagine a soft, moist sponge topped with a delicate crown of nature’s finest jewels.
These wildflower cakes are more than just a feast for the eyes; they bring a subtle, herbal complexity to your kitchen that standard frostings simply cannot match.
Whether you are a seasoned baker or a curious beginner, the simple act of placing a fresh petal onto a cake transforms a basic dessert into an extraordinary masterpiece.
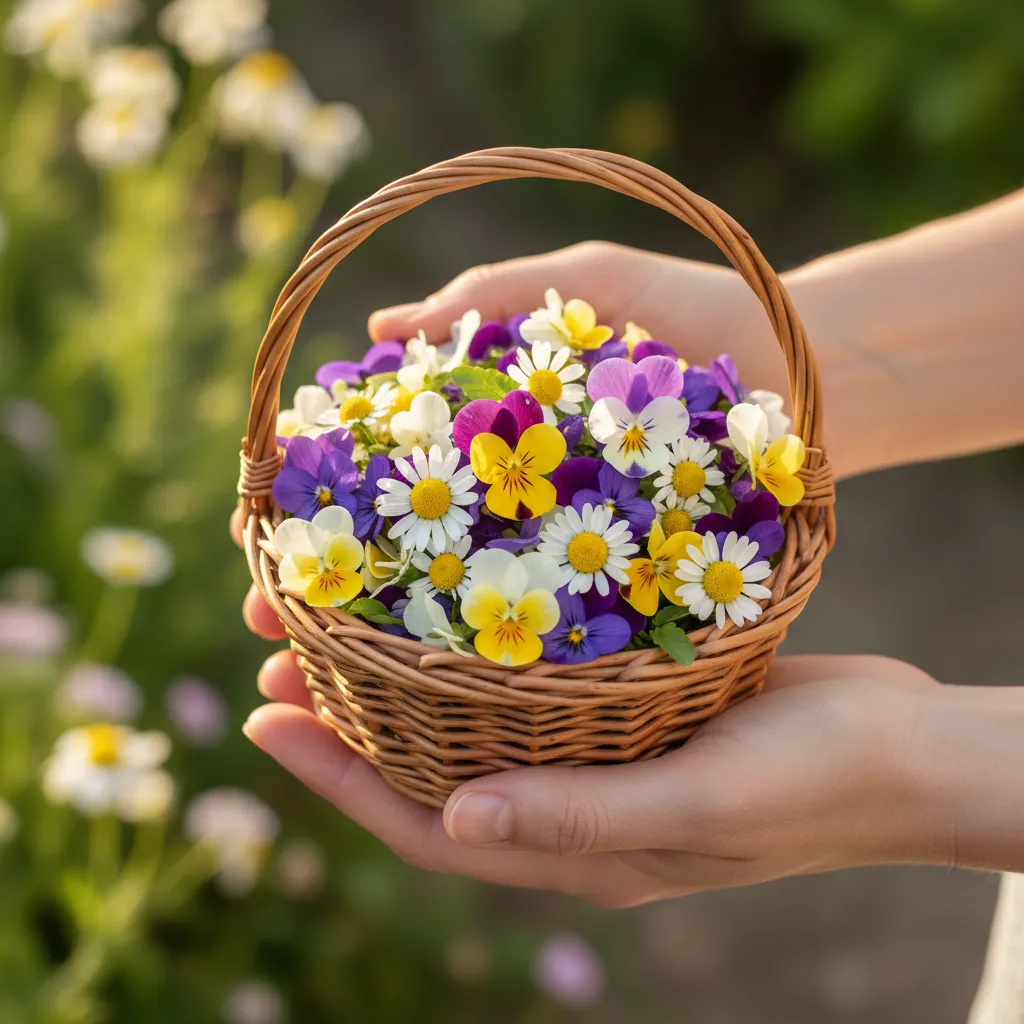
Safety is paramount when you bring the garden to the table, and identifying the right blooms is your first step toward success.
Not every flower is fit for a plate, so we focus on varieties like pansies and lavender that offer both beauty and balanced nutrition.
Learning to source organic, pesticide-free petals ensures your creations are as wholesome as they are stunning.
Taking a moment to decorate with these natural wonders invites a sense of peace and creativity into your busy routine.
These seven ideas are designed to be accessible for parents and aspiring chefs alike, focusing on clear techniques and vibrant flavors.
It is time to roll up your sleeves and discover the joy of sharing a meal that celebrates the very best of the earth.
Edible Flower Safety First: Sourcing Pesticide-Free Blooms and Identifying Toxic Varieties
Adding wildflowers to a cake creates a stunning visual impact. However, safety must always be your top priority in the kitchen.
Not every bloom is safe to eat. You must ensure every petal touching your frosting is free from chemicals and completely non-toxic.
This ensures your beautiful dessert remains a joy to eat. We will guide you through selecting the safest options for your guests.
Nature provides the most beautiful garnishes, but safety is the essential ingredient in every floral recipe.
Bloom Best Practices
- Skip the florist aisle: Never use flowers from a standard bouquet or nursery unless they are explicitly labeled culinary-grade or organic, as ornamental blooms are often treated with non-food-safe pesticides.
- Verify the variety: Common names can be misleading. Always double-check the Latin scientific name to ensure the specific species is non-toxic before letting it touch your frosting.
- The straw hack: To protect your cake from stem sap and keep delicate flowers secure, insert the stem into a piece of a drinking straw before pushing it into the cake.
Where to Source Pesticide-Free Blooms
Never buy flowers from a standard florist for culinary use. Commercial floral shops often use pesticides that are not safe for consumption.
The best source is your own organic garden. You have full control over the soil and can guarantee no harmful sprays were used.
If gardening is not an option, visit a local farmers market. Ask the grower specifically if their blooms are food-grade and organic.
Many high-end grocery stores now carry packaged edible flowers. Look for these in the fresh herb section near the produce.
These store-bought options are perfect for topping an easy healthy spring dessert strawberry cake recipe.
Avoid flowers from florists, garden centers, or nurseries as they are likely treated with pesticides not labeled for food crops.
North Carolina State Extension, Choosing and Using Edible Flowers
The Floral Insider
- Always ask your local farmer if their blooms are food-grade. Just because they are grown organically does not always mean they are safe for consumption if they were grown near non-edible crops.
- Check the refrigerated herb section of specialty grocers. Edible flowers are often sold in small containers right next to the fresh mint and microgreens.
- When in doubt, skip the florist entirely. Their flowers are bred for longevity and aesthetics, often using systemic pesticides that cannot be simply washed off before eating.
Distinguishing Safe Blooms from Toxic Varieties
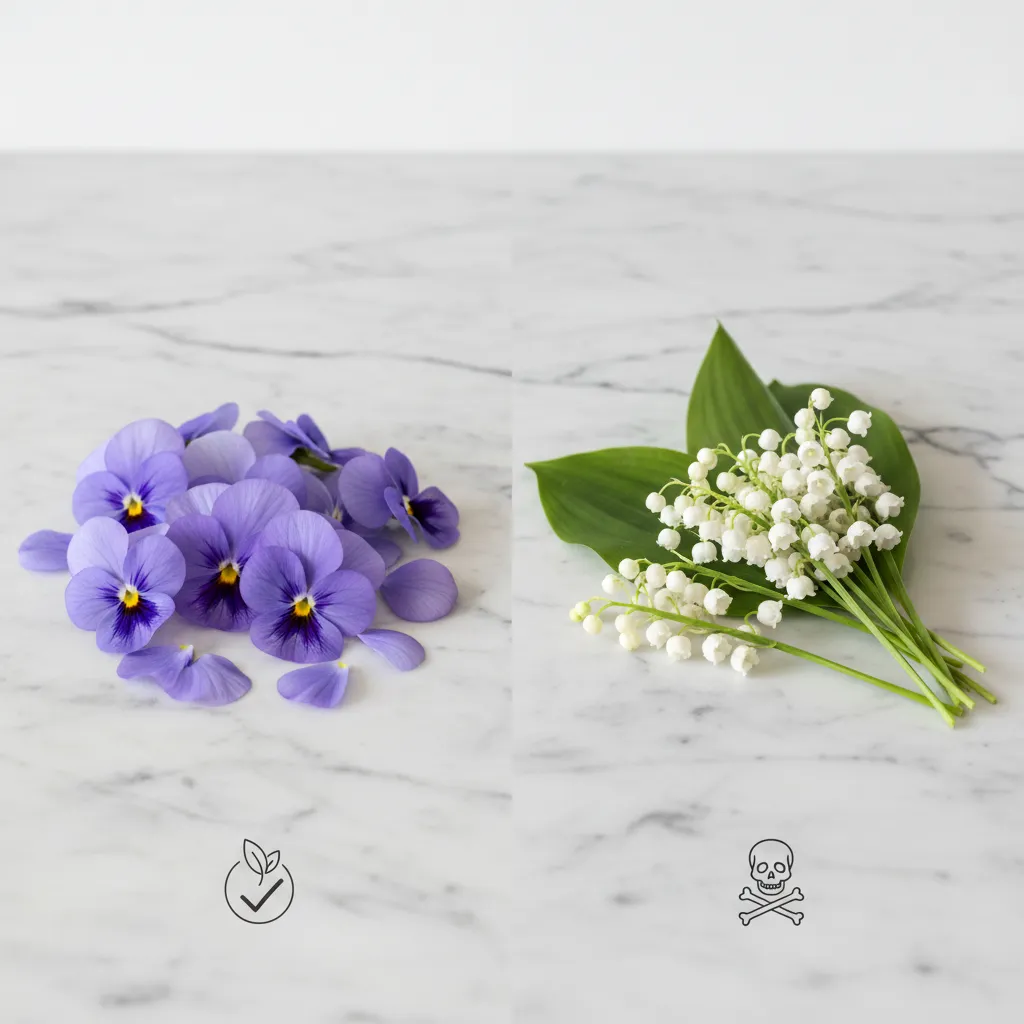
Proper identification is critical. Some toxic flowers look similar to edible ones. Always use the Latin name to verify the plant variety.
If you are ever unsure about a flower, do not use it. It is better to have a plain cake than to risk the health of your friends and family.
Below is a quick reference guide to help you choose wisely. This list covers common garden favorites found in many backyards.
| Flower Variety | Safety Status | Flavor Profile |
|---|---|---|
| Pansy / Viola | ✅ Safe | Mild, grassy, wintergreen |
| Nasturtium | ✅ Safe | Peppery, spicy like arugula |
| Lavender | ✅ Safe | Sweet, floral, perfumed |
| Foxglove | ❌ TOXIC | N/A (Do not consume) |
| Hydrangea | ❌ TOXIC | N/A (Do not consume) |
| Lily of the Valley | ❌ TOXIC | N/A (Do not consume) |
The Florist’s Safety Brief
- Use a plant identification app to cross-reference photos with Latin names, ensuring you have the exact edible variety before it touches any frosting.
- Avoid using flowers from standard retail florists or nurseries unless they are specifically labeled food-grade, as these are often treated with systemic pesticides not safe for consumption.
- When in doubt, perform a petal-only trim; even with safe varieties like Roses or Dianthus, the bitter white base of the petal should be removed for the best flavor profile.
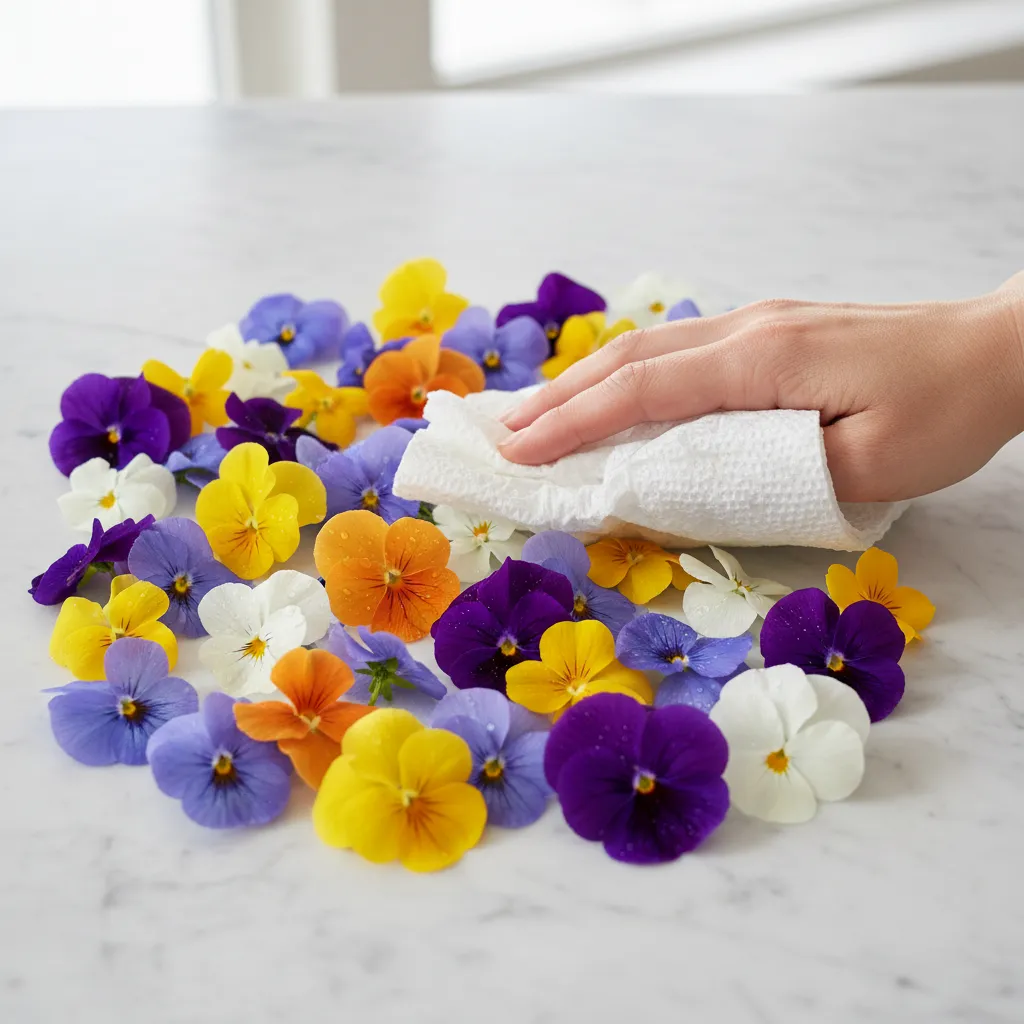
Cleaning and Storage Tips
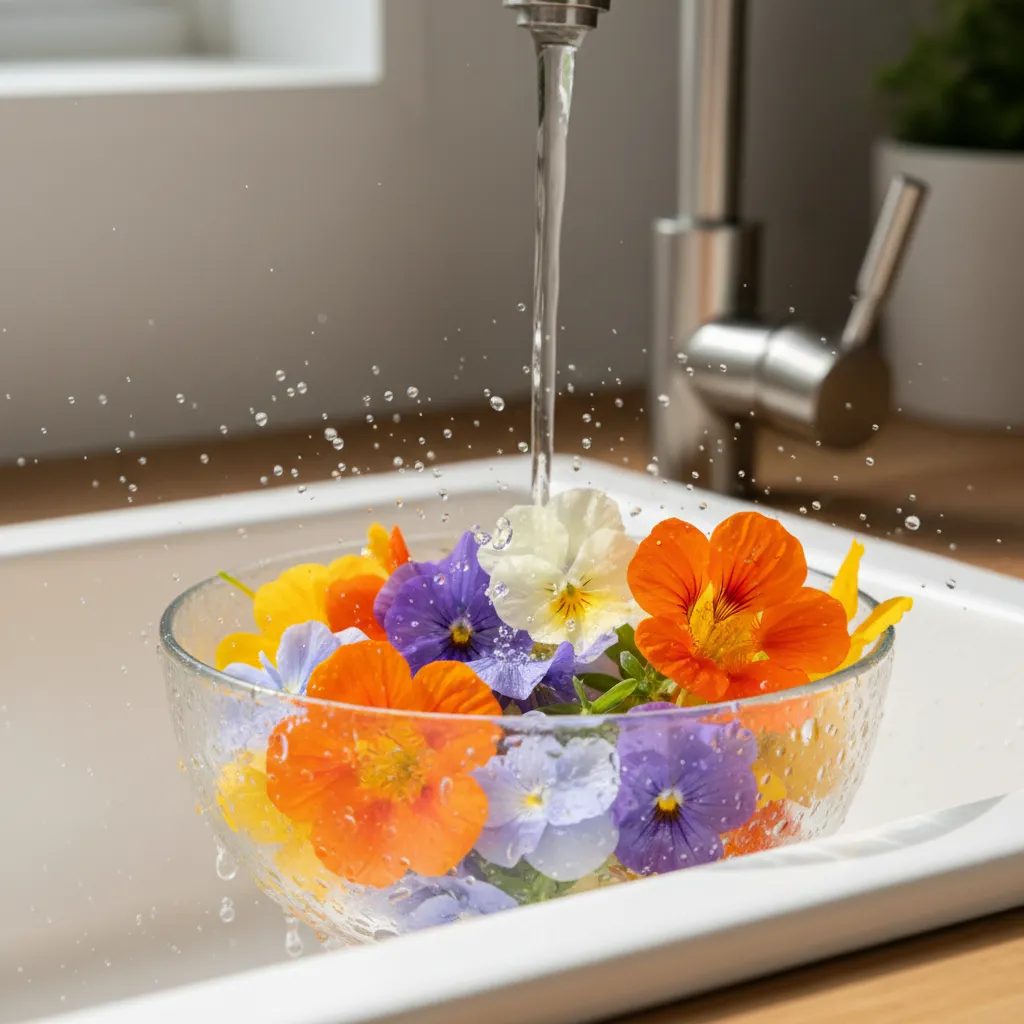
Once you harvest your blooms, shake them gently. This dislodges any small insects that might be hiding inside the petals.
Wash them in a bowl of cool water immediately before use. Dry them carefully on a paper towel to prevent wilting or bruising.
If you need to keep them fresh, use techniques similar to how to store fresh herbs for weeks.
Remove the pistils and stamens before serving. These parts can be bitter and may contain pollen that aggravates allergies.
Bloom Keeper Secrets
- To extend shelf life, store your cleaned blooms on a damp paper towel inside an airtight container in the refrigerator’s crisper drawer.
- Revive slightly wilted flowers by submerging them in a bowl of ice water for about 30 seconds to restore their crisp texture.
- Always remove the green sepals and stems before eating, as these parts can be tough and significantly more bitter than the delicate petals.
The 5-Minute Upgrade: Pressing Fresh Pansies onto Store-Bought White Cakes
We all have moments where baking from scratch creates too much stress. That is where the grocery store bakery saves the day.
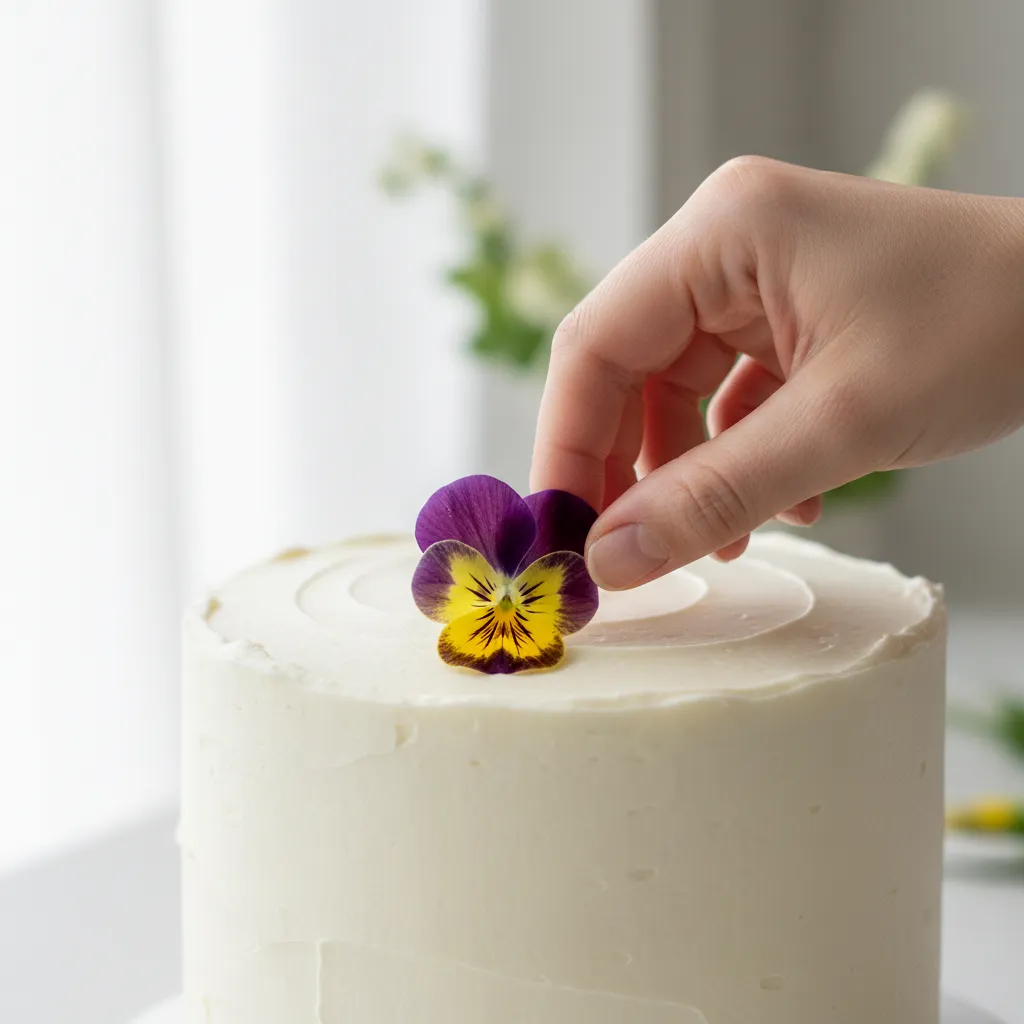
You can transform a plain vanilla cake into a masterpiece in minutes. The secret lies in using fresh, vibrant pansies.
These flowers have flat faces that press beautifully into buttercream. The result is an artisanal look that mimics high-end bakeries.
If you are planning a larger gathering, this trick pairs perfectly with fresh spring party food ideas for adults.
Store-bought doesn’t mean soulless; a touch of nature turns convenience into art.
The Floral Flourish
- Always use organic or food-grade pansies to ensure they are safe for contact with your dessert.
- To ensure your flowers stay fresh, gently pat them dry with a paper towel before pressing, as excess moisture can cause the buttercream to slide.
- For the best adhesion, let the cake sit at room temperature for 15 minutes before decorating so the frosting is soft enough to grip the petals.
Selecting and Preparing Your Blooms
Not all flowers are safe for consumption. You must ensure your pansies are grown specifically for eating.
Avoid flowers from standard florists or nurseries. These often contain pesticides that are not safe for food contact.
Only eat flowers that are grown organically and have not been treated with pesticides. If you are unsure, do not eat them.
University of Minnesota Extension, Edible Flowers
Choose pansies with fully open petals. Wilted edges will detract from the crisp, clean look we want to achieve.
Wash them gently in cool water. Pat them completely dry with a paper towel before they touch the icing.
Ingredients
- 1 (8-inch) round store-bought white cake with vanilla buttercream
- 12 to 15 fresh, organic pansies (various colors)
- 1 tbsp warm water (optional, for smoothing frosting)
Instructions
- Remove the cake from its packaging. Place it on a clean serving stand or platter.
- If the frosting is crusted over, dip a metal spatula in warm water. Glide it over the sides to soften the buttercream slightly.
- Trim the stems off the pansies completely. You want the flower to lie perfectly flat against the cake surface.
- Gently press a pansy onto the side of the cake. Use your finger to smooth the petals down so they adhere to the sticky frosting.
- Repeat this process around the circumference of the cake. You can arrange them in a random scatter or a precise ring.
- Serve immediately or refrigerate. If refrigerating, remove the cake 30 minutes before serving to soften the buttercream.
Floral Decor Secrets
- To ensure your petals are bone-dry without bruising, place them in a salad spinner lined with paper towels and spin gently for a few seconds.
- If your pansies arrive looking a bit tired, submerge them in an ice water bath for ten minutes; this will firm up the petals and make them easier to handle.
- When working with a cake that has been refrigerated, a tiny drop of honey or light corn syrup can act as a natural glue to help the flowers stick to firm frosting.
Styling Tips for Maximum Impact
The contrast between the bright petals and white frosting is stunning. You can enhance this with simple color theory.
Consider the mood of your event. Dark purple pansies create drama, while yellow ones feel sunny and casual.
Serve this cake alongside lush non-alcoholic pink drink recipes for a cohesive color palette.
| Flower Color | Visual Vibe | Recommended Occasion |
|---|---|---|
| Deep Velvet Purple | Elegant & Moody | Evening Dinner Parties |
| Bright Yellow | Cheerful & Warm | Sunday Brunch |
| Soft Lavender | Delicate & Airy | Baby Showers |
| Burgundy/Red | Romantic & Bold | Anniversaries |
Remember to warn guests that the flowers are edible. Some may hesitate to eat them without permission.
This simple upgrade proves you do not need hours in the kitchen. Smart choices create beauty with minimal effort.
Stylist’s Shortcut
- To prevent wilting, keep your fresh pansies in ice-cold water until the very moment you are ready to decorate.
- Combine varied sizes of blooms to create a more natural, garden-inspired aesthetic rather than a rigid pattern.
- Apply a tiny drop of honey or corn syrup to the back of the petal to help it stay perfectly in place on vertical cake surfaces.
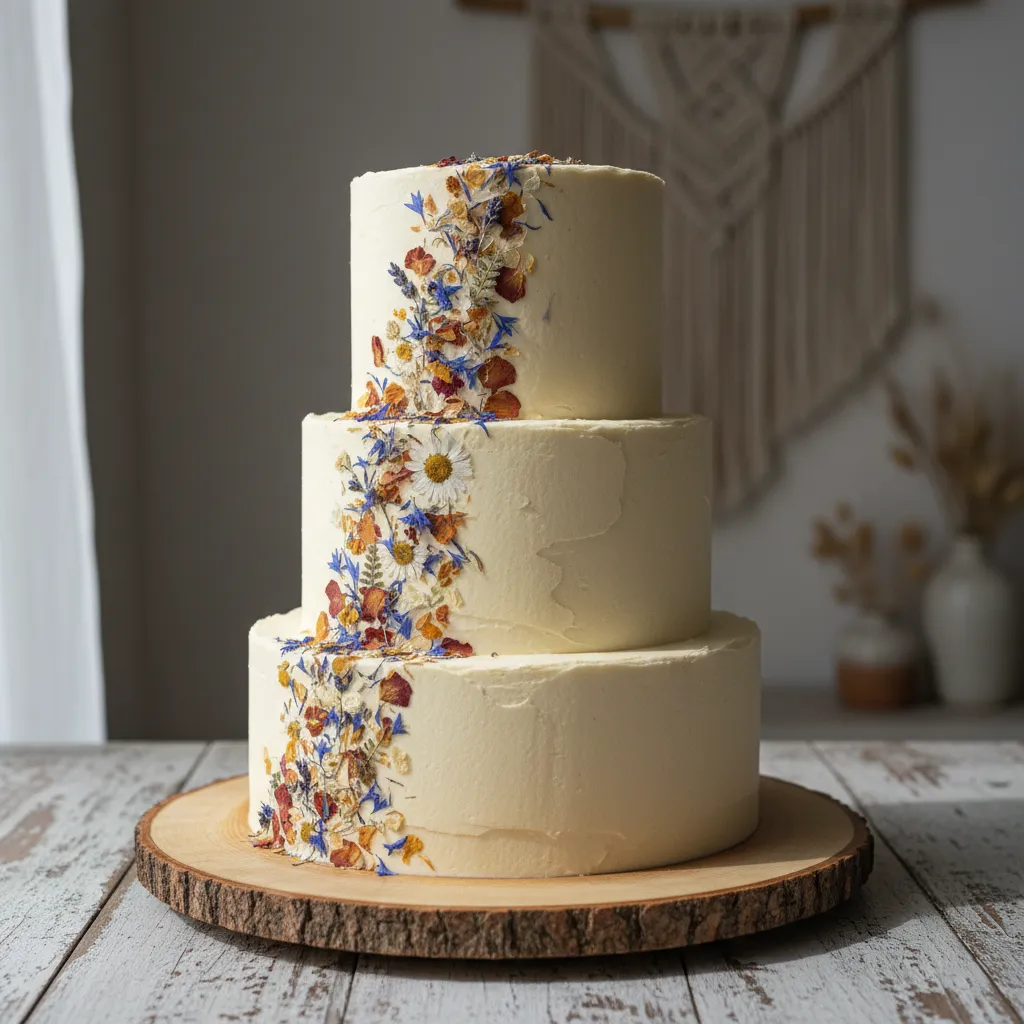
The Meadow Look: Styling Naked Cakes with Chamomile Stems and Lavender
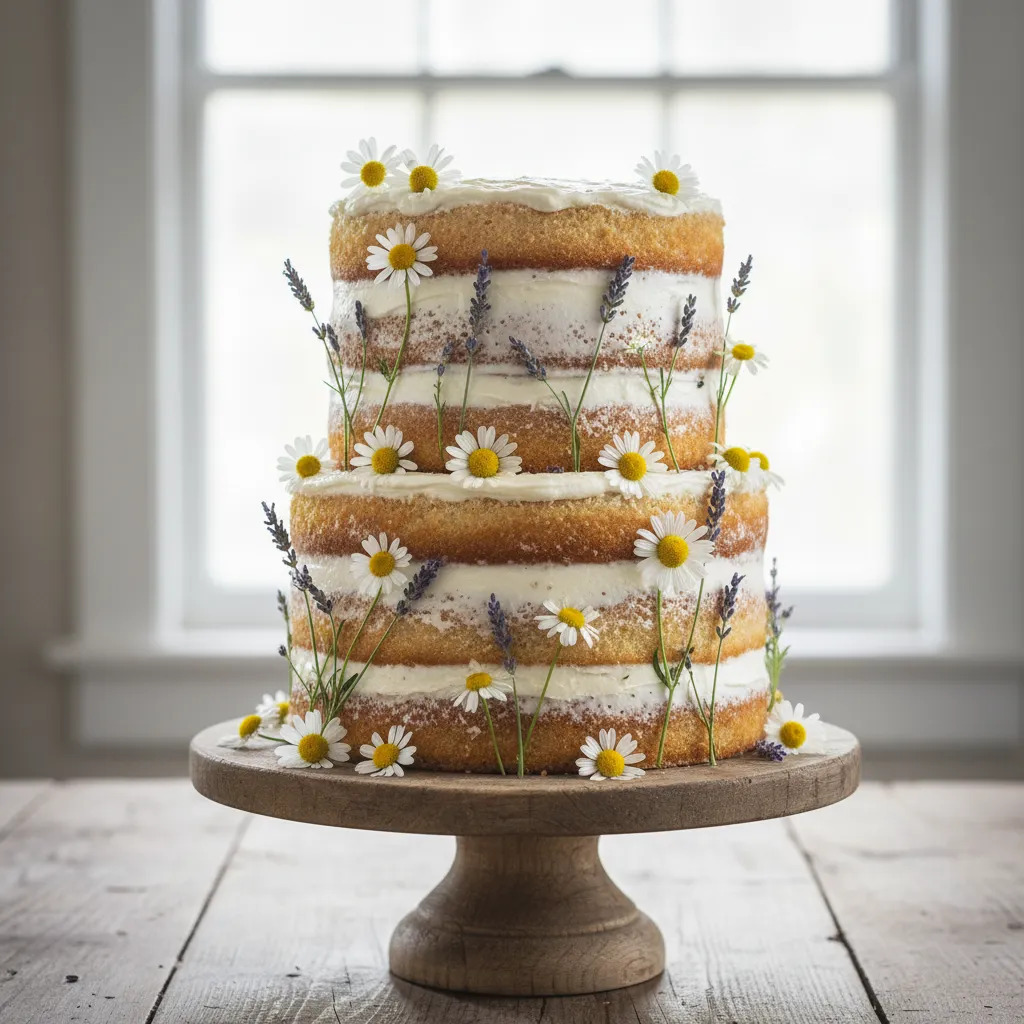
The “meadow look” is a beloved style for modern bakers. It captures the essence of a wild field in late spring. This aesthetic relies on imperfection.
Instead of thick fondant, we use the “naked” frosting technique. This exposes the golden cake layers beneath. It creates a warm, rustic canvas.
Chamomile acts as the playful element here. Its small white petals look like daisies dancing in the wind. They bring a sense of cheer to the design.
Lavender adds height and elegance. The purple hues contrast beautifully with the pale yellow sponge. The scent offers a calming sensory experience.
This style pairs wonderfully with citrus flavors. If you enjoy zesty desserts, our Easy Italian Lemon Ricotta Cookies Recipes explore similar bright profiles.
A naked cake is nature’s canvas, where every imperfect crumb tells a delicious story.
Wildflower Wisdom
- Always ensure your botanicals are food-safe and pesticide-free before decorating; you can wrap the stems in floral tape to create a barrier between the plant and the cake.
- To achieve a true meadow aesthetic, avoid symmetry by grouping stems in clusters of three or five at varying heights across the top and sides.
- Insert your chamomile and lavender just before serving to prevent the delicate petals from wilting in the moisture of the frosting.
Preparing Your Botanical Elements
Safety is paramount when using fresh florals. You must ensure no organic fluids leach into the cake. This is especially true for lavender stems.
Always source your blooms from a reputable organic grower. Never use flowers from a florist shop, as they often contain heavy pesticides.
Only eat flowers that have been grown without pesticides. To be safe, do not eat flowers from florists, nurseries or garden centers.
Iowa State University Extension, Edible Flowers Guide
To prepare the stems, you will need a few specific tools. This ensures the cake remains edible and sanitary. Here is your essential toolkit:
- Floral Tape: To seal the cut ends of the stems.
- Posy Picks: Plastic tubes that hold water and protect the cake.
- Tweezers: For placing delicate chamomile heads precisely.
- Offset Spatula: To create the scraped, naked finish on the buttercream.
Ingredients
- 3 layers of Vanilla Bean Cake (cooled)
- 4 cups Swiss Meringue Buttercream
- 1 fresh bunch Organic Chamomile flowers
- 12 fresh stems Organic Lavender
- 1 roll Green floral tape
Instructions
- Stack the Cake: Place the first cake layer on your board. Pipe a dam of buttercream around the edge and fill the center. Repeat.
- Apply Crumb Coat: Cover the entire cake in a thick layer of buttercream. Use a bench scraper to smooth the sides.
- Scrape to Reveal: Press the scraper firmly against the side while rotating. Remove excess frosting until the cake layers peek through.
- Chill: Place the cake in the fridge for 30 minutes. This helps the buttercream set before decorating.
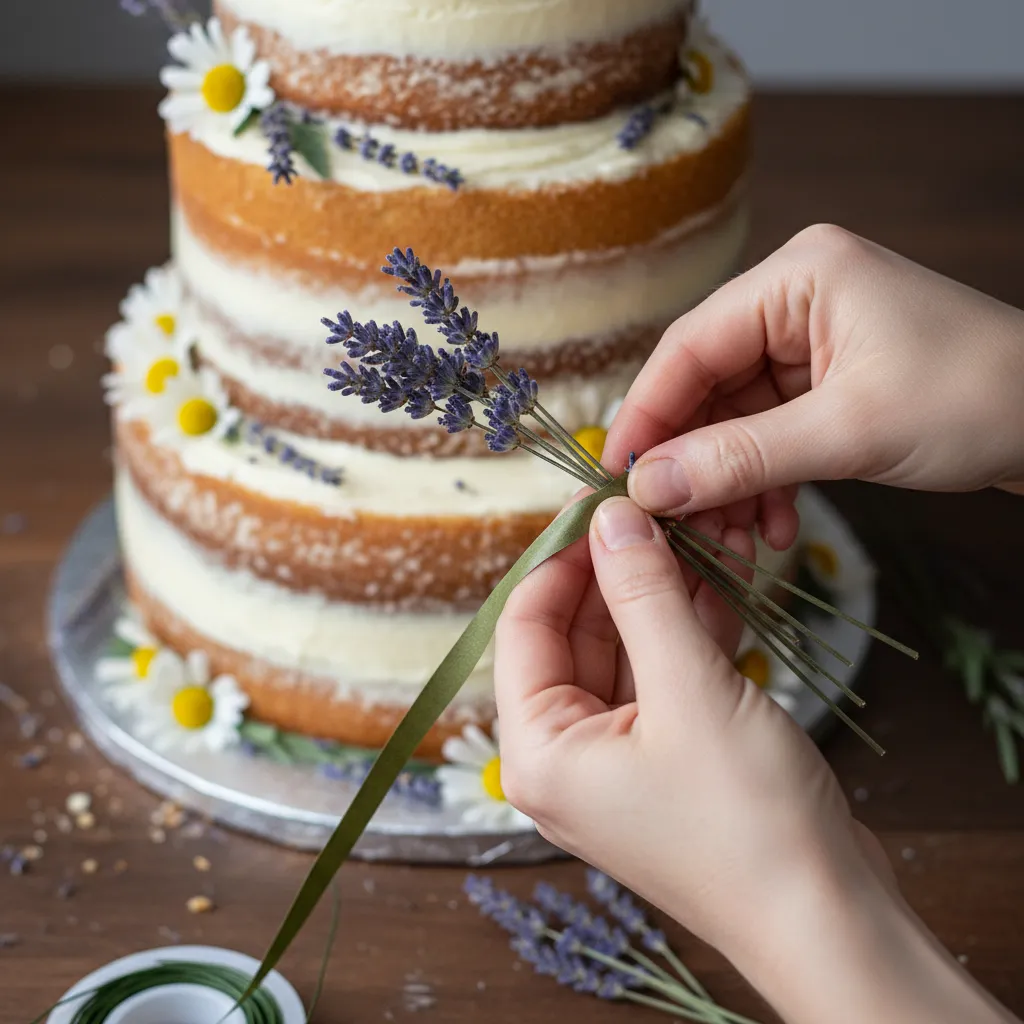
- Prepare Stems: Cut flower stems to 2 inches. Wrap each stem tightly with floral tape to seal the cut end.
- Insert Blooms: Insert lavender stems at varying heights for drama. Fill gaps with clusters of chamomile.
- Garnish: Sprinkle a few loose chamomile petals on the cake stand for a fallen-petal effect.
This cake is a showstopper for garden parties. Serve it alongside refreshing beverages for a complete experience.
For a true Southern pairing, try serving this with one of our Best Homemade Sweet Iced Tea Recipes. The tea balances the floral sweetness.
Botanical Baker’s Secrets
- To keep delicate chamomile from drooping, hydrate the stems for two hours in cool water before sealing them with tape.
- If you are worried about stem stability, cluster three lavender stems together with tape before inserting them into a single posy pick for a more dramatic look.
- Use tweezers to gently fluff the petals of the chamomile after insertion to hide any visible floral tape or posy pick edges.
Textured Art: How to Create Simple Wildflowers Using a Palette Knife
Creating wildflowers with a palette knife is remarkably intuitive. It feels less like baking and more like painting on a canvas.
This technique is perfect for beginners because it relies on imperfection. The goal is an organic, windswept look rather than precision.
You do not need steady hands or complex piping skills. The natural movement of your wrist creates the delicate petals for you.
This style works best on a sturdy, chilled surface. A stable base, like our Easy Homemade Red Velvet Cake, provides the perfect canvas.
In the art of cake design, imperfections are just petals caught in a gentle breeze.
Artist’s Studio Secrets
- Keep your cake well-chilled before starting; a firm surface prevents the base frosting from dragging as you create your textured petals.
- Load only the very tip or the edge of your palette knife to keep the floral shapes small and delicate rather than chunky.
- Wipe your blade clean after every single stroke to ensure your colors stay vibrant and your petal edges remain crisp.
Mastering the Smear Technique
The secret lies in the consistency of your medium. If the frosting is too soft, the petals will droop and lose their texture.
Your buttercream should be stiff enough to hold a peak but smooth enough to spread without tearing the cake’s base coat.

Ingredients
- 2 cups American Buttercream (stiff consistency)
- 1 tsp Gel Food Coloring (Violet, Yellow, Sage Green)
- 1 tsp Heavy Cream (optional, for adjusting texture)
Instructions
- Divide the buttercream into three small bowls. Tint each bowl with your chosen wildflower colors using the gel coloring.
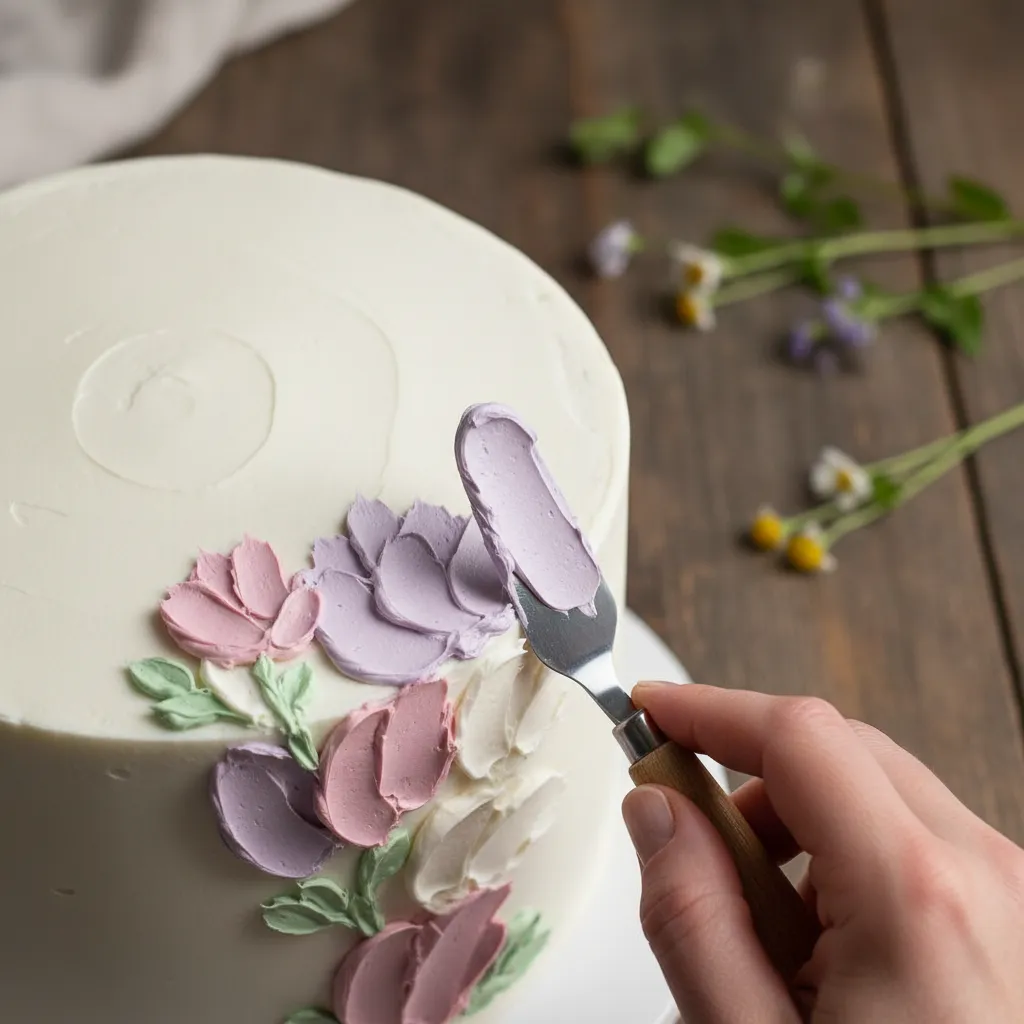
- Scoop a small amount of frosting onto the back of a small offset palette knife. You only need a dime-sized amount.
- Press the knife gently against the chilled cake surface. Apply more pressure at the start and release as you pull away.
- Repeat this motion in a circular pattern to form a flower head. Use five distinct strokes for a simple blossom.
- Wipe your knife clean between colors. Dip the tip into the yellow frosting and dab the center of your flowers.
- chill the cake for 20 minutes to set the design before serving or adding more layers.
For best results when painting with buttercream, chill your cake until the base coat is firm to the touch. This prevents your colors from blending into the background.
The Wilton School of Cake Decorating, Buttercream Painting Guide
Palette Knife Pro Hacks
- Wipe your palette knife after every single stroke to ensure your wildflower colors stay vibrant and do not blend into a muddy mess.
- If your frosting starts to feel too soft, pop your palette knife in chilled water for a moment to help maintain those sharp, petal-like edges.
- Practice your ‘flick’ motion on parchment paper first to get a feel for the pressure before applying it to your final cake surface.
Tools of the Trade
Success often depends on having the right equipment handy. You do not need an expensive kit, but a few key items are essential.
Using the correct knife size allows for better control. Smaller knives create dainty petals, while larger ones make bold statements.
- Small Tapered Palette Knife: Essential for creating narrow, realistic petals.
- Offset Spatula: Use this for smoothing the base coat before you begin painting.
- Paper Towels: Keep these nearby to wipe your tools constantly for clean colors.
- Turntable: Rotating the cake makes it easier to reach all angles without touching the wet frosting.
Artisan Insights
- Dip your palette knife in warm water and wipe it dry before smoothing edges; the residual heat creates a perfectly professional finish.
- If your frosting becomes too soft, place your tools in the freezer for two minutes to help maintain the structure of delicate petals.
- Use a damp cloth instead of paper towels for a more sustainable way to keep your palette knives spotless between color changes.
Troubleshooting Your Textures
Sometimes the frosting does not behave as expected. Simple adjustments to temperature or pressure can fix most issues immediately.
If you are planning a gathering, these floral designs pair wonderfully with our Fresh Spring Party Food Ideas.
| Problem | Likely Cause | Quick Fix |
|---|---|---|
| Petals Sliding | Kitchen is too warm | Refrigerate bag/bowl for 10 mins |
| Jagged Edges | Frosting is too dry/stiff | Mix in 1/2 tsp of milk |
| Colors Muddying | Dirty palette knife | Wipe blade after every stroke |
| Base Tearing | Base coat is too soft | Freeze cake for 15 minutes |
Artist Secrets
- Always test your consistency on a piece of parchment paper before touching the cake; if the edges look frayed, add a tiny drop of milk to achieve a silkier texture.
- Keep your palette knife spotless by wiping the blade with a warm, damp cloth after every single stroke to ensure your colors stay vibrant and clean.
- If your hands run warm, chill your metal tools in the freezer for five minutes to help the frosting hold its shape the moment it leaves the blade.
The Boho Sprinkle: Using Dried Petal Confetti for a Quick Floral Finish
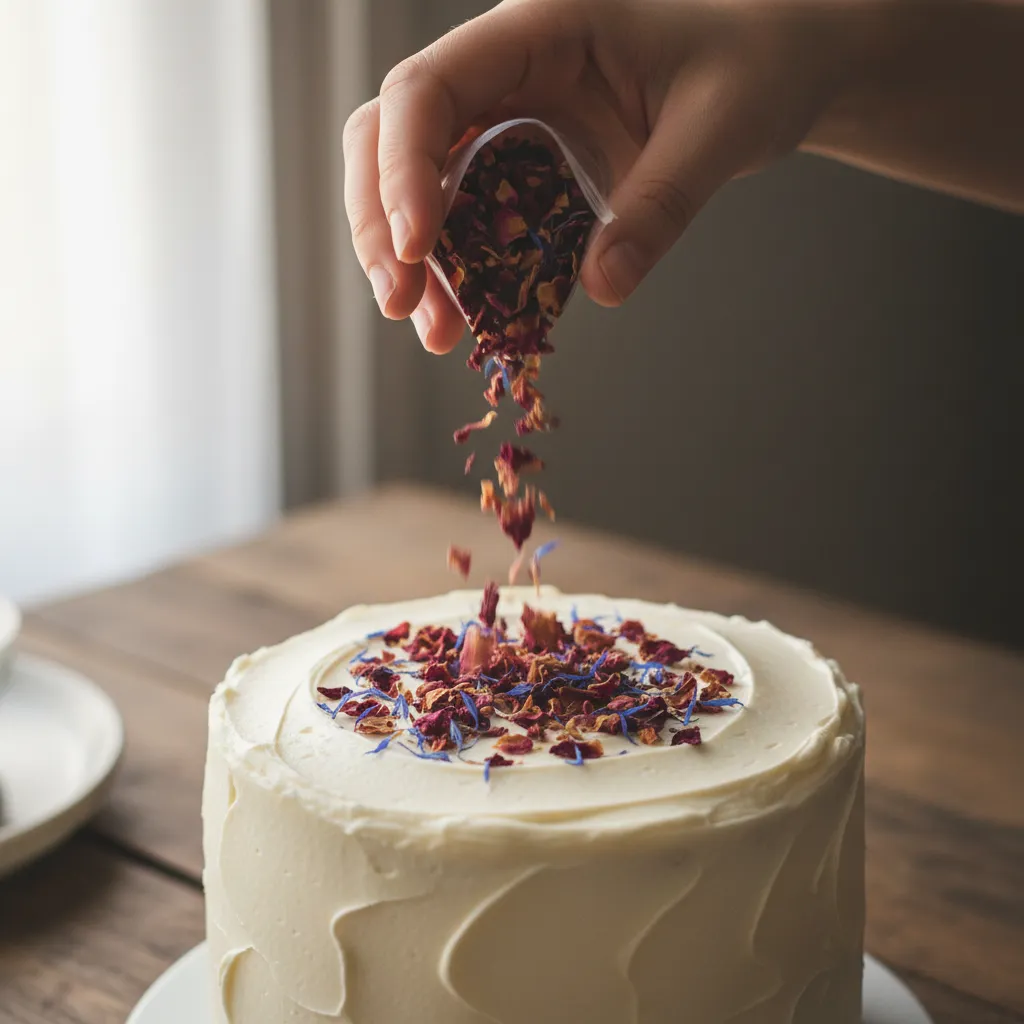
The “Boho Sprinkle” technique transforms a plain cake into a work of art. It mimics the joy of tossing confetti but uses nature’s candy.
This method is perfect for adding texture and a pop of color. It works wonderfully on a classic red velvet cake or a simple vanilla base.
Nature’s confetti turns a simple homemade cake into a whimsical wildflower masterpiece.
Dried petals offer a distinct advantage over fresh blooms. They are shelf-stable and provide a concentrated burst of vintage color.
You can prepare your petal mix weeks in advance. This makes the final decoration step stress-free and incredibly fast.
Wildflower Wisdom
- To ensure your cake looks professionally styled, mix various petal sizes and contrasting colors. A blend of small lavender buds and larger rose petals adds visual depth and a more authentic boho feel.
- For the best results, apply your petal confetti while the frosting is still slightly tacky. This ensures the petals adhere securely without needing extra edible glue or pressure.
- Store your dried petal mix in an airtight, dark container away from direct sunlight to prevent the colors from fading before your big event.
Choosing Your Petal Palette
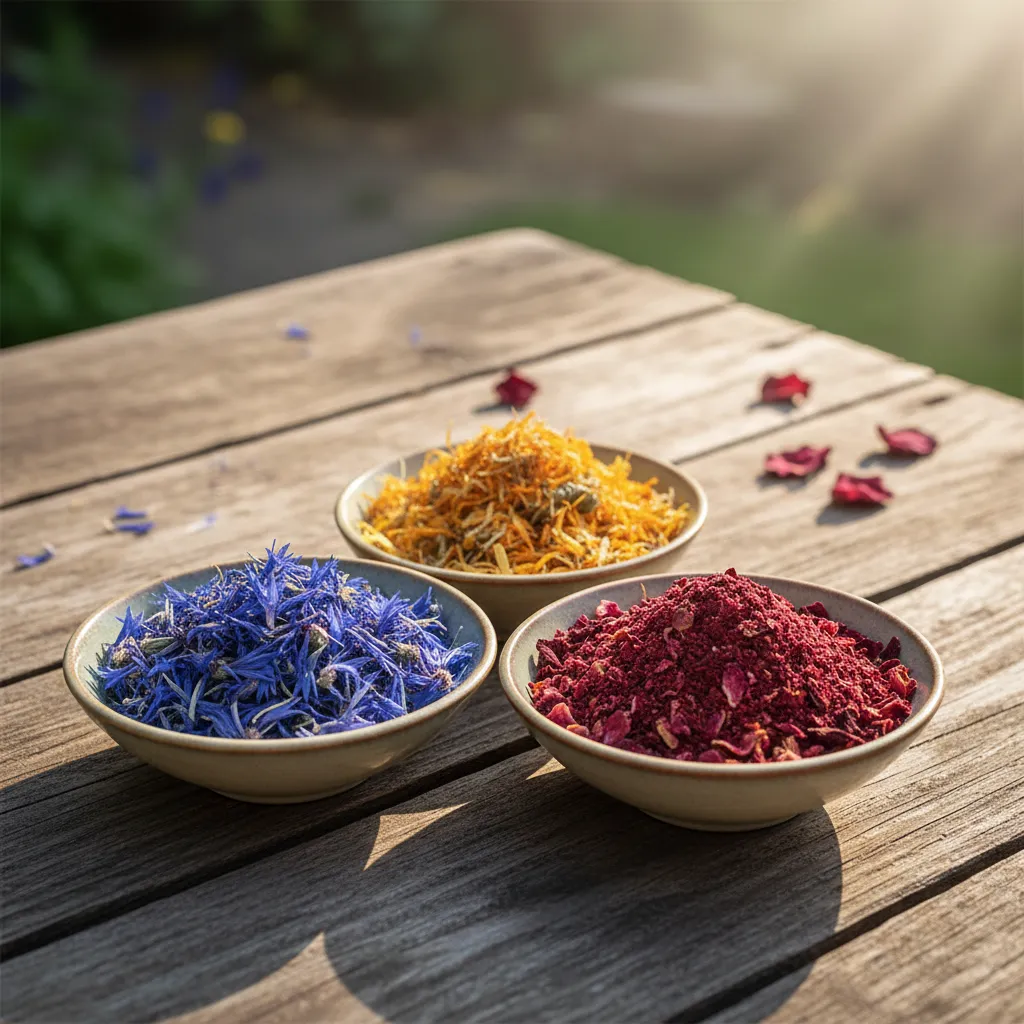
Not all dried flowers are created equal for this technique. You want petals that hold their color well after drying.
- Cornflower: Retains vibrant blues and pinks. Ideally suited for a cool-toned aesthetic.
- Calendula: Offers striking oranges and yellows. These petals add a sunny, golden warmth.
- Rose: Provides classic romance. Dark red roses dry to a deep burgundy, while pinks fade to a soft blush.
- Hibiscus: Delivers a deep, tart red. Use these sparingly as the flavor is quite tangy.
If you enjoy floral flavors in your morning routine, like in a moist coffee cake, you will love this finish.
Only the petals of these flowers are edible. Remove the pistils and stamens before eating.
Colorado State University Extension, Edible Flowers
Master the Bloom
- For a multi-dimensional look, mix delicate cornflower threads with broader calendula petals to create contrasting textures on your cakes and pastries.
- To keep your petals crisp and vibrant, sprinkle them onto your frosting just before serving, as residual moisture can eventually cause the delicate colors to bleed.
- Enhance the flavor profile by pairing scents; try rose petals on rich chocolate desserts and hibiscus on citrus-based treats for a perfectly balanced taste experience.
DIY Dried Petal Confetti
Creating your own blend allows for custom color schemes. Ensure your cake is frosted and the buttercream is still slightly tacky.
Ingredients
- 1 cup Dried mixed edible flower petals (Rose, Calendula, Cornflower)
- 1 Frosted cake (chilled for 10 minutes)
Instructions
- Gently crush the larger dried petals between your fingers. You want a mix of small flakes and larger distinct petals.
- Hold your hand about six inches above the cake. Sprinkle the petals freely over the top and down the sides.
- Press the petals very gently into the frosting with a clean spoon or spatula to secure them.
This simple application creates a cascade effect. It looks professionally styled but takes only moments to achieve.
Stylist’s Secret
- To ensure the colors really pop, try mixing vibrant petals like cornflower blue with subtle tones like white jasmine for a sophisticated, dimensional look.
- If your petals are clinging to your fingers due to static, lightly dust your hands with cornstarch before handling them for a cleaner, more controlled sprinkle.
- Store any leftover confetti in a cool, dark place in an airtight jar to prevent the colors from fading before your next bake.
A Garden of Sweet Endings
Transforming a simple cake into a botanical masterpiece is easier than it looks. With just a few petals, you create something truly magical.
Remember that safety is your most important ingredient. Always verify your blooms are edible and free from harmful chemicals.
Whether you choose peppery nasturtiums or sweet lavender, nature offers a palette of flavors waiting to be explored.
So go ahead and gather your garnish. There is no greater joy than serving a slice of nature’s beauty to the ones you love.
Floral Curiosities & Kitchen Questions
Absolutely not. Commercial bouquets are often treated with heavy pesticides. Only use flowers labeled specifically as “food grade” or organic.
Add your blooms right before serving. This keeps them perky and fresh. If they sit too long on buttercream, they may wilt or seep liquid.
No, flavors vary wildly! Lavender is floral and sweet, while nasturtiums pack a spicy, peppery punch. Always taste a petal before decorating.
Keep them cool and moist. Place them on a damp paper towel inside an airtight container. Store this in the fridge for up to two days.