
Table of Contents
- 1. Cocoa Powder vs. Real Chocolate: The Ultimate Texture Comparison
- 2. The Liquid Foundation: Balancing Whole Milk and Heavy Cream for Richness
- 3. The 10-Minute Master Method: Low Heat Techniques to Prevent Scorching
- 4. Flavor Customization Matrix: Measurements for Peppermint, Mexican Spice, and Caramel
- 5. Rescue Mission: How to Fix Grainy or Separated Hot Chocolate
- Ready for Your Cozy Moment?
- Curiosities from the Cocoa Kitchen
Nothing compares to the comfort of a perfectly balanced cup of cocoa. This recipe moves beyond the instant packets to deliver a rich, velvety texture that coats the palate beautifully.
As a chef, I believe that high-quality ingredients and simple techniques can transform a basic beverage into a true culinary masterpiece.
You do not need specialized equipment to achieve professional results in your own kitchen. By whisking pure cocoa powder and creamy whole milk over a gentle flame, you create a decadent base that is far superior to anything found in a store.
This method ensures every sip is smooth, consistent, and deeply satisfying for both children and adults alike.
While this treat feels indulgent, we maintain a mindful approach by controlling the sweetness and using wholesome components. Sharing a warm mug with loved ones is a timeless tradition that nourishes the soul as much as the body.
I invite you to master this essential technique and bring a touch of luxury to your daily routine.
1. Cocoa Powder vs. Real Chocolate: The Ultimate Texture Comparison
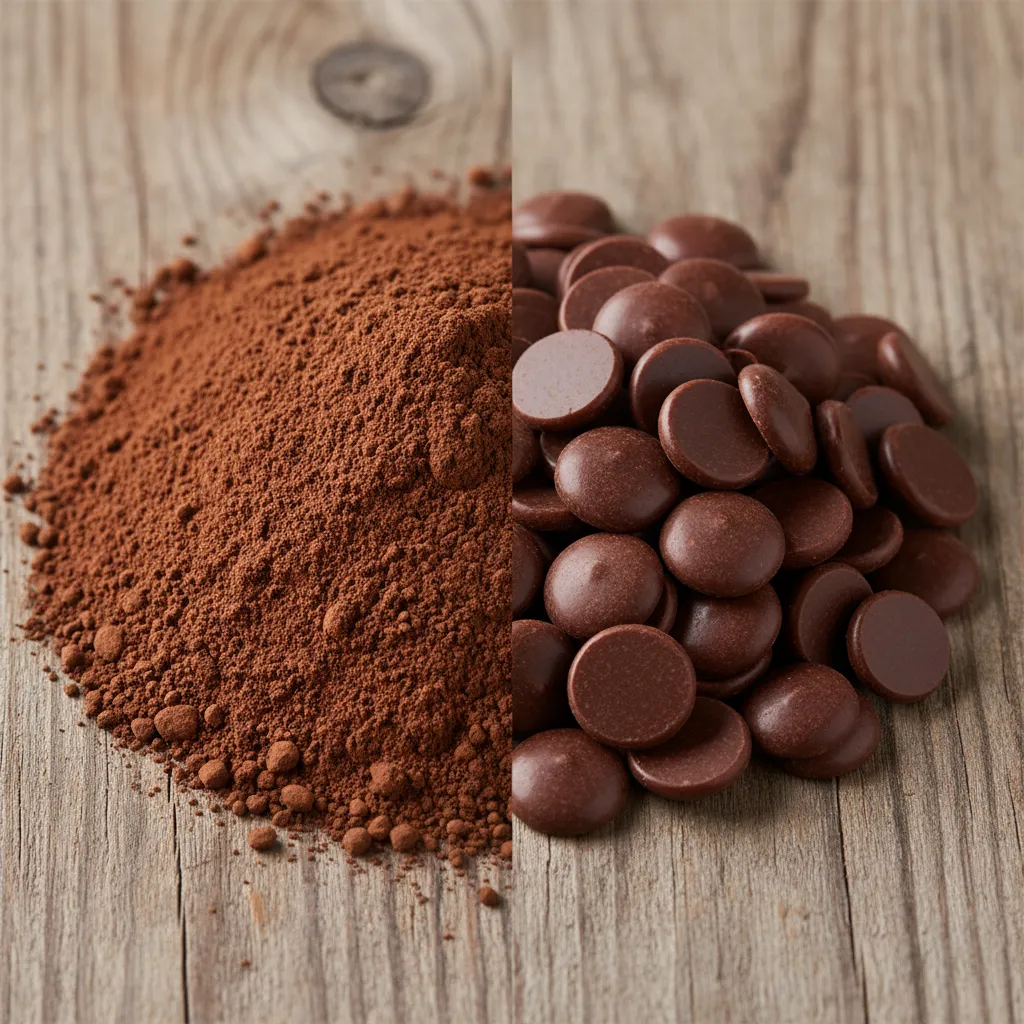
Many home cooks reach for the tin of cocoa powder when the craving strikes. It creates a nostalgic cup, but it often lacks the body of cafe drinks.
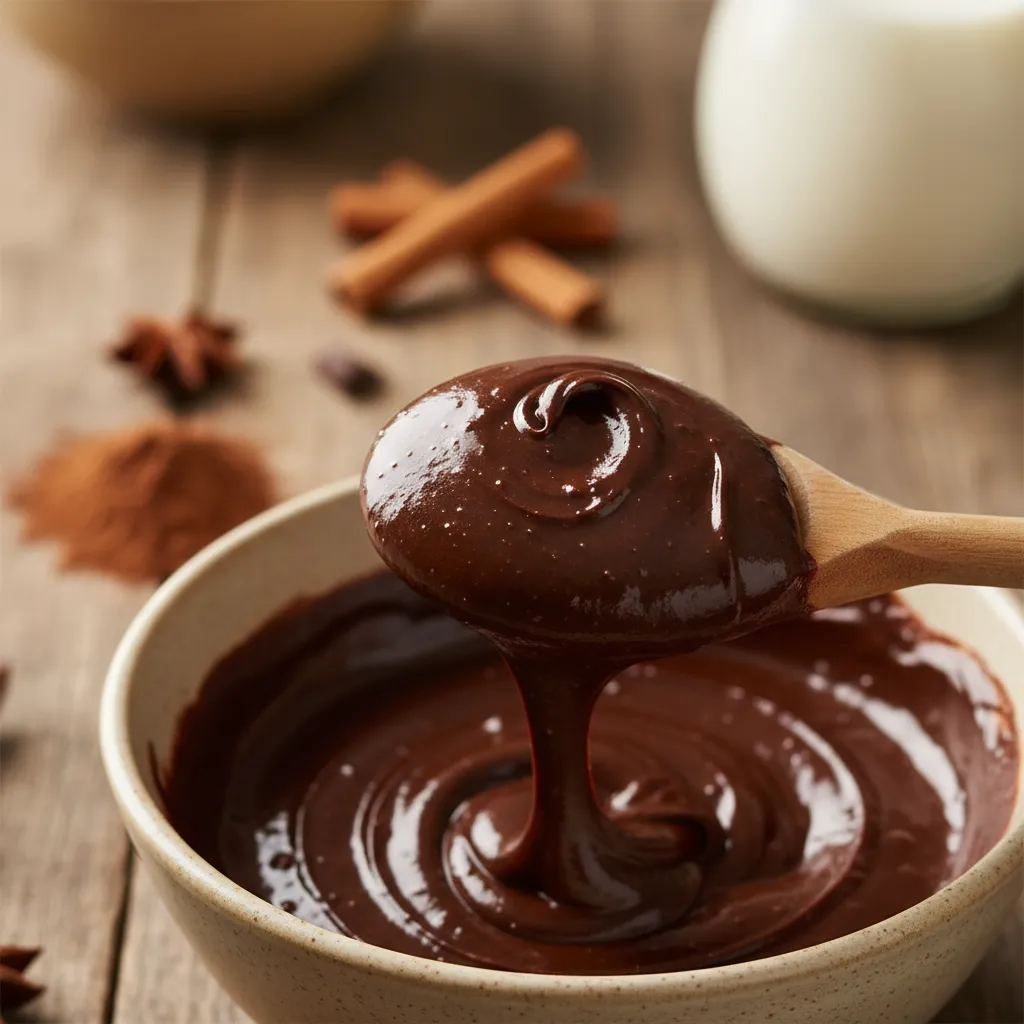
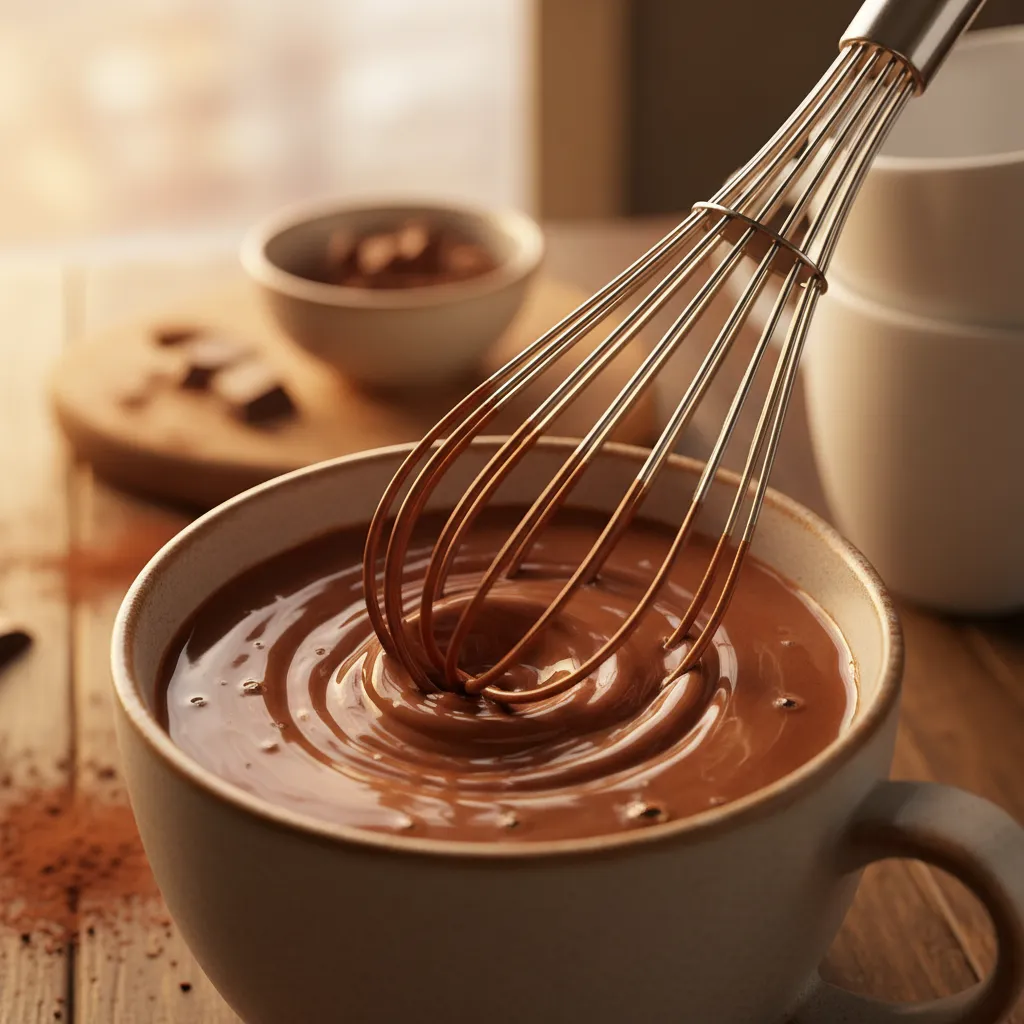
To achieve that luxurious viscosity, you must understand the role of cocoa butter. This fat is the secret to a velvety mouthfeel.
Cocoa powder is essentially chocolate with the fat removed. It delivers an intense, complex flavor profile that hits the palate immediately.
However, without the fat, the liquid remains thin. This is similar to the difference between a light sponge and a moist quality baking cocoa cake.
Real chocolate bars or high-quality chips contain cocoa butter. When melted, this fat emulsifies with the milk to create a thicker suspension.
The secret to the perfect cup is balancing the intensity of cocoa with the velvet embrace of real chocolate.
The Texture Breakdown
Understanding the physical differences helps you customize your cup. Here is how they stack up against each other in your mug.
| Feature | Cocoa Powder | Real Chocolate (60%+) |
|---|---|---|
| Flavor Profile | Intense, sharp, direct | Mellow, rounded, sweet |
| Texture | Thin, light ❌ | Thick, velvety ✅ |
| Fat Content | Low (10-24%) | High (Cocoa Butter) |
| Solubility | Needs whisking to dissolve | Must be melted gently |
For the ultimate experience, I recommend a hybrid approach. Using only chocolate can sometimes be too heavy or cloyingly sweet.
Using only powder yields a drink that feels like flavored water. By combining them, you get the deep punch of powder and the richness of the bar.
I find a mixture of cocoa powder and chocolate gives the best results; the cocoa powder adds a strong chocolate back-note and the chocolate adds richness.
David Lebovitz, Parisian Hot Chocolate Recipe
This method allows you to control the thickness without relying heavily on heavy cream. It is a technique often used when adding creamy richness to other beverages.
If you prefer a lighter drink, stick to cocoa powder. If you want a dessert-like experience, prioritize the bar chocolate.
The Chocolatier’s Secret
- The Golden Ratio: For the ultimate balanced cup, try using 1 tablespoon of cocoa powder for the intense flavor punch and 2 squares (approx. 20g) of dark chocolate for that luxurious body.
- Pre-Melt Your Solids: Never toss large chunks of chocolate directly into boiling milk. Chop the bar finely or melt it separately with a splash of warm milk to prevent a grainy texture or scorched bottom.
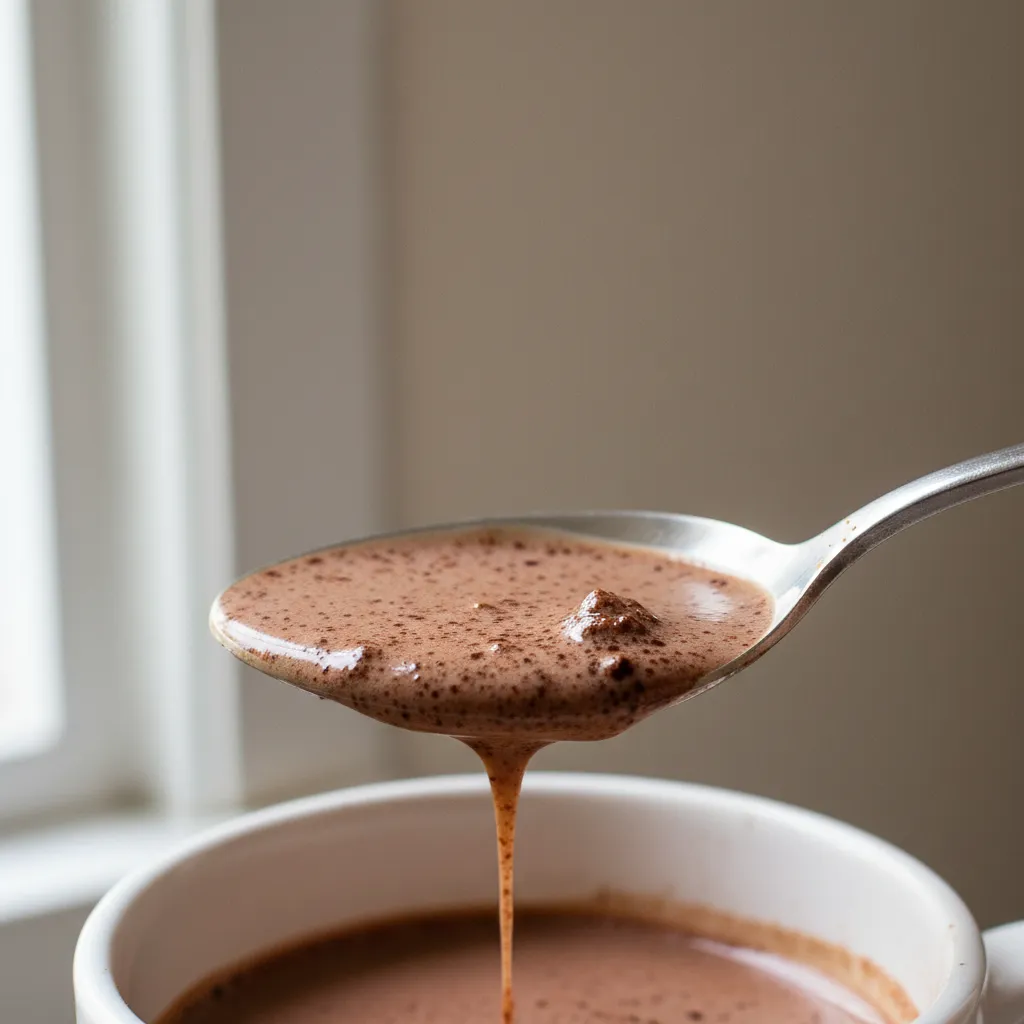
- Bloom for Smoothness: Mix your cocoa powder with a small amount of hot water or milk to create a smooth paste (slurry) before adding the rest of the liquid. This prevents those stubborn dry clumps from floating to the top.
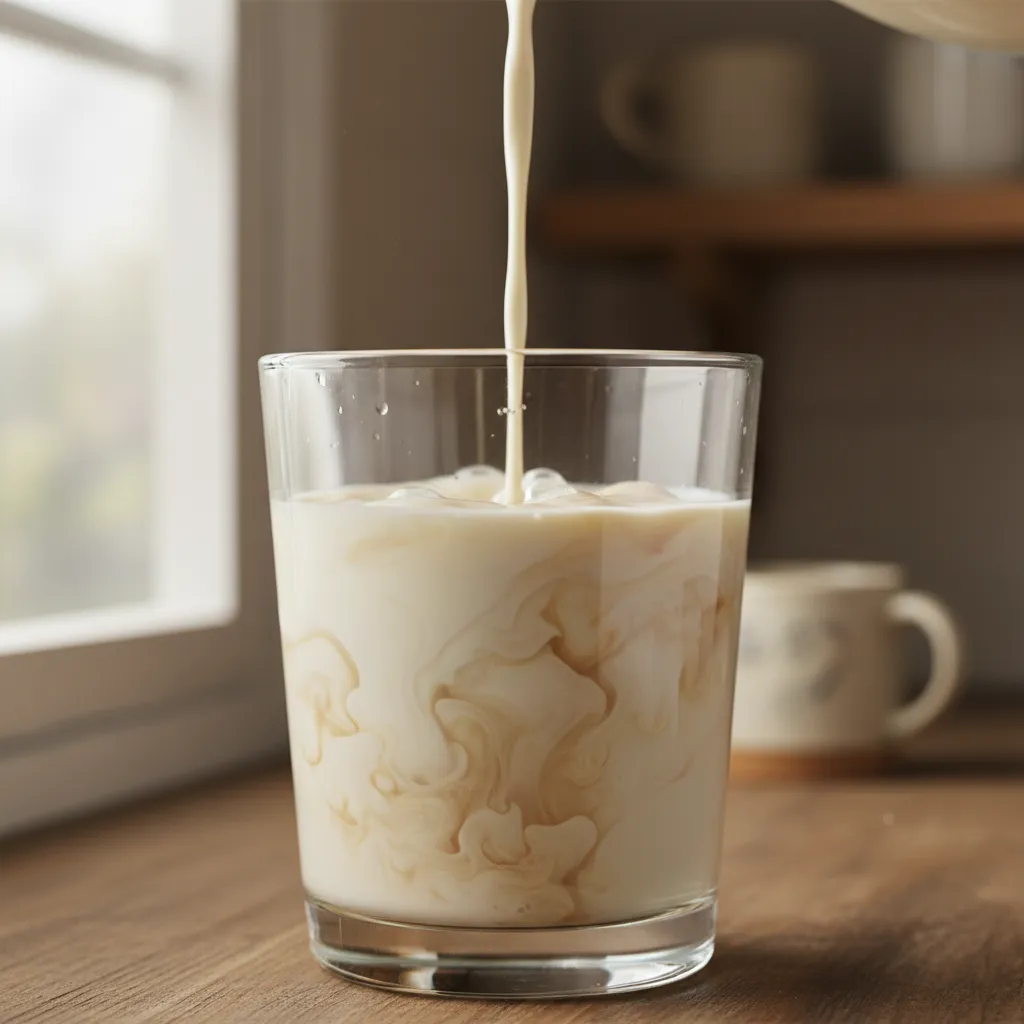
2. The Liquid Foundation: Balancing Whole Milk and Heavy Cream for Richness
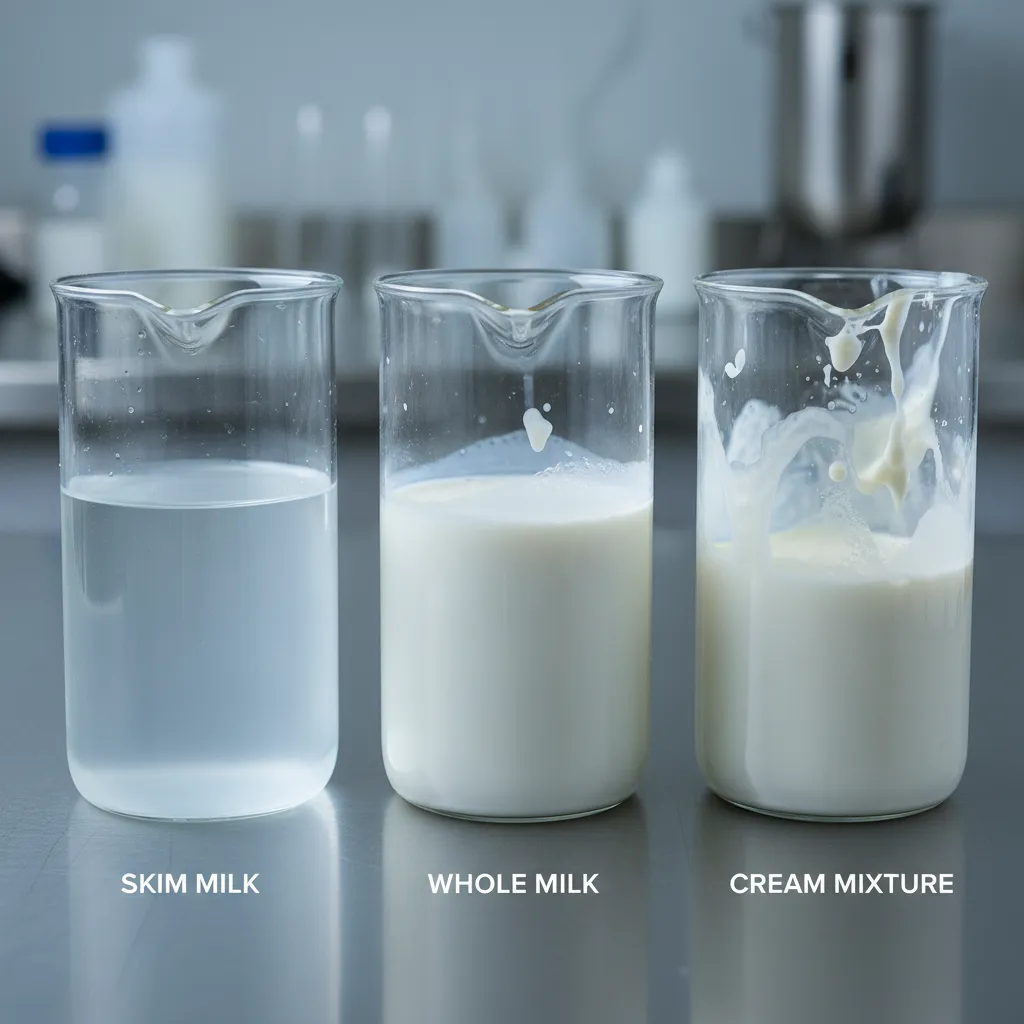
The secret to a luxurious drink lies in the liquid base you choose. Water creates a thin drink that lacks the substance needed to support rich cocoa butter.
To achieve a truly decadent texture, you must embrace dairy fat. Whole milk provides a sturdy canvas, but adding heavy cream elevates the experience.
The difference between good and unforgettable hot chocolate is often just a splash of heavy cream.
Creamy Connoisseur Secrets
- For the ultimate velvety mouthfeel, aim for a 3:1 ratio of whole milk to heavy cream; this ensures richness without making the drink feel overly heavy.
- Always heat your liquid base over low to medium heat while whisking constantly to prevent the dairy proteins from scorching or forming a skin on top.
- Try tempering your chocolate by slowly whisking small amounts of the hot milk-cream mixture into your cocoa solids first to ensure a perfectly smooth, lump-free emulsion.
Why Fat Content Matters for Flavor
Fat does more than add calories; it acts as a flavor carrier. It coats your palate, allowing the complex notes of cocoa to linger longer on the tongue.
Using low-fat options often results in a watery beverage. The lack of fat causes the chocolate solids to separate quickly, ruining the smooth suspension.
If you enjoy experimenting with dairy textures, you might like our homemade coffee creamer recipes. They explore similar principles of balancing creaminess.
For the richest, creamiest hot chocolate, you want to use milk with a higher fat content… The fat in the milk helps to emulsify the chocolate.
The Culinary Institute of America, How to Make Hot Chocolate
Finding the Golden Ratio

A drink made entirely of heavy cream is often too thick to enjoy. It can feel like drinking ganache rather than a comforting beverage.
Conversely, using only milk might not provide that coffee-shop style density. The ideal balance sits somewhere in the middle.
For most home cooks, a 3:1 ratio works perfectly. This means using three parts whole milk to one part heavy cream.
- Texture: Thick enough to coat a spoon but drinkable.
- Flavor: The cream buffers the bitterness of dark chocolate.
- Appearance: Creates a glossy, opaque finish that looks professional.
This technique is similar to preparing bases for homemade iced chai tea lattes, where body is essential.
| Liquid Base | Texture Profile | Best For |
|---|---|---|
| Water | Thin, distinct | Pure dark chocolate tasting |
| Whole Milk | Creamy, standard | Everyday drinking |
| Milk & Cream (3:1) | Velvety, lush | Dessert-style treats |
| Half-and-Half | Rich, heavy | Sipping small portions |
Always heat your dairy mixture gently. Boiling milk too rapidly can scorch the sugars and separate the whey proteins, leading to a gritty texture.
The Barista’s Secret
- Master the Golden Ratio of three parts whole milk to one part heavy cream for a texture that is perfectly velvety without being overly heavy.
- Always heat your liquid slowly over low heat; boiling or scorching the milk can break the emulsion and leave you with a grainy mouthfeel.
- If opting for plant-based milks, choose full-fat coconut or barista-blend oat milk to ensure enough fat content to carry the rich cocoa notes.
3. The 10-Minute Master Method: Low Heat Techniques to Prevent Scorching
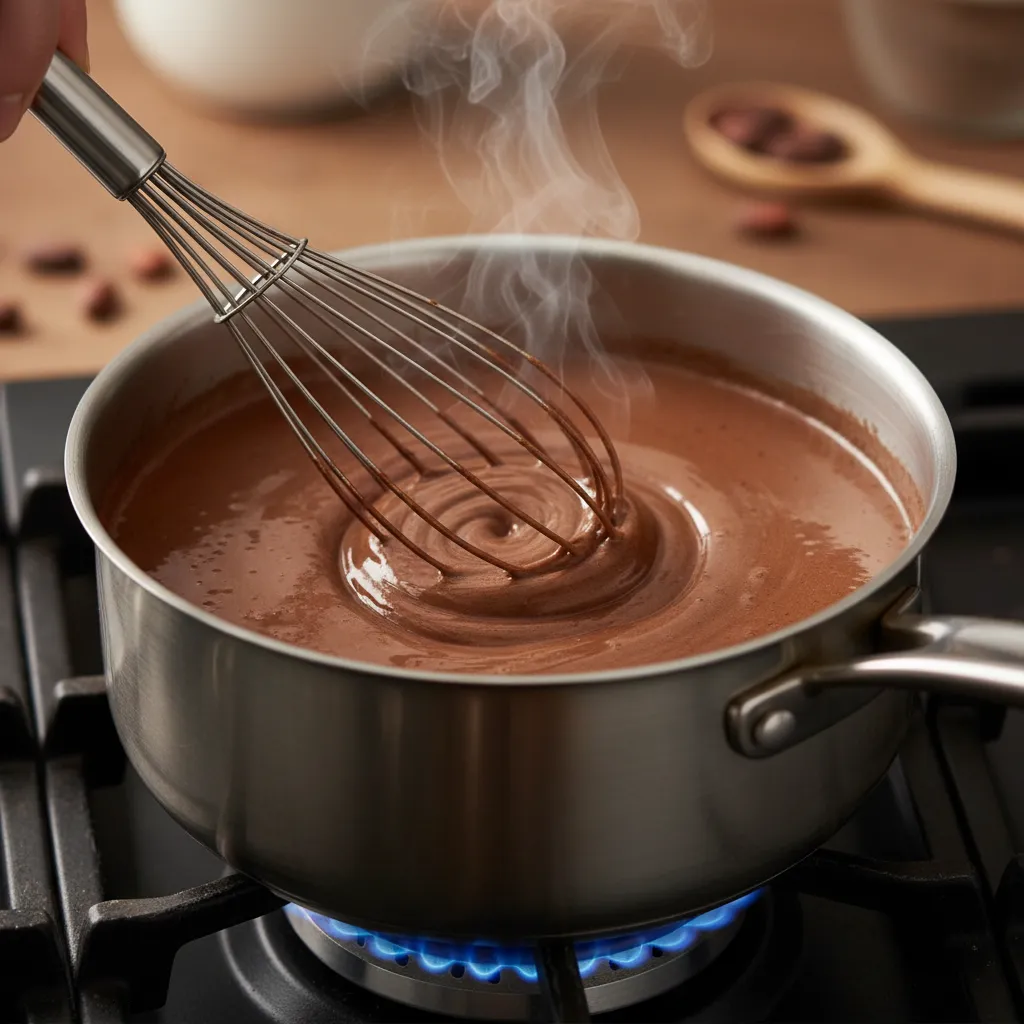
The secret to a velvety texture lies in patience and temperature control. High heat shocks dairy proteins which causes separation.
This creates a grainy mouthfeel that no amount of whisking can fix. We treat the milk like a delicate custard base.
Using a low-and-slow approach preserves the sweetness of the lactose. It also prevents that dreaded burnt film from forming on the bottom.
If you usually prefer chilled drinks like our 16 easy homemade cold coffee recipes, you will find this heating method requires a different pace.
Ingredients
- 2 cups Whole milk (or oat milk for dairy-free)
- 2 tbsp Unsweetened cocoa powder
- 2 tbsp Granulated sugar (adjust to taste)
- 1 pinch Sea salt
- 1/4 tsp Vanilla extract
Instructions
- Create the base: In a small saucepan, whisk together the cocoa powder, sugar, and salt until no lumps remain.
- Make a slurry: Add just 2 tablespoons of milk to the dry mix. Whisk vigorously to form a smooth, dark chocolate paste.
- Incorporate milk: Slowly pour in the remaining milk while whisking constantly to fully dissolve the paste.
- Heat gently: Place the pan over medium-low heat. Stir frequently for 8-10 minutes until steam rises, but do not boil.
- Finish: Remove from heat and stir in the vanilla extract. Serve immediately.
Don’t let it boil. If you boil milk, it will change the texture and flavor, and it can curdle.
Kelli Foster, The Kitchn
Great hot chocolate isn’t just a drink; it’s a warm hug in a mug waiting to happen.
Troubleshooting Common Texture Issues
Even with a simple recipe, texture issues can arise. Understanding the chemistry helps you fix mistakes instantly.
This savory beverage pairs beautifully with sweet treats. Try serving it alongside our easy homemade gingerbread cookies recipe for a festive touch.
| Problem | Likely Cause | Quick Fix |
|---|---|---|
| Grainy Texture | Milk curdled from high heat | Strain through fine mesh |
| Powder Lumps | Added cocoa to hot liquid | Use an immersion blender |
| Scorched Taste | Stagnant milk on burner | Do not scrape bottom; pour out |
| Too Watery | Low fat content in milk | Add a splash of heavy cream |
The Simmer Secret
- Swap your standard pot for a heavy-bottomed saucepan to ensure even heat distribution and eliminate the hot spots that cause scorching.
- Always use a silicone spatula to scrape the very bottom and corners of the pan frequently, as milk proteins tend to settle and burn in those hard-to-reach areas.
- If you see a skin or film forming on top, do not stir it back in; gently lift it off with a spoon to keep the final texture silky smooth.
4. Flavor Customization Matrix: Measurements for Peppermint, Mexican Spice, and Caramel

Transforming a simple mug of cocoa into a gourmet experience requires the right ratios. Too much extract can taste medicinal, while too little spice gets lost.
You can easily recreate coffee shop favorites by adjusting a few key measurements. Precision is the secret to balancing sweet and savory notes.
Use this reference matrix to customize a standard 12-ounce mug of hot chocolate. These ratios ensure the flavor shines without overpowering the rich cocoa base.
| Flavor Profile | Key Add-In | Quantity per Mug | Best Garnish |
|---|---|---|---|
| Peppermint | Peppermint Extract | 1/4 teaspoon | Crushed Candy Canes |
| Mexican Spice | Cinnamon & Cayenne | 1/2 tsp & pinch | Cinnamon Stick |
| Salted Caramel | Caramel Sauce | 1 tablespoon | Sea Salt Flakes |
Classic Peppermint Twist
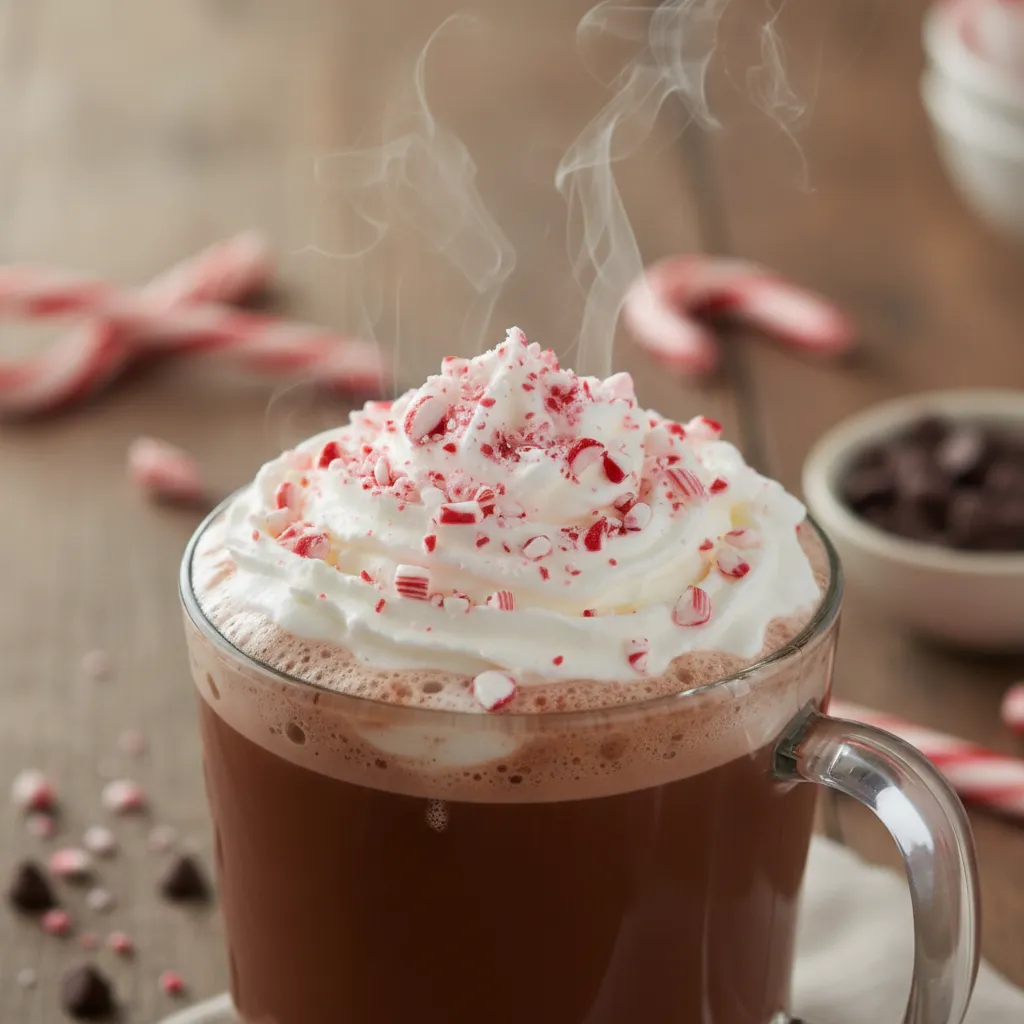
This variation brings a cool, refreshing contrast to the warmth of the chocolate. It is the perfect match for gingerbread cookies during the holidays.
Using high-quality peppermint extract instead of syrup provides a cleaner flavor profile. It cuts through the richness of the milk without adding excess sugar.
Ingredients
- 1 cup prepared hot chocolate base (hot)
- 1/4 tsp pure peppermint extract
- 2 tbsp whipped cream
- 1 tbsp crushed candy canes
Instructions
- Stir the peppermint extract directly into the hot chocolate base until fully blended.
- Top immediately with a generous dollop of whipped cream.
- Sprinkle the crushed candy canes over the cream before serving.
Mexican Spiced Cocoa
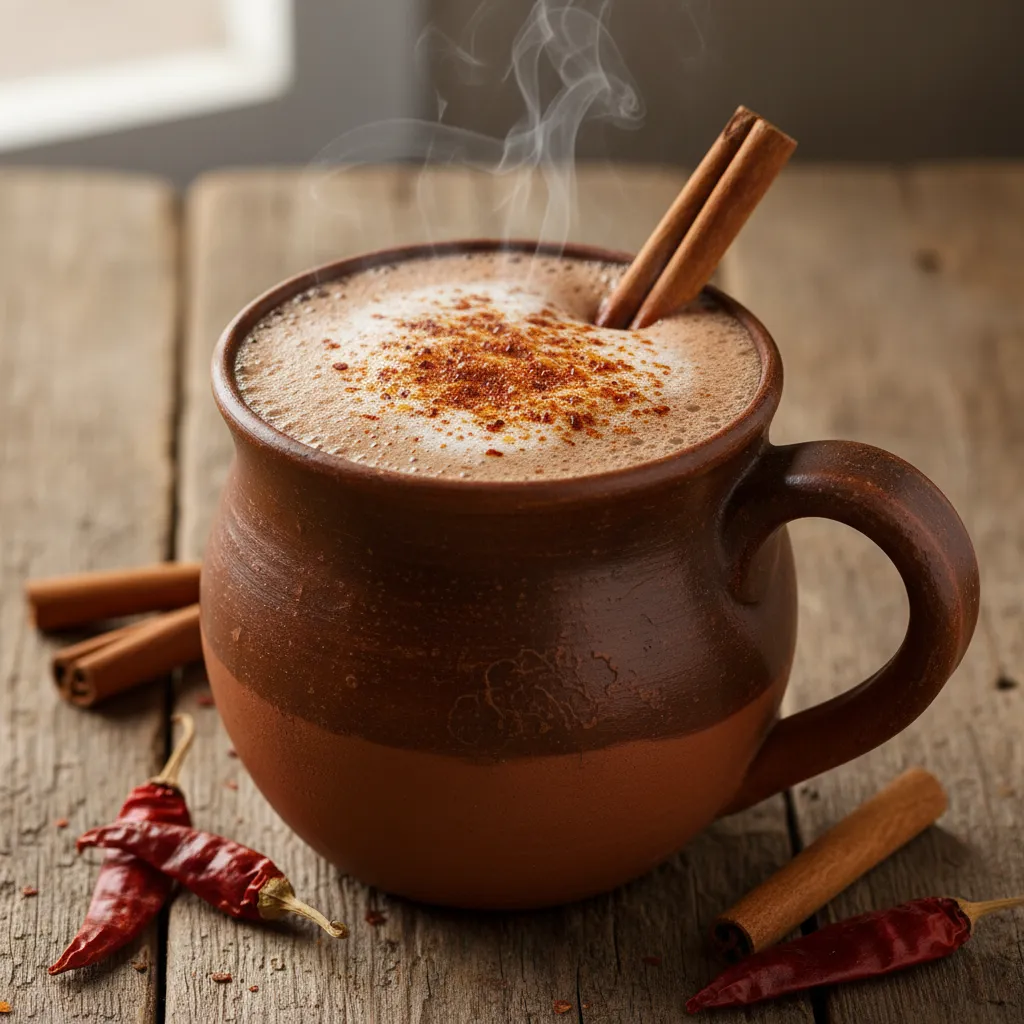
This version introduces a warming heat that lingers on the palate. The combination of cinnamon and a hint of chili enhances the natural fruitiness of the cocoa.
Don’t be afraid of the salt. Salt makes sugar taste sweeter and chocolate taste more chocolatey.
Senior Food Editor, Bon Appétit
Ingredients
- 1 cup milk (for the base)
- 2 tbsp cocoa powder
- 2 tbsp sugar
- 1/2 tsp ground cinnamon
- 1 small pinch cayenne pepper
- 1 cinnamon stick for garnish
Instructions
- Whisk the cocoa, sugar, cinnamon, and cayenne together in a small bowl to remove lumps.
- Heat the milk in a saucepan over medium heat until it begins to steam.
- Whisk the dry spice mixture into the milk and simmer for 2 minutes to bloom the spices.
- Pour into a mug and serve with a cinnamon stick.
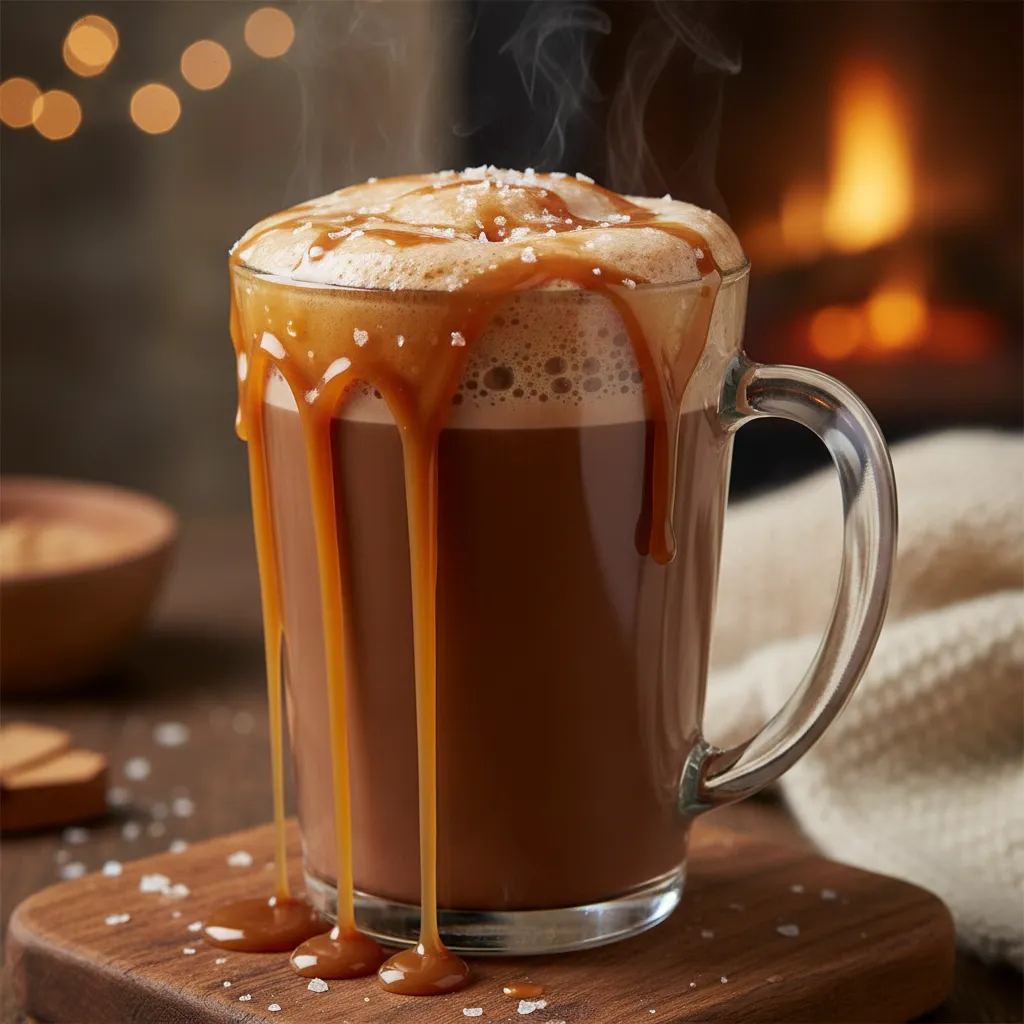
Salted Caramel Indulgence
Salted caramel adds a buttery depth that pairs beautifully with dark chocolate. The salt is crucial here, as it prevents the drink from becoming cloyingly sweet.
Ingredients
- 1 cup prepared hot chocolate base
- 1 tbsp salted caramel sauce
- 1/2 tsp flaky sea salt
- Extra caramel for drizzling
Instructions
- Pour the hot chocolate into your favorite mug, leaving an inch of space at the top.
- Stir in the tablespoon of salted caramel sauce until completely dissolved.
- Drizzle additional caramel over the top or on the foam.
- Finish with a pinch of flaky sea salt to highlight the flavors.
Hot chocolate is more than a drink; it is a warm hug for your soul on a cold day.
The Flavor Lab
- To get the most out of your Mexican Spice blend, whisk your cinnamon and cayenne into the dry cocoa powder first to bloom the spices and ensure a smooth, intense flavor profile.
- Always add peppermint extract after removing the cocoa from the heat; extreme temperatures can cause the delicate flavor compounds to evaporate, leaving your drink less aromatic.
- For a professional finish on your Salted Caramel Indulgence, swirl the caramel sauce against the inner walls of the mug before pouring to create a gourmet marbled effect.
5. Rescue Mission: How to Fix Grainy or Separated Hot Chocolate
Even the best home cooks encounter hiccups in the kitchen. You stir your pot expecting liquid velvet, but you find grit instead.
Do not pour your hard work down the sink just yet. Most texture issues are reversible with a few simple culinary tricks.
We will tackle the two most common disasters: grainy sludge and oily separation. Both are easy to fix if you act fast.
Solving the Grainy Texture
Graininess usually happens because the cocoa powder or sugar did not dissolve completely. This occurs when dry ingredients hit cold liquid.
If your drink feels like sand, do not panic. The solution relies on heat and vigorous motion to dissolve those solids.
The Fix: Pour the mixture back into a saucepan. Heat it gently while whisking constantly until it reaches a simmer.
If whisking fails, pour the hot liquid into a blender. Just like when making a smooth chai latte, blending creates a frothy, uniform texture instantly.
Rescuing Separated or Oily Chocolate
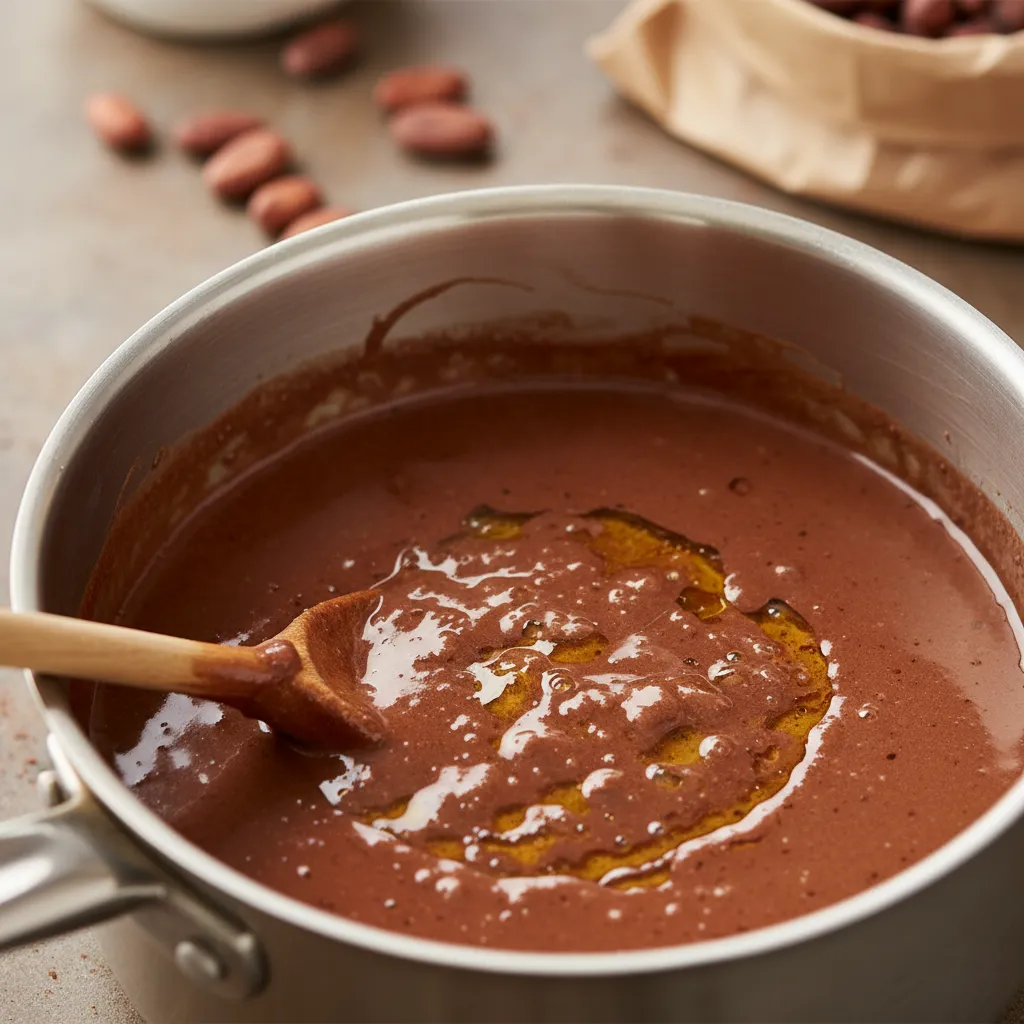
If you see an oil slick on top, your emulsion has broken. This happens when real chocolate gets too hot, causing the cocoa butter to split.
This is common when using high-quality chocolate bars instead of powder. The fats separate from the solids under high heat.
The Fix: Remove the pot from the heat immediately. Let it cool down for about two minutes to settle.
Add a splash of cold heavy cream or milk. Using an immersion blender, blitz the mixture to force the fat and liquid back together.
If your chocolate seizes or separates, don’t throw it out. Whisking in a teaspoon of boiling water (or warm liquid) can help bring the emulsion back together smoothly.
Serious Eats Team, How to Fix Seized Chocolate
Step-by-Step Recovery Checklist
Follow this rapid response guide to save your dessert drink before serving it to guests.
- Assess the heat: If it is boiling, turn the heat off immediately to stop separation.
- Add liquid: For grainy textures, add a tablespoon of hot water. For oily textures, add cold cream.
- Mechanical force: Use an immersion blender or countertop blender for the best results.
- Strain it: As a last resort, pour the drink through a fine-mesh sieve to catch stubborn lumps.
- Taste test: Adjust sweetness if you added extra liquid during the rescue process.
Proper technique usually prevents these issues. Similar to making creamy fudge without graininess, patience with heat is your best friend.
A broken sauce is not a failure; it is just an opportunity to use the blender. Your perfect cup is still possible.
The Texture Rescue Toolkit
- To prevent graininess before it starts, always bloom your cocoa powder by mixing it with a tiny splash of hot liquid to form a smooth paste before adding the rest of your milk.
- If your chocolate separates, use an immersion blender directly in the pot to emulsify the fats and liquids back into a velvety, uniform drink.
- For a truly professional finish, pour your rescued beverage through a fine-mesh sieve to remove any microscopic bits that survived the whisking.
Ready for Your Cozy Moment?
Now that you know the secret, combining intense cocoa powder with rich melted chocolate, you are ready to ditch the packets forever.
Remember to balance your liquid base. Whole milk offers structure, but that splash of heavy cream creates the silky mouthfeel we crave.
Don’t hesitate to customize your cup. Whether you add a pinch of cinnamon or a mountain of marshmallows, make this recipe your own.
Gather your ingredients and warm up the stove. A mug of pure, velvety comfort is just a few whisk strokes away. Enjoy the warmth!
Curiosities from the Cocoa Kitchen
Yes! Swap whole milk for oat or coconut milk. They have higher fat contents than almond milk, ensuring your drink stays thick and creamy.
Graininess happens if the cocoa isn’t whisked well. Create a smooth paste with a splash of hot liquid first to dissolve clumps completely.
You can, but I advise against it. Water makes the drink thin. Milk provides the necessary proteins and fats for that luxurious texture.
Store leftovers in the fridge for up to 3 days. Reheat gently on the stove, whisking constantly to bring the creamy texture back to life.