
Table of Contents
- The Master Ratio Matrix: Scalable Ingredient Measurements for Every Vessel Size
- The Mason Jar Recipe: A Low-Tech Method for Clean Filtered Concentrate
- The French Press Recipe: Simple Immersion Brewing for Richer Body
- The Dilution Equation: Formulas for Mixing Concentrate with Water or Cream
- Flavor Troubleshooting Guide: Science-Based Fixes for Sour or Bitter Batches
- Your Morning Ritual, Elevated
- Curiosities from the Counter
Imagine waking up to a smooth, velvety glass of coffee that has been steeping to perfection while you slept. Cold brew is more than just chilled caffeine.
It is a ritual of patience that rewards you with a low-acid, naturally sweet flavor profile that simply cannot be matched by hot-brewed methods.
In this guide, we will master the art of the perfect steep right in your own kitchen.
Whether you are a busy parent needing a quick morning boost or an aspiring barista looking to refine your technique, these recipes prioritize clarity and incredible taste.
You do not need expensive equipment to produce a professional-grade concentrate that rivals your favorite local cafe.
We will explore the nuances of coarse grinds and filtration to ensure every sip is clean and refreshing.
I am here to walk you through each step, from choosing the right beans to balancing your final pour with creamy additions.
Let us transform your coffee routine into a daily celebration of rich, bold flavors.
The Master Ratio Matrix: Scalable Ingredient Measurements for Every Vessel Size
Mastering cold brew starts with the relationship between coffee and water. This balance determines the strength and texture of your final cup.
Many beginners guess the amounts, resulting in a weak or bitter brew. We use a precise formula to ensure a smooth, chocolatey flavor profile.
The industry standard for a versatile concentrate is a 1:4 ratio by weight. This means one part coffee to four parts water.
Precision is the difference between a morning caffeine fix and a culinary experience.
You can dilute this concentrate later with water, milk, or homemade coffee creamer to suit your taste. It is flexible and forgiving.
Below is a scalable matrix for common household vessels. We calculated these amounts so you do not have to do the math.
| Vessel Size | Coffee (Grams) | Coffee (Cups) | Water (Cups) |
|---|---|---|---|
| Mason Jar (32 oz) | 170g | 2 cups | 4 cups |
| French Press (Standard) | 85g | 1 cup | 3 cups |
| Large Pitcher (64 oz) | 340g | 4 cups | 8 cups |
| Single Serve Cup | 42g | 1/2 cup | 1.5 cups |
We recommend a 1:5 ratio of coffee to water. This will give you a nice, strong concentrate.
Stumptown Coffee Roasters, Cold Brew Guide
Brewing Benchmarks
- Trust the scale, not the cup. Bean density varies by roast, so weighing your ingredients prevents the weak or bitter results caused by inaccurate volume measurements.
- Start strong. It is much easier to dilute a potent concentrate with water or milk later than it is to try and rescue a weak, watery batch.
- Mind the headspace. Coffee grounds expand significantly when wet, so leave at least an inch of space at the top of your jar to prevent overflow.
Measuring for Consistency: Weight vs. Volume
Volume measurements like cups can vary wildly depending on the roast. Dark roasts are less dense than light roasts, occupying more space.
For the most reliable results, we highly recommend using a digital kitchen scale. Weighing your beans guarantees the same flavor every time.
If you lack a scale, do not worry. The volume measurements in the matrix above are good estimates for standard medium-roast beans.
Once you master this base concentrate, you can explore other iced coffee recipes to expand your menu.
Ingredients
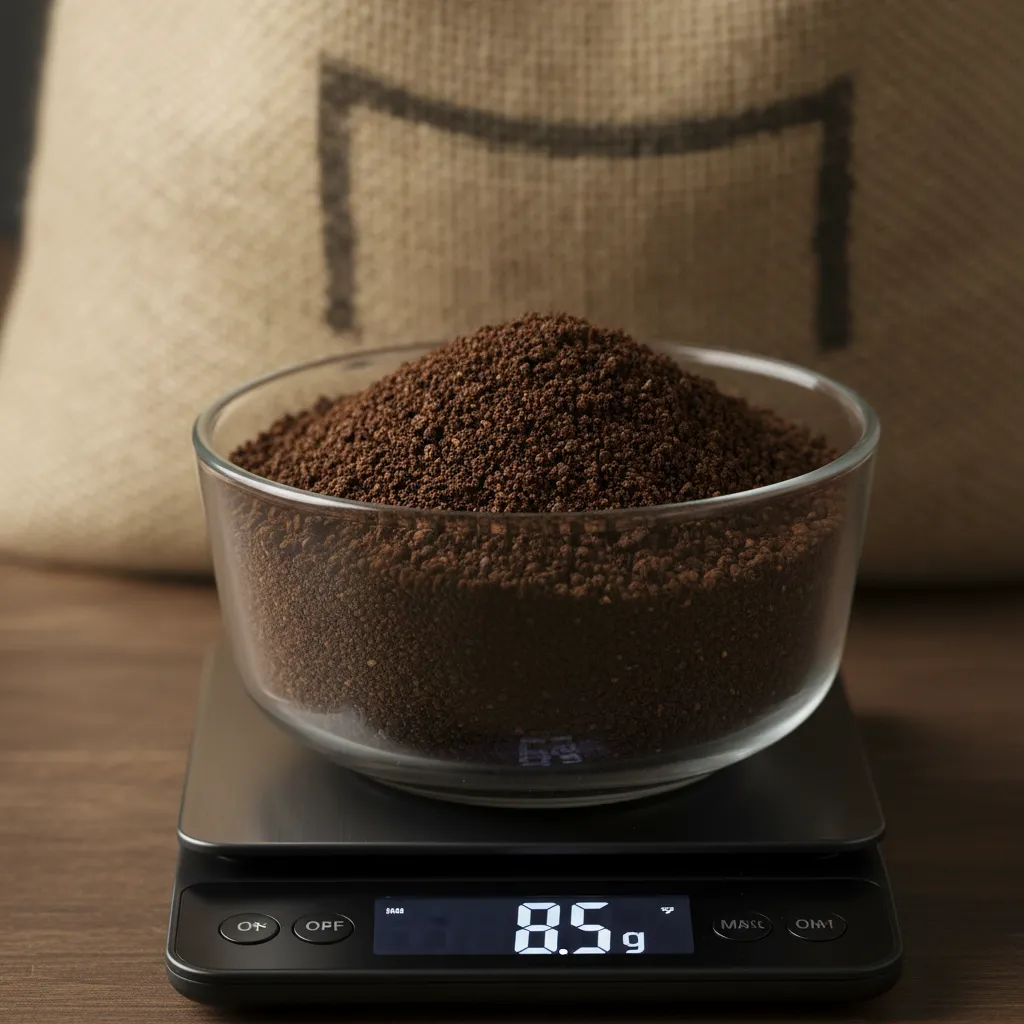
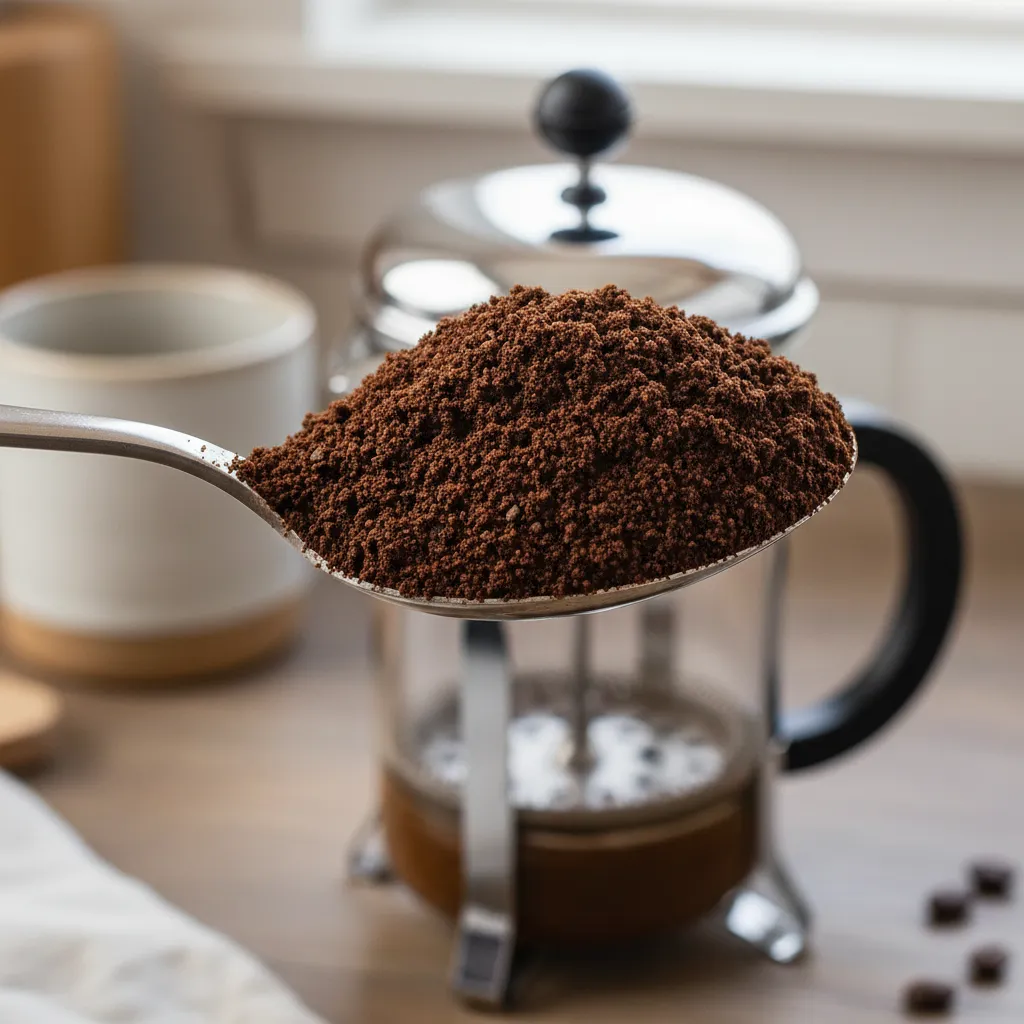
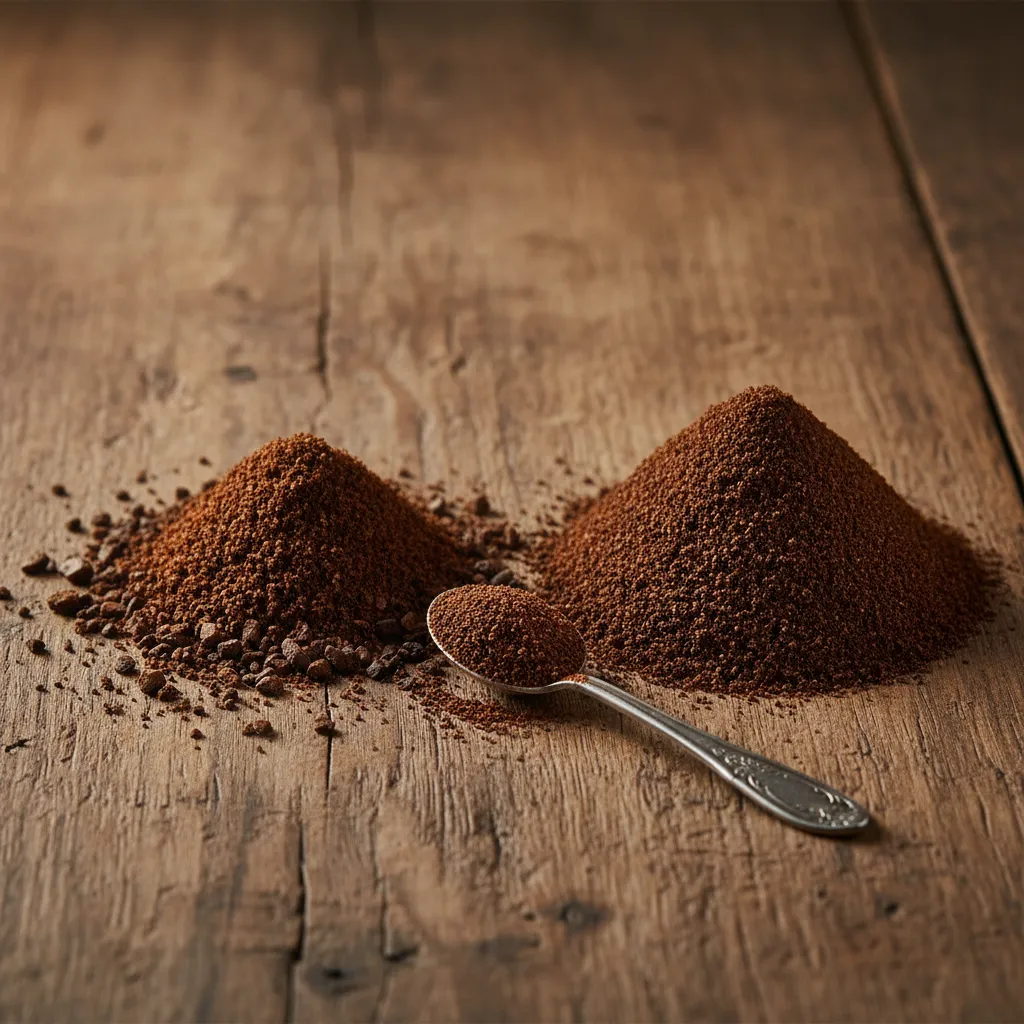
- 170g Coarse Ground Coffee (approx. 2 cups)
- 4 cups Filtered Water (room temperature)
Instructions
1. Place the coarse grounds into your chosen vessel. 2. Pour the water over the grounds, ensuring they are fully saturated. 3. Stir gently to remove dry pockets.
Barista Secrets
- Don’t pack it down: When measuring by volume, simply scoop and level off the grounds. Compacting them adds too much coffee, making your brew bitter.
- Trust the tare: Always place your empty vessel on the scale and hit the ‘tare’ or ‘zero’ button before adding beans to ensure accurate measurement.
- Water weight hack: Remember that 1 ml of water equals exactly 1 gram. This makes calculating ratios simple if you decide to weigh your water for perfect precision.
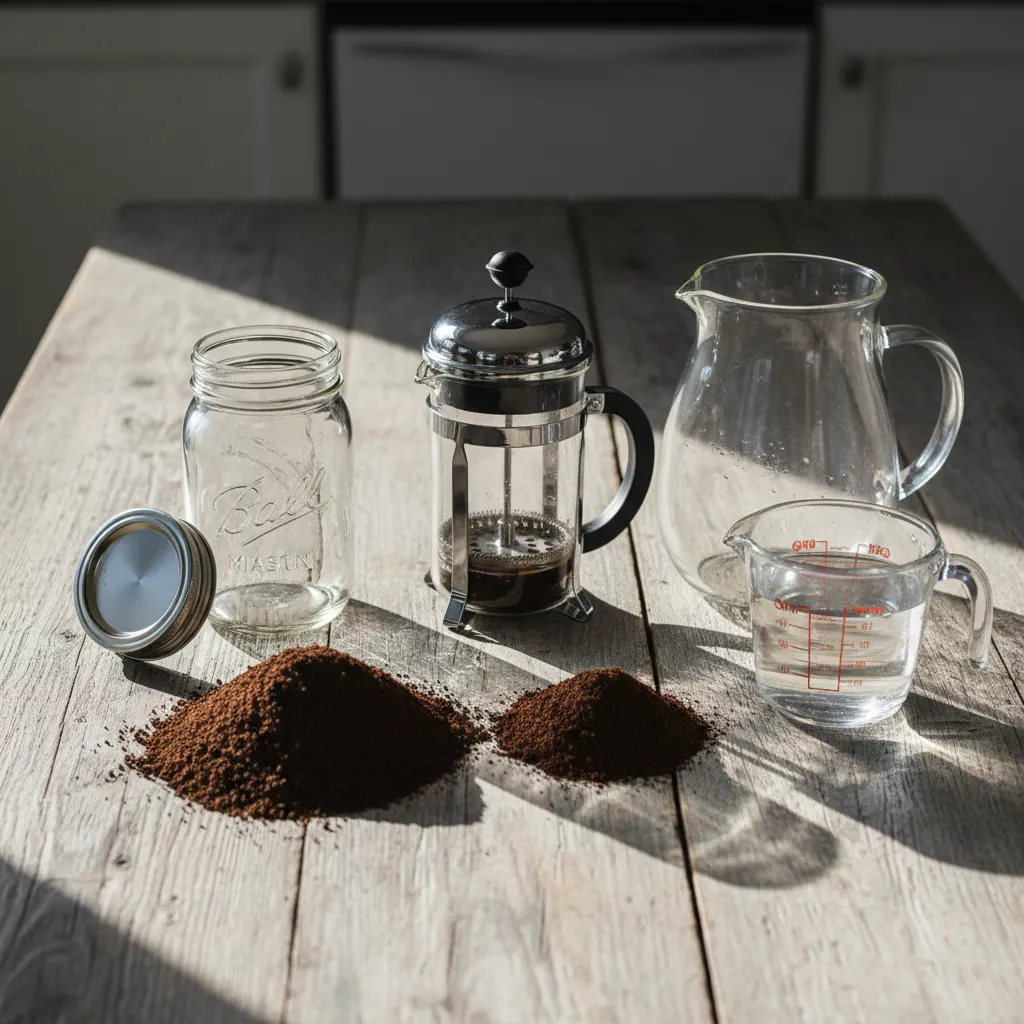
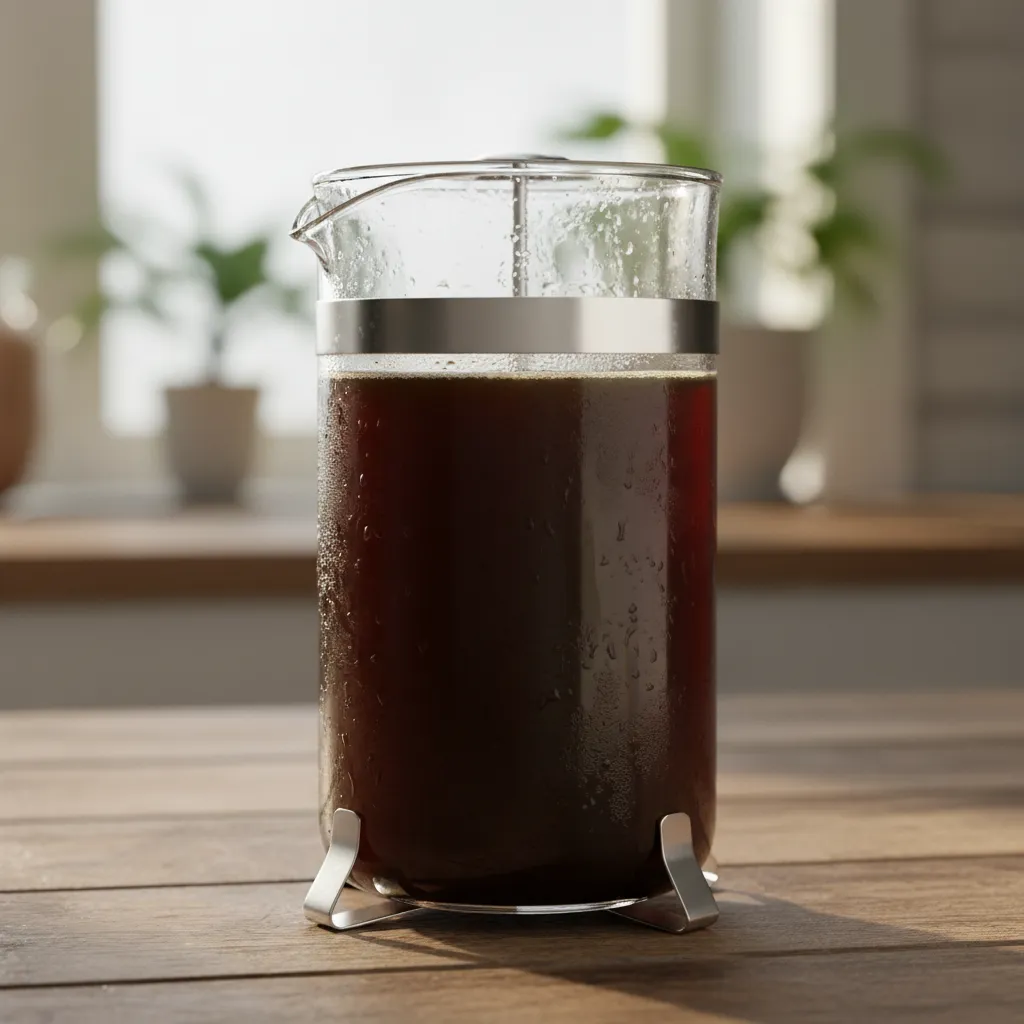
The Mason Jar Recipe: A Low-Tech Method for Clean Filtered Concentrate
The mason jar method is the gateway to artisanal home brewing. It requires zero electricity and uses tools you likely already own.
This technique relies on total immersion. The water surrounds the grounds completely, extracting deep chocolate notes and rich flavors.
You do not need a fancy French press or a dedicated tower. A simple wide-mouth jar and a piece of cheesecloth are your best friends here.
The result is a robust concentrate. It is versatile enough to be diluted for a smooth morning cup or used as a base for baking.
Great coffee isn’t about the machine. It is about the bean, the grind, and the patience.
Ingredients
- 1 cup whole coffee beans (coarsely ground)
- 4 cups cold filtered water
Instructions
- Grind the beans: Pulse your beans until they resemble coarse sea salt. A consistent coarse grind prevents muddy sediment in your cup.
- Combine: Pour the grounds into a clean, wide-mouth mason jar. Add the cold water directly over the coffee.
- Stir gently: Use a wooden spoon to stir the mixture. Ensure all grounds are fully saturated and no dry pockets remain.
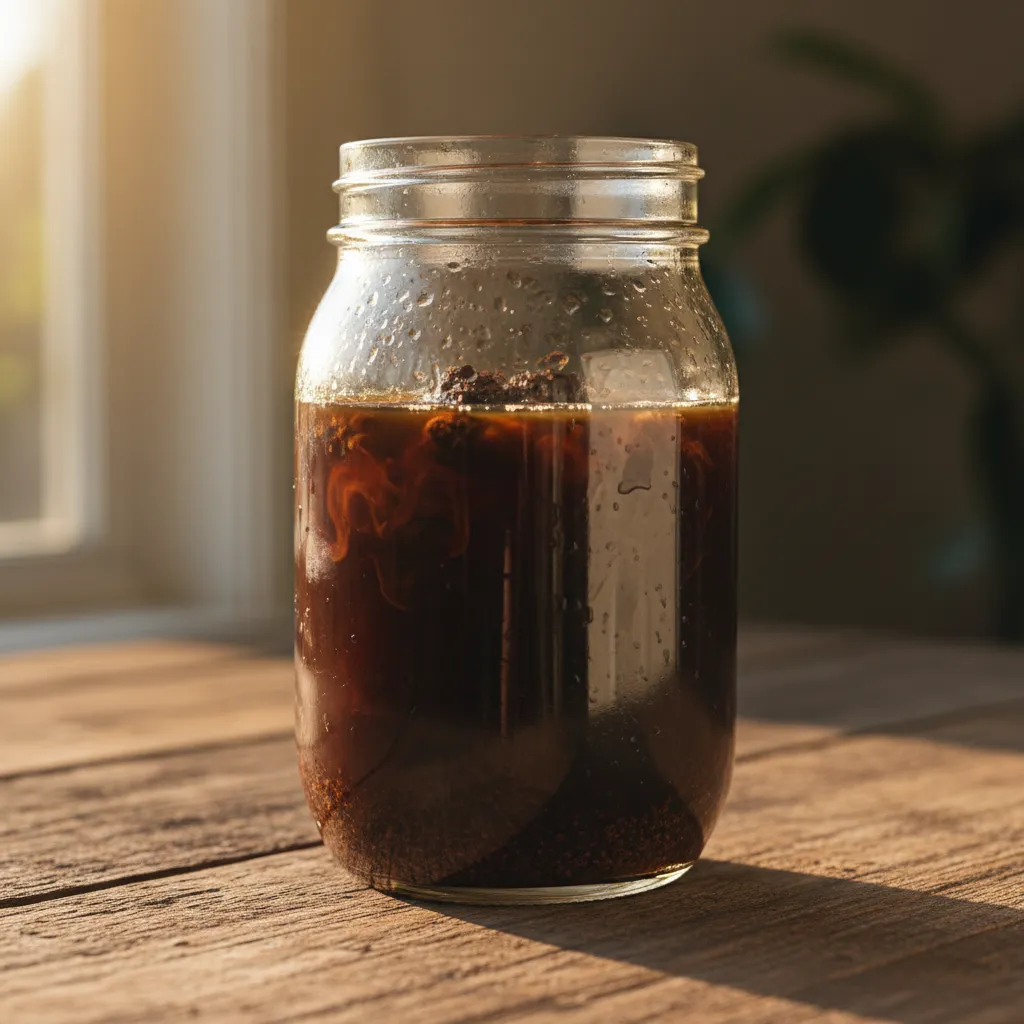
- Steep: Cover the jar with a lid. Let it sit at room temperature for 12 to 18 hours. Do not exceed 24 hours to avoid bitterness.
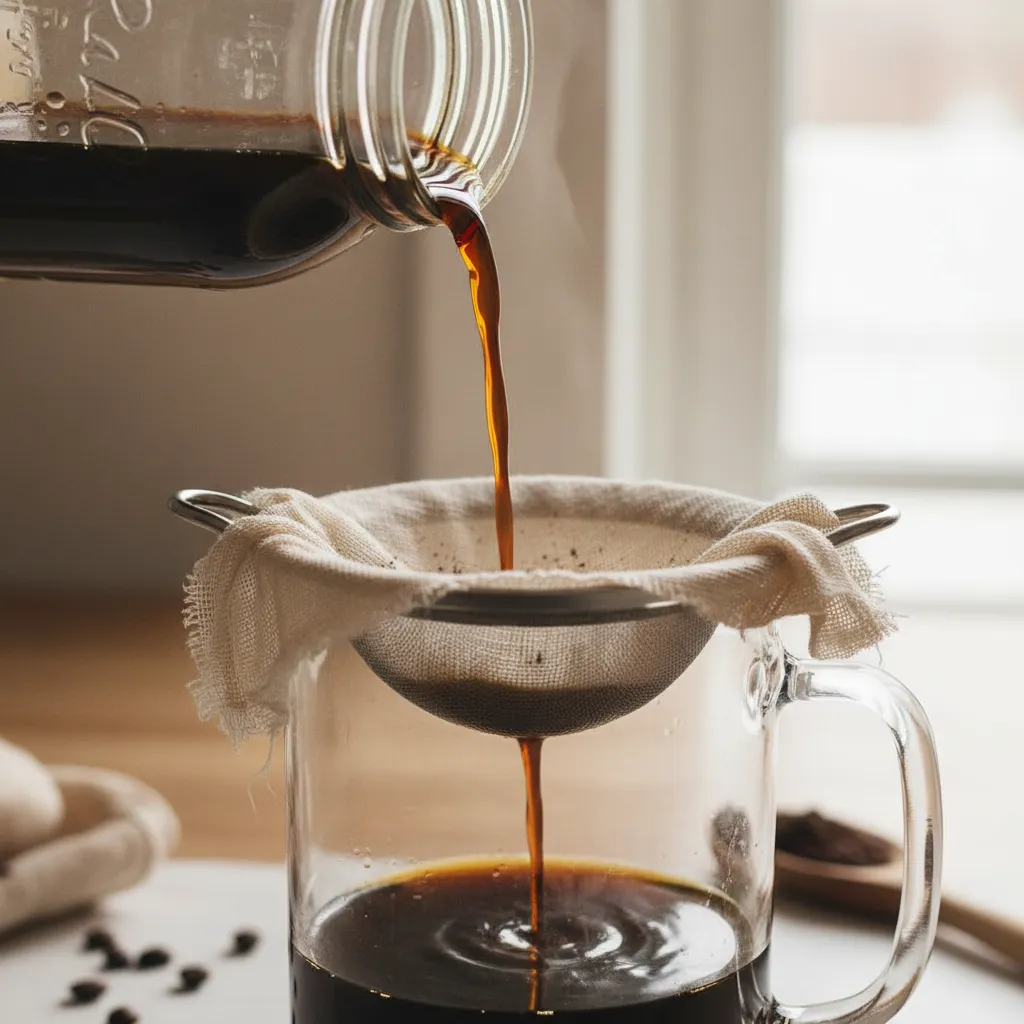
- Strain: Place a fine-mesh sieve lined with cheesecloth over a pitcher. Pour the coffee through slowly to separate the grounds.
- Store: Discard the grounds. Transfer the clean concentrate to a sealed bottle and refrigerate for up to two weeks.
This concentrate is potent. We recommend diluting it with equal parts water or milk to suit your specific palate intensity.
If you enjoy experimenting with flavors, try adding a splash of vanilla or pairing it with one of our healthy homemade coffee creamer recipes.
Because the water and coffee sit together for quite a while, you need a coarse grind. If the grind is too fine, the coffee will taste bitter.
Blue Bottle Coffee Team, Cold Brew Guide
Mastering the steeping time is crucial for flavor. The duration changes the chemical profile of the final cup significantly.
Shorter steeps yield a sweeter, lighter body. Longer steeps extract more heavy, earthy notes that some drinkers find overwhelming.
Use the chart below to determine your perfect flavor profile based on time. Adjust your next batch according to these results.
| Steep Time | Flavor Profile | Acidity Level |
|---|---|---|
| 12 Hours | Sweet, floral, light body | Medium-Low |
| 16 Hours | Balanced, chocolatey, rich | Low |
| 20 Hours | Intense, heavy, earthy | Very Low |
| 24+ Hours | Bitter, woody, astringent | Flat |
Once you have mastered the basics, you can explore other variations. For more inspiration, check out our list of easy homemade cold coffee recipes.
Barista Secrets
- Freeze any leftover concentrate into coffee ice cubes. This ensures your iced coffee remains robust and flavorful without getting watered down as the ice melts.
- Always rinse your cheesecloth or paper filter with water before straining. This prevents the dry material from absorbing your precious coffee oils and removes any papery taste.
- If you don’t own a burr grinder, use the bulk grinder at your local grocery store on the coarsest setting (usually French Press) to achieve the perfect sea-salt texture.
The French Press Recipe: Simple Immersion Brewing for Richer Body
The French press is a staple in many kitchens for hot coffee, but it is also the easiest vessel for making cold brew. This method relies on full immersion.
Because the grounds sit directly in the water for hours, the resulting concentrate is incredibly robust. It captures deep chocolate notes and heavy body.
Unlike paper filters which trap oils, the metal mesh of a French press allows aromatic oils to pass through. This creates a savory, velvety mouthfeel.
This technique is perfect for those who enjoy a stronger coffee presence. It serves as an excellent base for Dutch Bros style iced coffee drinks.
Time replaces heat in cold brewing, transforming simple beans into a smooth, low-acid elixir worth waiting for.
Ingredients
- 1 cup Whole coffee beans (roasted explicitly for filter coffee)
- 4 cups Cold or room temperature filtered water
Instructions
- Grind the beans: Grind your coffee beans to a coarse consistency, resembling kosher salt. This prevents sludge in your final cup.
- Combine: Add the coarse grounds to the bottom of your French press beaker. Pour the water over the grounds in a circular motion.
- Stir gently: Use a wooden spoon to stir the mixture. Ensure all grounds are saturated with water to encourage even extraction.
- Cover and wait: Place the lid on the press but do not plunge yet. Leave the plunger up. Let it sit at room temperature for 12 to 18 hours.
- Plunge and pour: Slowly press the plunger down. Pour the coffee immediately into a separate pitcher to stop the brewing process.
If you find the texture too gritty, you can pour the finished brew through a fine-mesh sieve or a cheesecloth. This removes the finest sediment.
Particle size is key. If your grind is too fine, you’ll get a muddy cup. For cold brew, we recommend a coarse grind, similar to sea salt.
Counter Culture Coffee, Cold Brew Guide
Once you have mastered the basic extraction, you can experiment with the ratio. A 1:4 ratio creates a strong concentrate ideal for dilution with milk.
If you prefer drinking it black, try a 1:8 ratio of coffee to water. This yields a ready-to-drink beverage that does not require extra water.
Proper storage is vital for maintaining flavor. Keep your concentrate in an airtight jar in the fridge. It will stay fresh for up to two weeks.
Many home cooks pair this bold concentrate with sweet treats. It balances perfectly with homemade cinnamon rolls for breakfast.
Troubleshooting Your Brew
Even with a simple device, small variables change the flavor profile. Here is a checklist to refine your technique:
- Bitter Taste: You likely steeped it too long. Reduce the brew time by 2 hours next time.
- Weak Flavor: The grind may be too coarse, or you used too much water. Try a finer grind or less water.
- Cloudy Appearance: You likely plunged too fast. Press the plunger down slowly and steadily.
- Sour Notes: This indicates under-extraction. Extend your steeping time by 2 hours.
Press Pro-Tips
- If you love the body but hate the sludge, try the Double-Strain Method. Pour your plunged concentrate through a rinsed paper filter to catch the finest sediment while retaining that chocolatey depth.
- Always decant immediately after plunging. Even with the plunger down, the water remains in contact with the grounds, which will quickly turn your smooth brew bitter if left inside the press.
- Freeze leftover concentrate into coffee ice cubes. Using these instead of regular ice prevents your morning glass from becoming watery as it melts.
The Dilution Equation: Formulas for Mixing Concentrate with Water or Cream
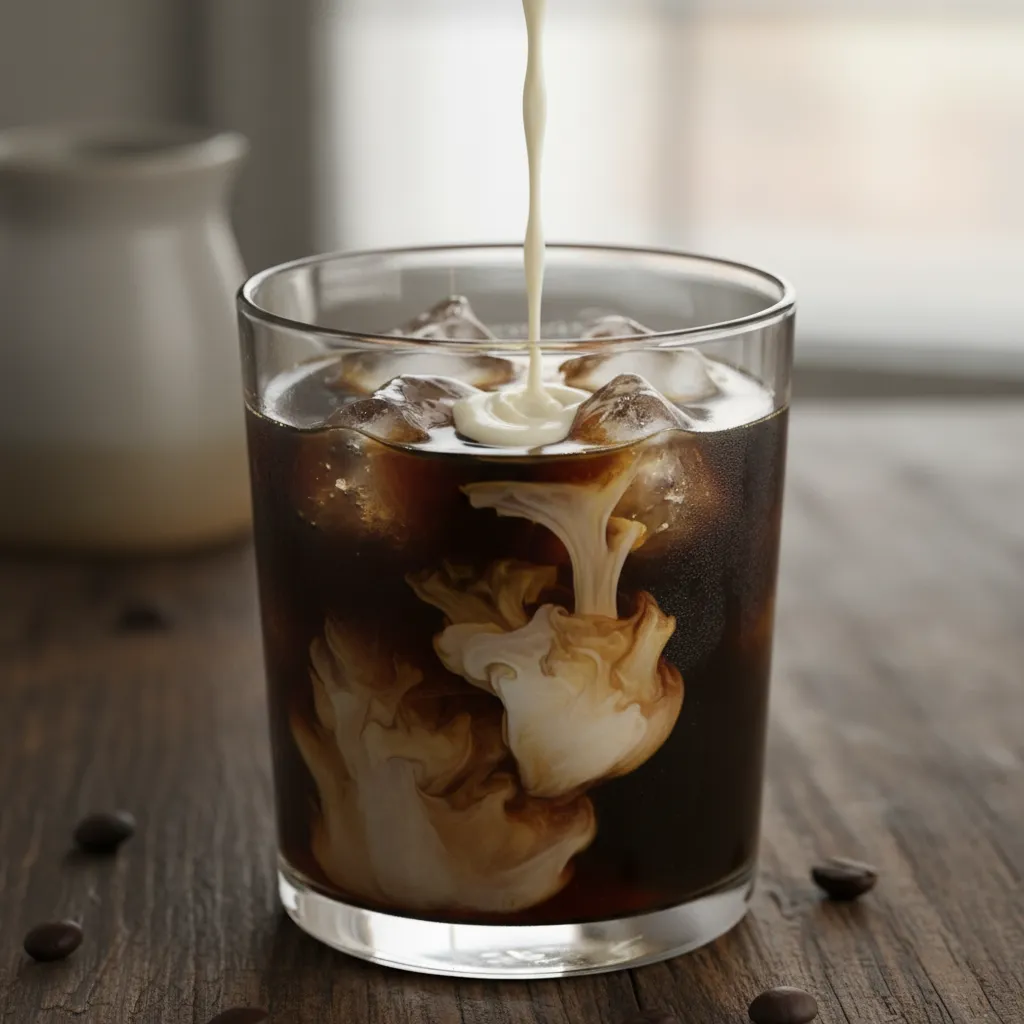
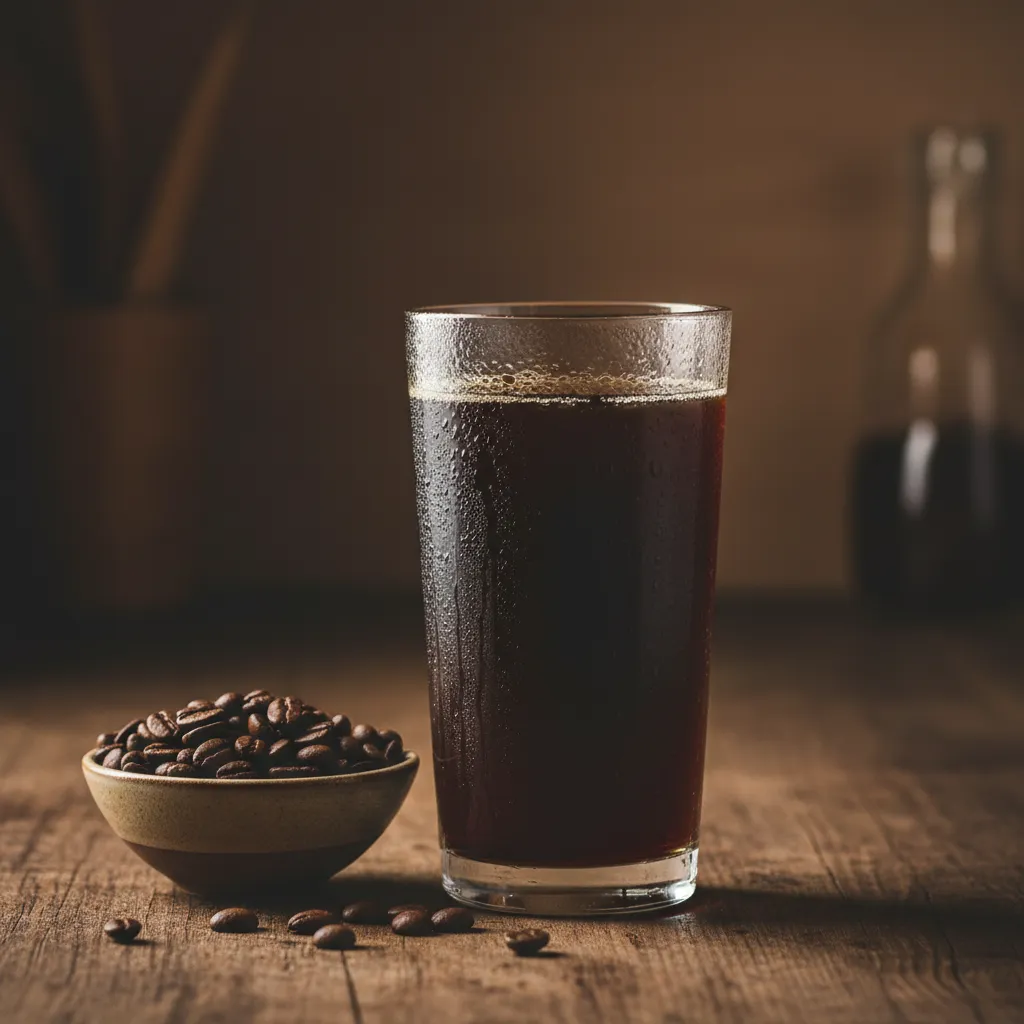
You have successfully filtered your grounds. You now hold a jar of liquid gold. This dark liquid is your concentrate. It is potent, smooth, and rich.
Drinking the concentrate straight provides an intense caffeine kick. However, it often masks the subtle flavor notes of the bean. It needs a partner.
The perfect cup of cold brew is not just brewed; it is balanced. Dilution unlocks the hidden flavors in your concentrate.
Perfecting the Pour
- Start with a 1:1 ratio (equal parts concentrate and water or milk) as your baseline, then taste and adjust to find your personal strength preference.
- Account for the melt factor: if you are pouring over a full glass of ice, use slightly less water, as the ice will naturally dilute your drink as you sip.
- For a refreshing twist, dilute your concentrate with sparkling water or tonic to create a bubbly cold brew soda.
Finding Your Perfect Ratio
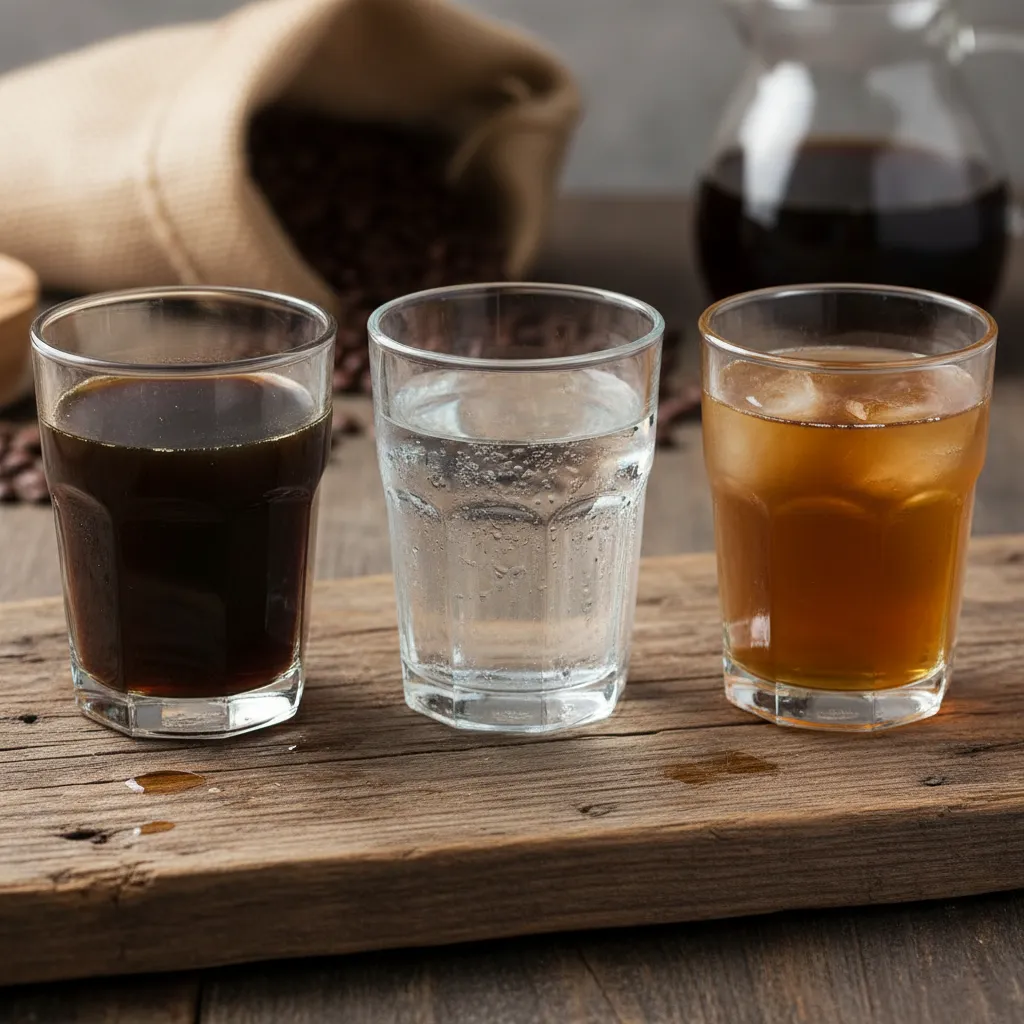
The beauty of homemade cold brew lies in customization. You control the strength by adjusting how much water you add to the concentrate.
Most baristas recommend starting with a standard baseline. From there, you can adjust based on your preference for a bold or mellow cup.
If you prefer a lighter drink, you might enjoy exploring other healthy DIY iced coffee recipes at home for variety.
Common Dilution Ratios
| Strength Profile | Concentrate Part | Water/Milk Part | Resulting Flavor |
|---|---|---|---|
| The Standard | 1 Part | 1 Part | Balanced, smooth, classic strength. |
| The Bold | 2 Parts | 1 Part | Intense, heavy body, espresso-like. |
| The Mellow | 1 Part | 2 Parts | Light, tea-like body, refreshing. |
| The Latte | 1 Part | 2 Parts (Milk) | Creamy, rich, dessert-like texture. |
You can always add more water or milk, but you can’t take it out. Start with a 1:1 ratio and adjust to taste.
Coffee Expert Team, Bean Box Brewing Guide
Barista Secrets
- Use coffee ice cubes to chill your drink without diluting the flavor as they melt.
- For consistent results, measure your parts by weight rather than volume to ensure your favorite ratio stays the same every time.
- Always dilute your concentrate immediately before serving to maintain the peak freshness of your batch in the fridge.
Mixing with Cream and Alternatives
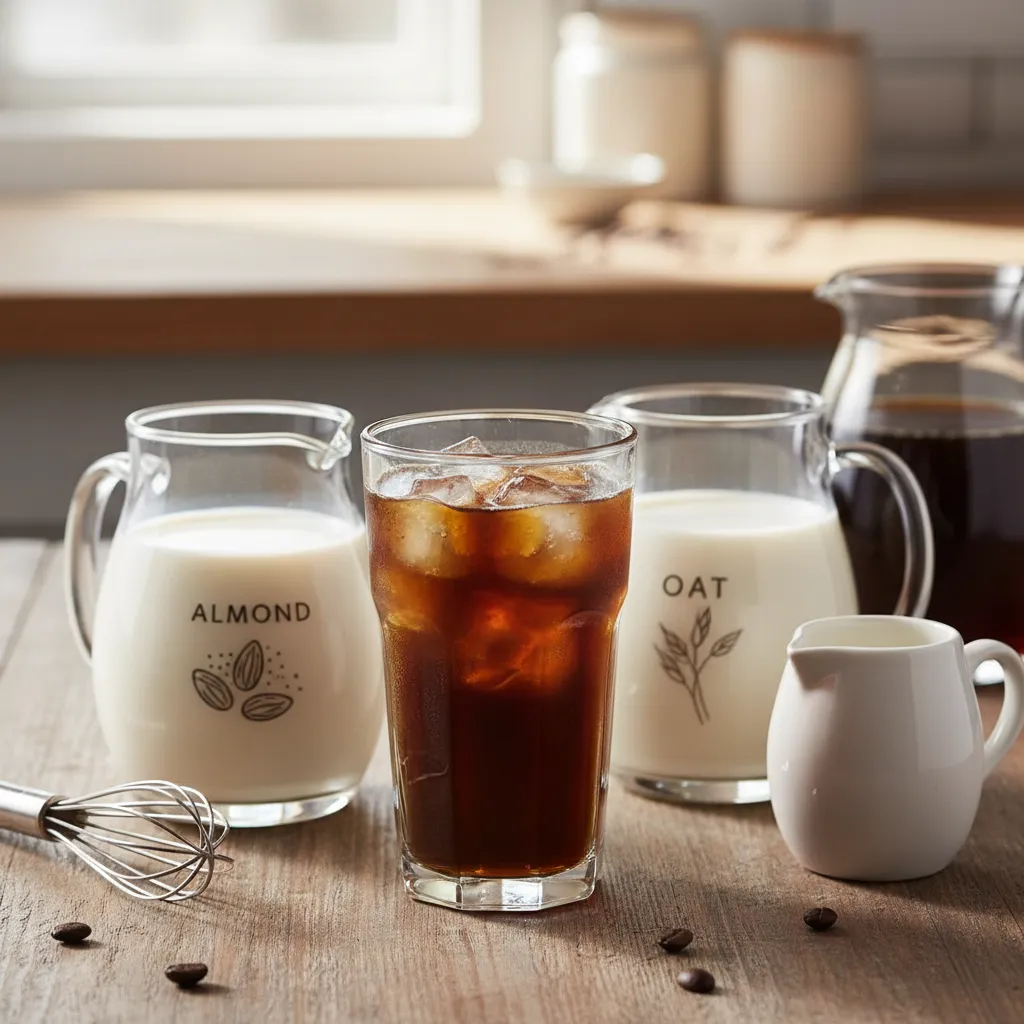
Water is the traditional mixer, but it is not your only option. Using dairy or plant-based milks changes the mouthfeel entirely.
Oat milk is currently a favorite pairing. Its natural sweetness complements the chocolatey notes often found in cold brew beans.
For a decadent treat, try a healthy pumpkin cold foam recipe on top. The foam sits perfectly on the dense concentrate.
Steps for the perfect pour:
- Fill your glass to the top with fresh ice.
- Pour your concentrate halfway up the glass.
- Slowly pour your water or milk over the ice to create a visual layer.
- Stir gently with a tall spoon or straw to incorporate fully.
Master the Pour
- To get that cafe-style texture, try frothing your oat or almond milk before pouring it over the concentrate to create a silky, aerated finish.
- For a dairy-free indulgence, use full-fat coconut milk; its natural fats emulsify beautifully with the cold brew’s oils.
- To achieve the perfect visual layer, pour your milk over the back of a spoon held just above the coffee surface to keep the layers distinct.
Flavor Troubleshooting Guide: Science-Based Fixes for Sour or Bitter Batches
Even the best home baristas encounter a bad batch occasionally. If your coffee tastes off, do not pour it down the sink immediately.
Understanding the chemistry behind extraction helps you dial in the perfect cup. We can adjust variables to fix the balance for next time.
The Flavor Lab Fix
- If your coffee tastes sharp or sour, use hotter water or a finer grind to draw out more sweetness.
- For a brew that is unpleasantly bitter, try coarsening your grind size or decreasing the total contact time between water and grounds.
- Add a microscopic pinch of salt to a bitter cup; it neutralizes bitter compounds on your palate without making the coffee taste salty.
Fixing the Sour or Acidic Brew
Sourness indicates under-extraction. The water did not pull enough sweetness or oil from the beans to balance the natural acids.
This often results in a sharp, grassy, or lemon-like flavor that lacks body. It creates an unpleasant puckering sensation on the palate.
To fix this, try a slightly finer grind setting. This increases the surface area and allows the water to extract flavor more efficiently.
Alternatively, extend your steeping time. Adding 2 to 4 hours to the process can help round out the flavor profile significantly.
If your cold brew tastes sour, it’s under-extracted. This means the grind was too coarse or the brew time was too short.
The Editors, Bon Appétit
If you have a sour batch right now, do not waste it. You can blend it with milk or creamers to mask the acidity effectively.
For inspiration on how to salvage a batch with creative add-ins, check out our guide to homemade cold coffee recipes.
The Barista’s Fix-It List
- To instantly salvage a sour batch, add a tiny pinch of salt to your glass; the sodium helps neutralize sharp acidity and makes the coffee taste remarkably smoother.
- Ensure your coffee grounds resemble coarse sea salt; if the particles are too large, the water cannot penetrate deep enough to extract the necessary sweetness.
- If you are unsure if the brew is done, taste a small spoonful after 12 hours; if it tastes thin or grassy, let it steep for another 4 hours to reach full extraction.
Correcting the Bitter or Harsh Batch
Bitterness usually signals over-extraction. You have pulled too many tannins and harsh compounds from the grounds into the water.
This leaves a dry, astringent sensation in your mouth. It often happens when the grounds are too fine or steeped for far too long.
The most common culprit is using pre-ground coffee meant for drip machines. It is simply too fine for the long immersion process.
Ensure your grounds resemble coarse sea salt. If they look like sand or powder, coarsening the grind is your primary solution.
You can also reduce the steep time. If you typically brew for 24 hours, try stopping at 16 or 18 hours to reduce harshness.
If your current batch is too bitter, dilute it with water or serve it over plenty of ice. Sweeteners also help counteract the tannins.
Those who prefer a naturally sweeter profile might enjoy our easy caramel iced coffee recipes for a treat.
Diagnostic Brew Chart
Use this quick reference guide to identify and solve your flavor issues based on the texture and taste of your final cup.
| Symptom | Probable Cause | The Adjustment |
|---|---|---|
| Sour / Grassy | Under-extraction (Grind too coarse) | Grind finer or steep longer. |
| Bitter / Dry | Over-extraction (Grind too fine) | Grind coarser or steep less. |
| Watery / Weak | Wrong ratio or dilution | Use more coffee or less water. |
| Cloudy / Silty | Poor filtration | Filter twice or use paper filters. |
Great cold brew isn’t magic; it is simply patience combined with the perfect grind size.
Barista Secrets
- Add a tiny pinch of salt to your finished cup. Sodium naturally suppresses the perception of bitterness and enhances the coffee’s inherent sweetness without making it taste salty.
- If a batch is too harsh to drink black, try a dairy or nut milk dilution. The fats and sugars in milk bind to the bitter tannins, creating a much smoother and more balanced mouthfeel.
- Always sift your grounds if you do not have a high-end burr grinder. Removing the fine, dust-like particles before steeping prevents them from over-extracting and adding that unwanted dry, astringent quality to your brew.
Your Morning Ritual, Elevated
Mastering homemade cold brew transforms your morning routine. With just coarse grounds, water, and patience, you create a smooth, rich concentrate.
Remember the golden 1:4 ratio for the perfect strength. It serves as a versatile canvas for your favorite milk or healthy homemade creamer.
There is no need for expensive equipment. A simple mason jar yields barista-quality results right in your own kitchen.
So go ahead, steep a batch tonight. You will wake up to a refreshing, low-acid cup that rivals any coffee shop creation.
Curiosities from the Counter
Stored in an airtight container in the refrigerator, your concentrate stays fresh for up to two weeks. The flavor often smooths out even more after the first day.
Bitterness usually comes from steeping too long or using beans ground too finely. Aim for a coarse, sea-salt texture and stick to a 12 to 18-hour steep time.
Not at all! Cold brew refers to the extraction method, not the serving temperature. You can mix one part concentrate with two parts boiling water for a hot cup.
Medium to dark roasts are ideal. They bring out deep chocolate and nutty notes. Light roasts can sometimes taste overly acidic or sour when cold brewed.