
Table of Contents
- 1. Speed Up Preparation with Pantry Staples and Quick-Rise Yeast
- 2. Adjust for Humidity and Cold Kitchens Using Environmental Troubleshooting
- 3. Achieve Perfect Rounds with the Dental Floss Cutting Technique
- 4. Master the Signature Velvety Cream Cheese Frosting
- 5. Simplify Your Morning with Overnight and Freezer Storage Methods
- Sweet Success in Every Swirl
- Cinnamon Roll Secrets Revealed
There is nothing quite like the scent of warm cinnamon and sweet dough filling your kitchen on a quiet morning.
Many beginners feel intimidated by yeast, but I am here to show you that masterfully crafted rolls are well within your reach.
This recipe simplifies the process without sacrificing that bakery-quality texture you crave.
We will focus on creating a soft, pillowy crumb and a rich, buttery filling that provides the perfect balance of sweetness.
By using quality ingredients and straightforward techniques, you can ensure every bite is a nurturing experience for your family.
We prioritize flavor and clarity so that even the busiest parents can find success in the kitchen.
Baking for your loved ones is a profound way to share joy and create lasting memories around the table.
Follow these steps carefully, and you will soon present a tray of golden, gooey rolls that look as beautiful as they taste.
Let us begin this delicious journey together and transform your home into the ultimate neighborhood bakery.
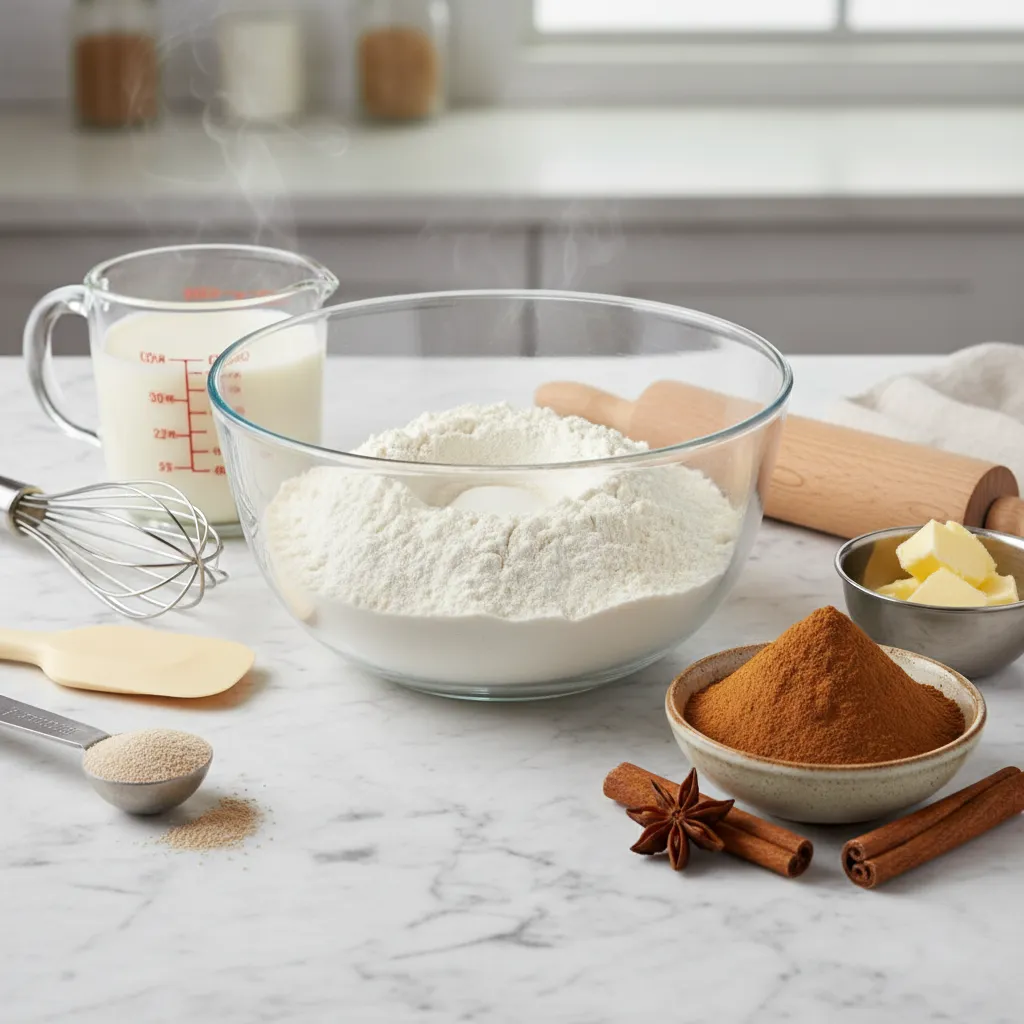
1. Speed Up Preparation with Pantry Staples and Quick-Rise Yeast
Creating bakery-style treats at home is easier than you think. You do not need complex equipment to achieve a soft, pillowy texture.
The secret lies in your pantry staples. Basic flour, sugar, and butter transform into a decadent breakfast with very little effort.
Homemade cinnamon rolls are the ultimate love language from your kitchen.
Most traditional recipes require hours of proofing. By using modern techniques, we can cut that time in half without losing flavor.
If you enjoy simple morning bakes, you might also like these Easy Coffee Cake Recipes Simple Breakfast options.
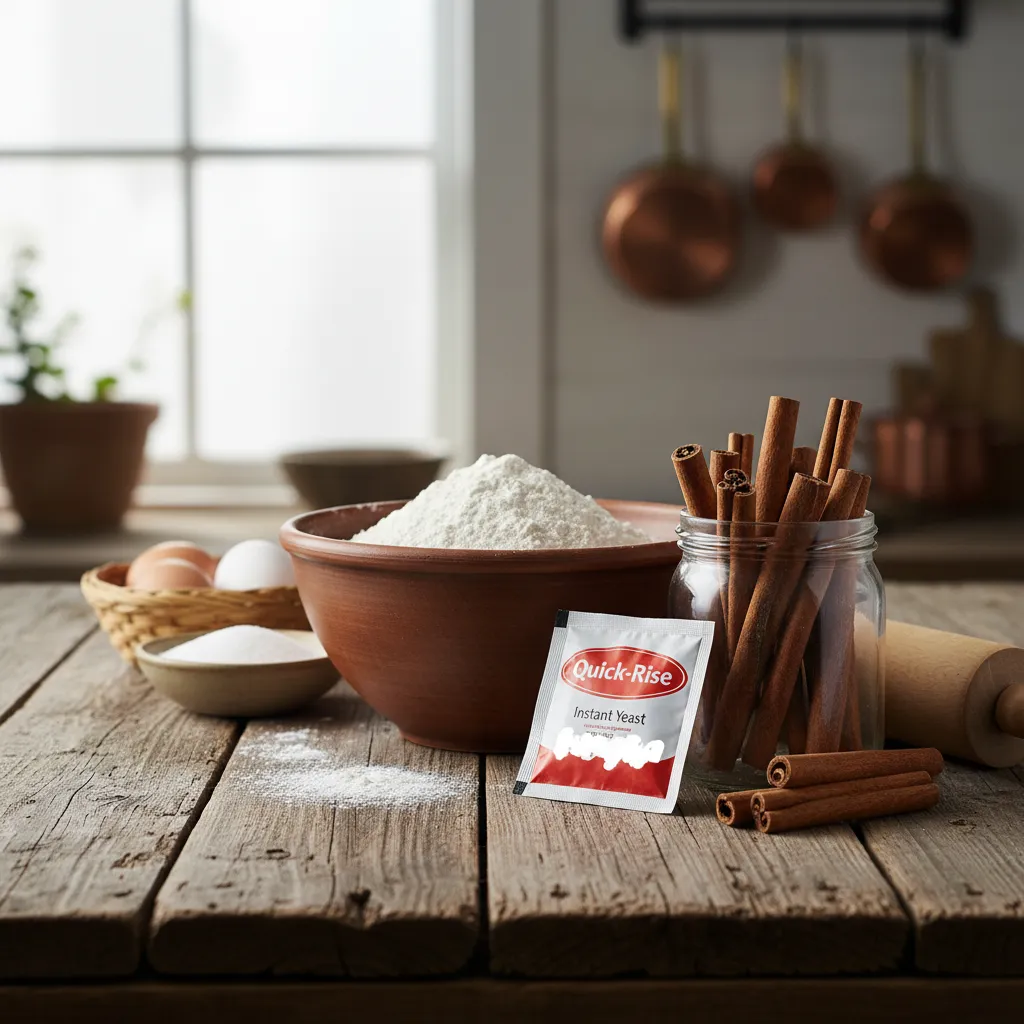
The Power of Quick-Rise Yeast
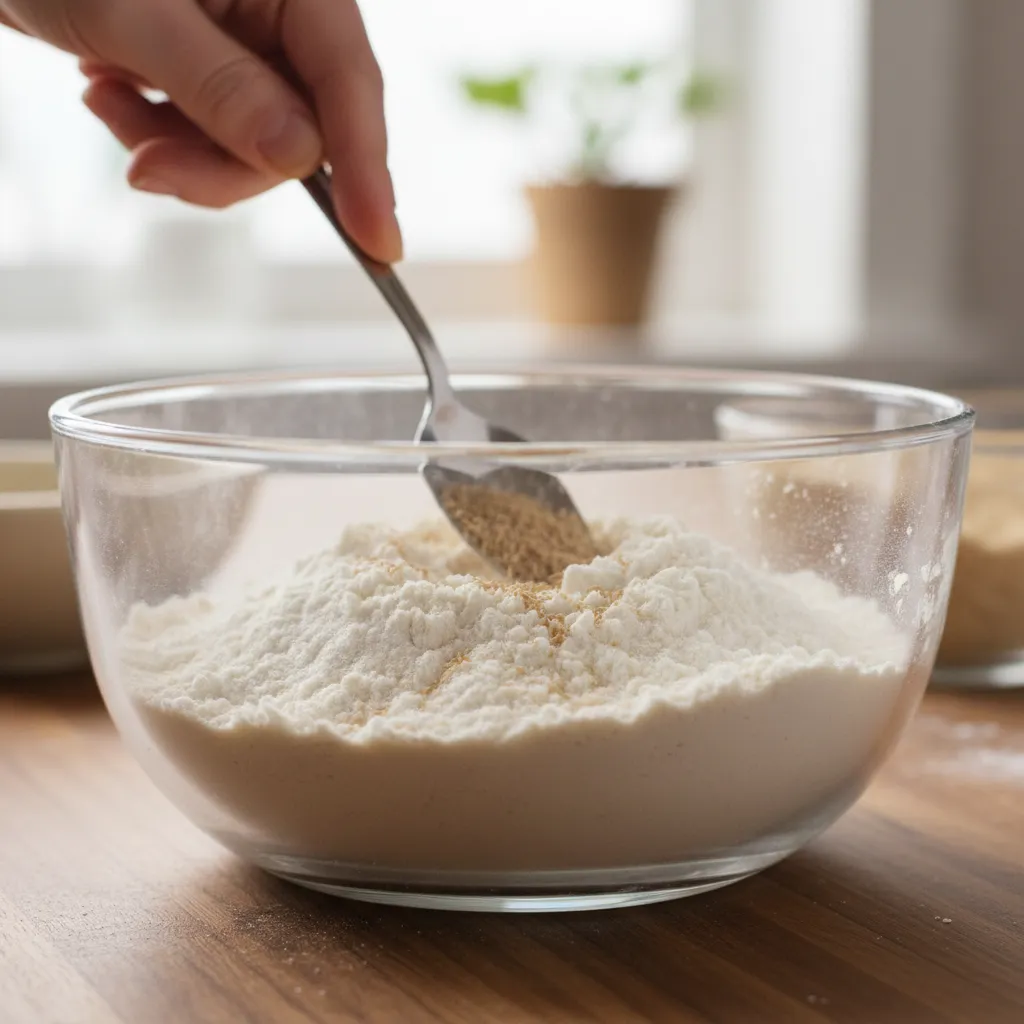
Quick-rise yeast is a game-changer for busy home cooks. It is designed to dissolve faster and act more vigorously than standard yeast.
This type of yeast allows you to skip the first long rise. You can move straight from kneading to shaping your beautiful rolls.
| Feature | Active Dry Yeast | Quick-Rise Yeast |
|---|---|---|
| Needs Proofing in Water | ✅ | ❌ |
| Saves Preparation Time | ❌ | ✅ |
| Double Rise Required | ✅ | ❌ |
Using quick-rise yeast ensures your dough stays light. It provides a reliable lift that results in that signature airy crumb we love.
Instant yeast can be added directly to the dry ingredients without dissolving it in water first, making the process much faster.
PJ Hamel, King Arthur Baking / Senior Digital Editor
Ingredients
- 2 3/4 cups all-purpose flour
- 1 packet (0.25 oz) quick-rise yeast
- 1/4 cup granulated sugar
- 1/2 cup whole milk
- 1/4 cup warm water (110°F)
- 3 tbsp unsalted butter, softened
- 1 large egg, room temperature
- 1/2 cup butter, melted (for filling)
- 1 cup light brown sugar, packed
- 2 tbsp ground cinnamon
Instructions
- In a large bowl, whisk together 2 cups of flour, the yeast, and granulated sugar until well combined.
- Combine milk, water, and 3 tbsp butter in a microwave-safe bowl. Heat until warm, about 110°F.
- Add the warm liquid and the egg to the flour mixture. Beat by hand or with a mixer until smooth.
- Gradually add the remaining flour. Knead the dough for 5 minutes until it becomes smooth and elastic.
- Cover the dough and let it rest for 10 minutes. Use this time to prepare your cinnamon filling.
- Roll the dough into a large rectangle. Spread the melted butter evenly over the entire surface.
- Mix the brown sugar and cinnamon. Sprinkle this mixture generously over the buttered dough.
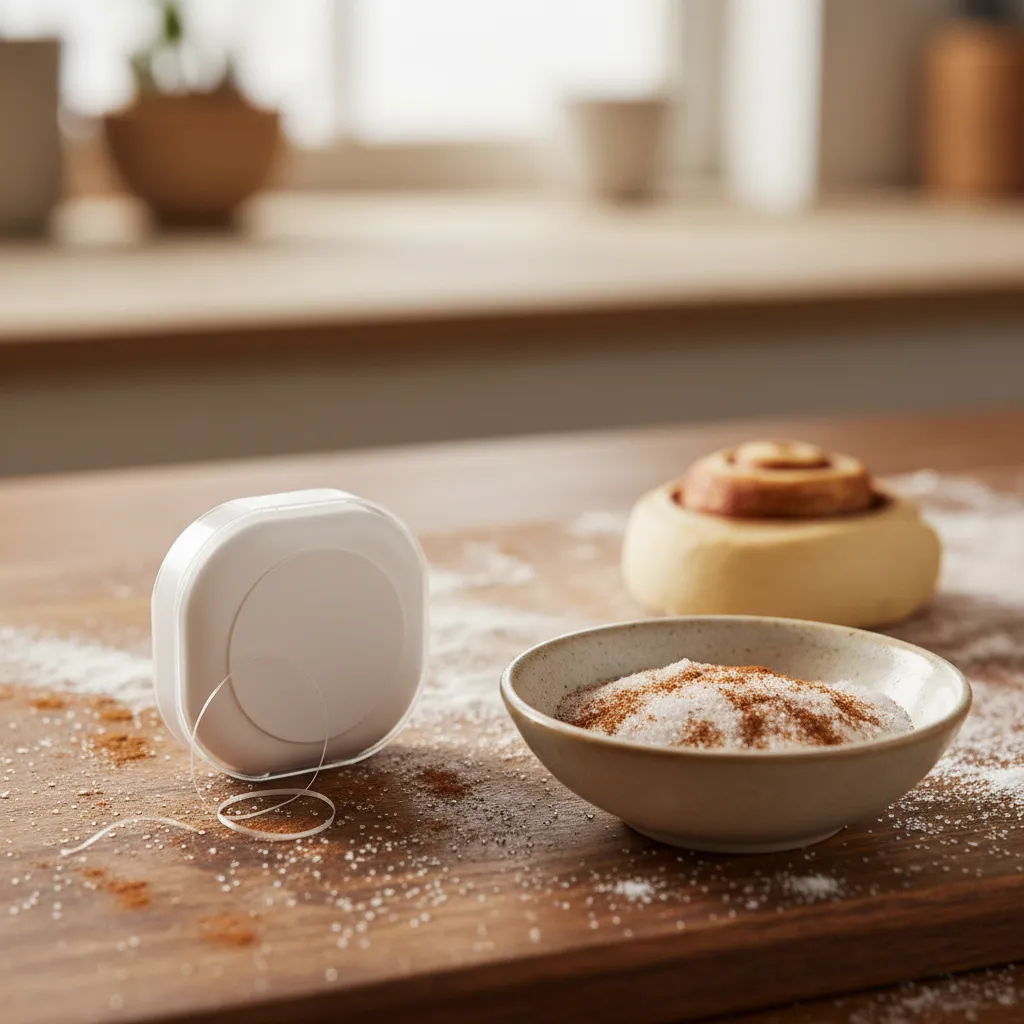
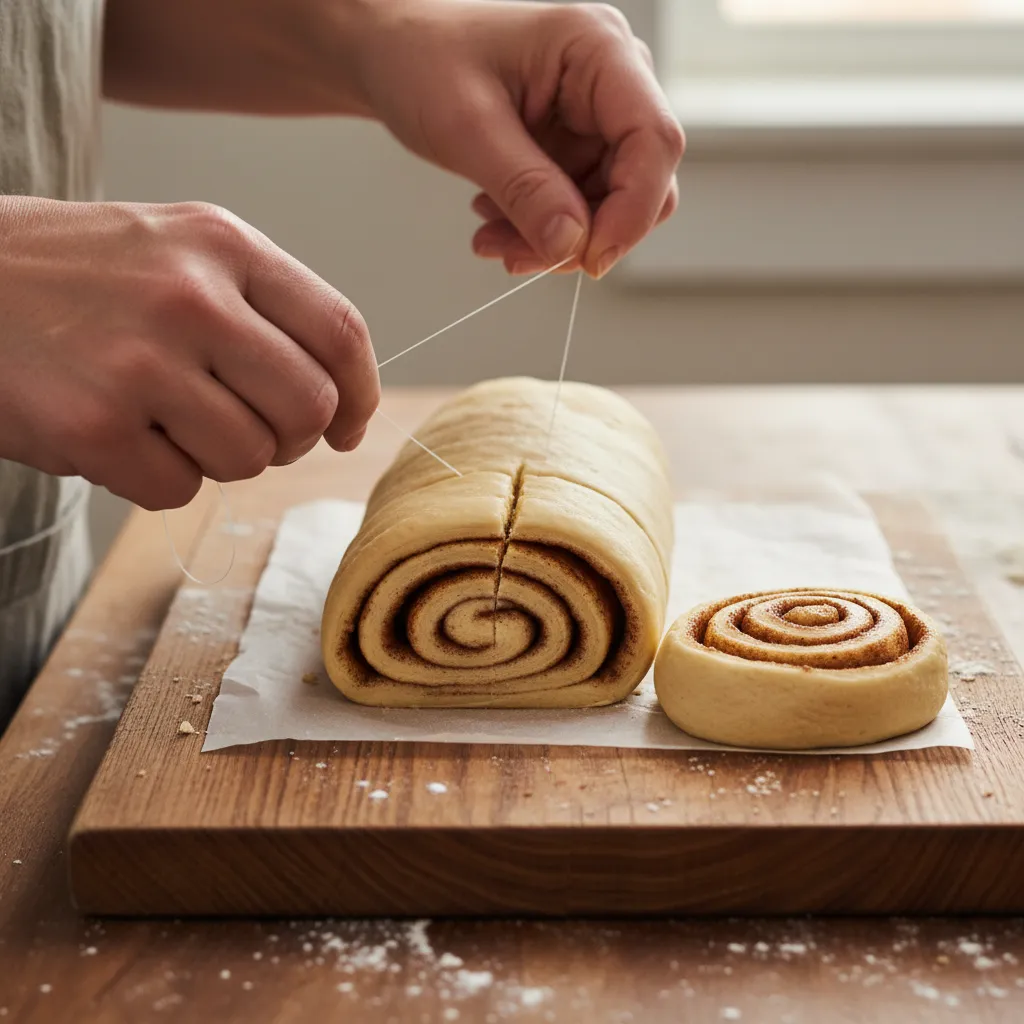
- Roll the dough tightly into a log. Cut into 12 even pieces using a sharp knife or unflavored dental floss.
- Place rolls in a greased pan. Let rise in a warm spot for 30 minutes, then bake at 375°F.
If you prefer a different morning treat, consider making Easy and Fast Fluffy Pancakes Recipes for your family.
Pairing these rolls with a hot beverage creates a cozy atmosphere. The aroma of cinnamon will fill your entire home instantly.
Baker’s Secret Sauce
- To achieve a perfect rise in chilly kitchens, place your pan in a turned-off oven next to a bowl of steaming hot water to create a DIY proofing box.
- For the cleanest slices without squishing your dough, use a piece of unflavored dental floss to zip through the log instead of a knife.
- Make sure your liquid mixture is warm but not hot (around 110°F); too much heat will kill the yeast, while too little will prevent that pillowy texture.
2. Adjust for Humidity and Cold Kitchens Using Environmental Troubleshooting
Humidity acts as an invisible ingredient in your kitchen. High moisture levels in the air often require adding slightly more flour to reach a supple texture.
Flour is naturally hygroscopic, meaning it absorbs water from the environment. This can make your dough feel sticky or overly slack on rainy days.
If your kitchen is cold, yeast will struggle to activate properly. It requires a warm, draft-free spot to ferment and create those airy, soft bubbles.
You can find similar tips for managing fermentation in our ultimate sourdough starter troubleshooting guide, which covers temperature control.
A warm kitchen is a baker’s best friend, but patience is the true secret to the perfect rise.
Temperature is the most important factor in the speed of fermentation. A warmer dough will rise faster than a cooler one.
Red Star Yeast, Yeast Fundamentals & Baking Lessons
Ingredients
- 4 cups all-purpose flour
- 1 packet (0.25 oz) active dry yeast
- 1 cup warm whole milk (110°F)
- 1/2 cup granulated sugar
- 1/3 cup melted unsalted butter
- 1 large egg, room temperature
- 1 tsp salt
- 1 cup brown sugar, packed
- 2 tbsp ground cinnamon
- 1/2 cup softened butter for filling
Instructions
- Dissolve yeast and sugar in warm milk, then let it sit until foamy.
- Mix in melted butter, egg, salt, and flour until a soft dough forms.
- Knead the dough for 5 to 7 minutes until it becomes smooth and elastic.
- Place dough in a greased bowl, cover it, and let rise for 1 hour.
- Roll dough into a large rectangle on a lightly floured surface.
- Spread softened butter over the dough and sprinkle with cinnamon sugar.
- Roll the dough tightly into a log and cut into 12 even pieces.
- Place rolls in a greased baking pan and let rise for another 30 minutes.
- Bake at 350°F for 20 to 25 minutes until light golden brown.
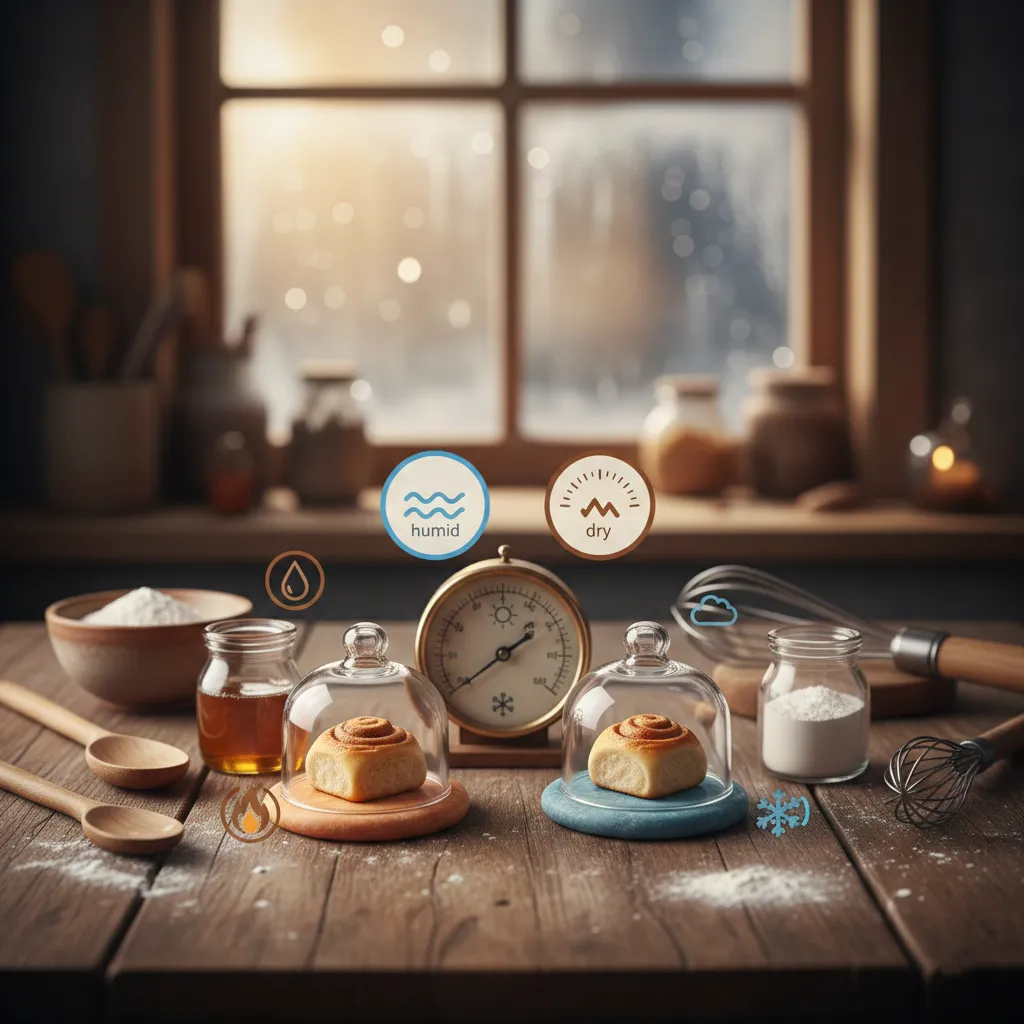
Environmental Troubleshooting Adjustments
| Condition | Culinary Adjustment |
|---|---|
| High Humidity | Add 1 tbsp of flour at a time until dough cleans the bowl. |
| Dry Climate | Keep dough tightly covered with plastic wrap to prevent skinning. |
| Cold Kitchen | Proof dough in a turned-off oven with the light on for warmth. |
| High Altitude | Increase oven temperature by 15 degrees to set the structure. |
Using these troubleshooting steps ensures your rolls turn out fluffy regardless of the weather or your modern kitchen layout.
Baker’s Secret Toolkit
- Switch to weight-based measurements using a digital scale; flour absorbs moisture from the air, making volume measurements inconsistent on humid days.
- Create a DIY proofing box by placing your dough in a turned-off microwave alongside a mug of steaming hot water to trap heat and humidity.
- If your kitchen is drafty, wrap your bowl in a thick kitchen towel or a heating pad set to the lowest temperature to keep the yeast active.
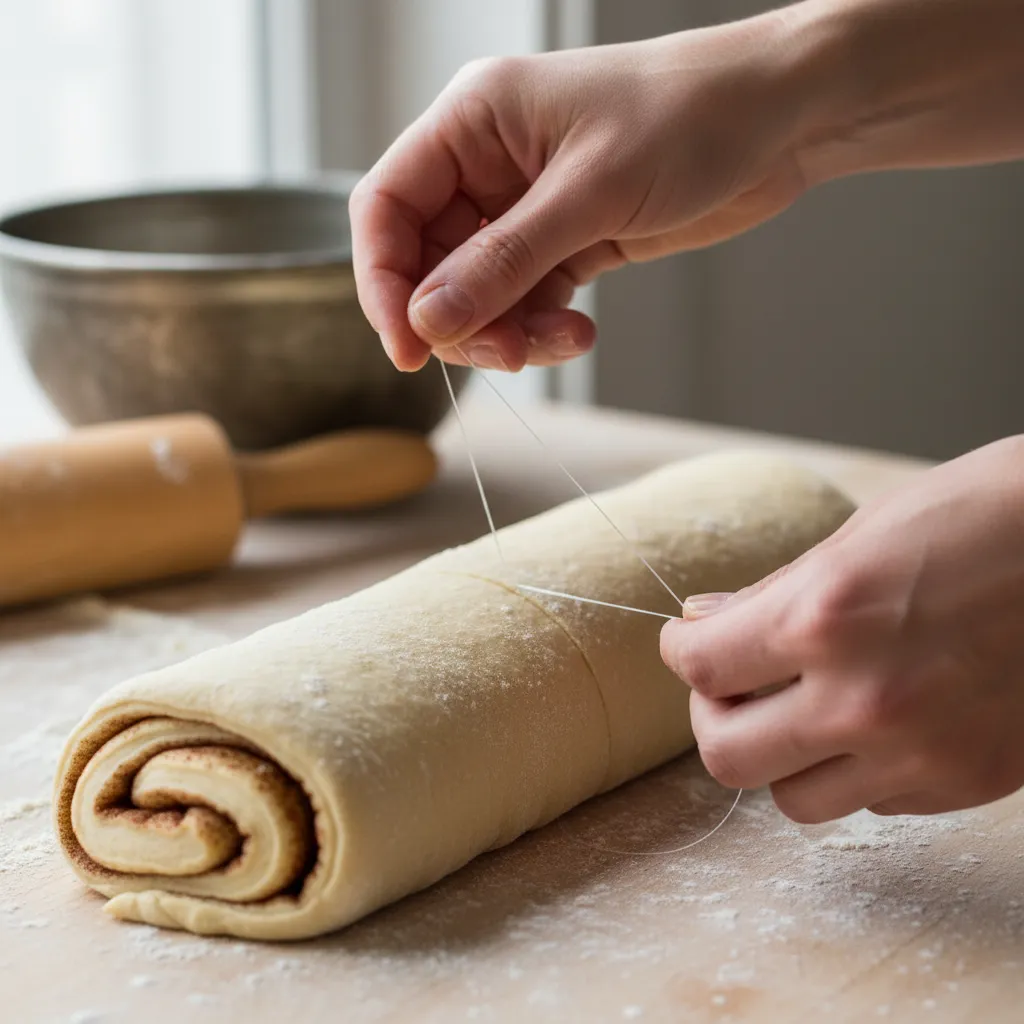
3. Achieve Perfect Rounds with the Dental Floss Cutting Technique
Mastering the cut is vital for easy, simple, homemade cinnamon rolls. You want to preserve those golden, buttery layers without smashing them.
A traditional knife often squishes the soft, aerated dough. This compression ruins the rise and makes the rolls look lopsided.
Dental floss is the ultimate tool for a professional finish. It ensures your rolls bake evenly into beautiful, golden rounds.
The secret to a perfect spiral is in the slice, not just the roll.
Why Unflavored Floss is Best
Always use unflavored, unwaxed dental floss for this task. Minty flavors can transfer to your dough, ruining the warm cinnamon aroma.
This tool provides a clean, 360-degree cut. It applies even pressure from all sides, keeping the dough perfectly round.
Traditional knives often flatten the dough. For more on dough integrity, see our guide on why dough spreads.
For the cleanest cut, use a piece of unflavored dental floss. Slide it under the log, cross the ends, and pull quickly.
Martha Stewart, How to Cut Cinnamon Rolls
Step-by-Step Precision
Using floss creates a tension that a blade cannot replicate. It allows the yeast to expand upward rather than outward during the proof.
If you enjoy working with yeast dough, you might also like our easy coffee cake recipes for your next brunch.
| Method | Result | Best For |
|---|---|---|
| Serrated Knife | Potential Squashing | Cold, firm dough |
| Dental Floss | Perfect Spirals | Soft, room-temp dough |
Ingredients
- 1 long roll of prepared cinnamon roll dough
- 12 inches of unflavored, unwaxed dental floss
Instructions
- Slide the floss under the log of dough at the desired width.
- Cross the ends of the floss over the top of the roll.
- Pull both ends of the floss quickly in opposite directions.
- Repeat every 1.5 inches for even, uniform rolls.
Baker’s Secret
- Use a ruler to lightly mark 1.5-inch intervals along the dough log before you start cutting to ensure perfectly uniform rolls that bake at the same rate.
- If your dough feels too warm or sticky, pop the rolled log into the freezer for 5 to 10 minutes; this makes the floss slice through the butter layers even more effortlessly.
- Always cross the floss ends fully before pulling to ensure a quick, clean snap that maintains the integrity of those delicate yeast spirals.
4. Master the Signature Velvety Cream Cheese Frosting
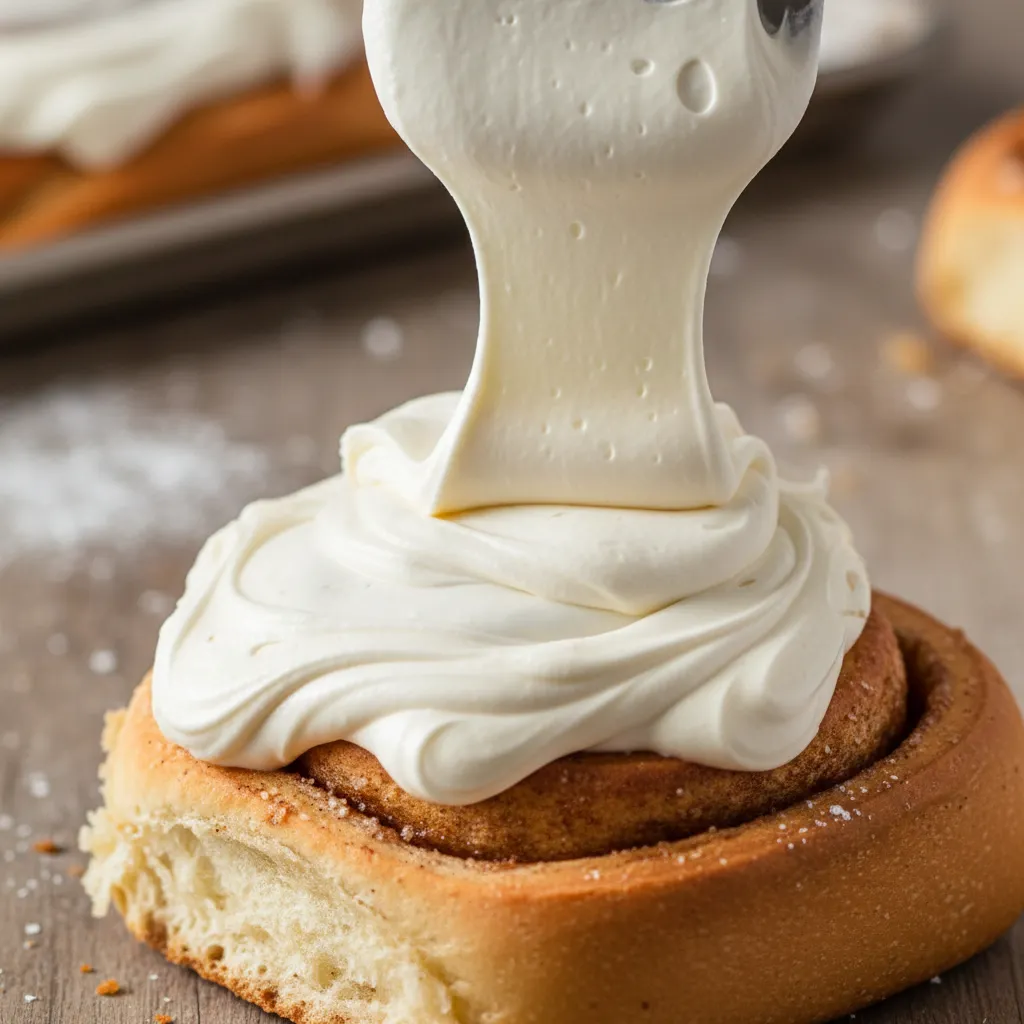
The aroma of warm cinnamon is intoxicating. Adding a thick layer of velvety frosting makes it heavenly.
You want a balance of sweetness and tang. This recipe delivers a professional, glossy finish every time.
A cinnamon roll without cream cheese frosting is like a summer day without sunshine, lacking that essential glow.
Similar to our pumpkin cream cheese muffins, this topping adds a rich, zesty layer.
For a cozy morning, pair these rolls with our velvety hot chocolate.
Always use brick-style cream cheese. The tub variety contains too much air and moisture for a stable set.
The secret to a great cream cheese frosting is a higher ratio of cream cheese to butter, which keeps it from being too sweet.
Shilpa Uskokovic, Bon Appétit
Ingredients
- 8 oz full-fat cream cheese, softened
- 1/2 cup unsalted butter, softened
- 2 cups powdered sugar, sifted
- 1 tsp pure vanilla extract
- 1/8 tsp sea salt
Instructions
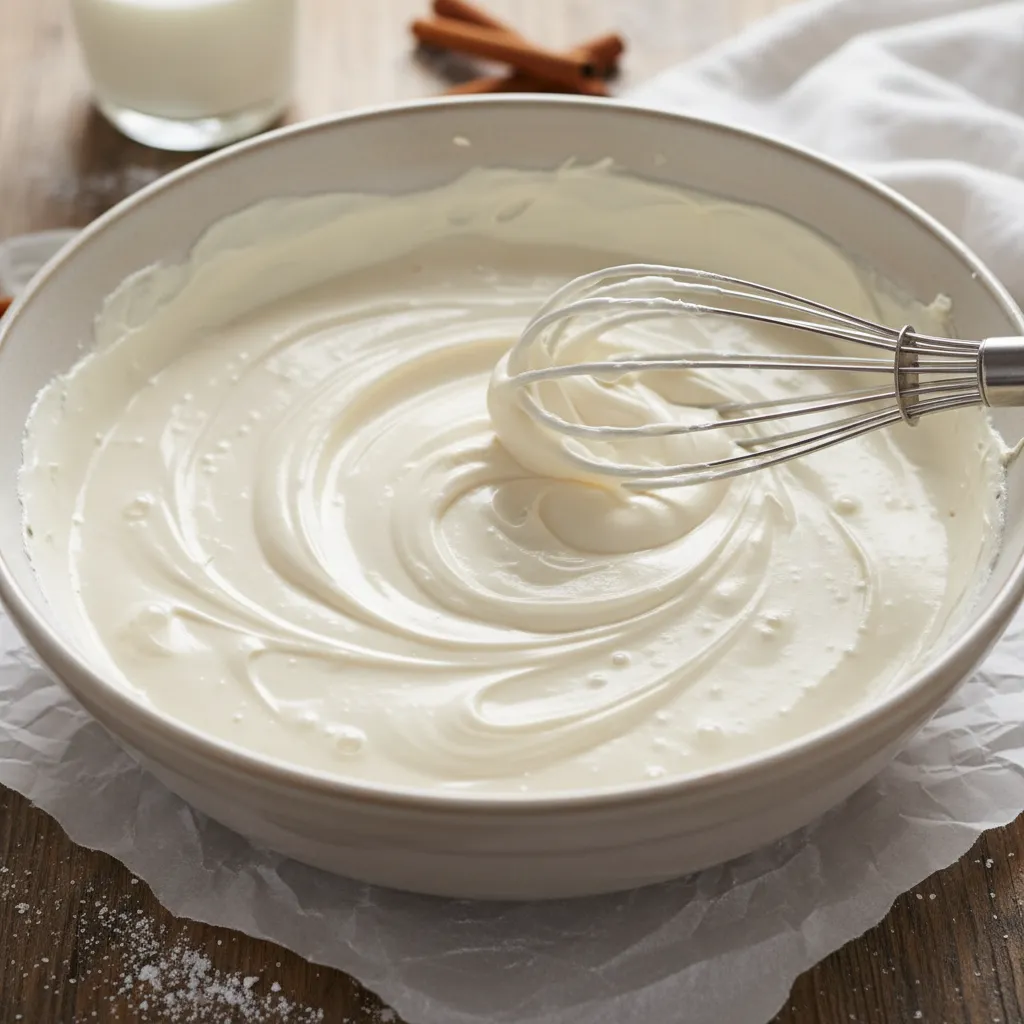
- Place the softened cream cheese and butter in a large mixing bowl.
- Beat on medium speed until the mixture is completely smooth and pale.
- Gradually add the powdered sugar 1 cup at a time while mixing slowly.
- Pour in the vanilla extract and salt to enhance the flavor profile.
- Whip on high for 2 minutes until the texture is light and airy.
- Spread generously over warm rolls so the frosting melts slightly into the swirls.
Temperature is vital for the perfect application. If the rolls are too hot, the frosting will liquefy and run off.
Wait about 5 to 10 minutes after baking. This allows the rolls to stay moist while holding the frosting shape.
| Desired Consistency | Adjustment Method |
|---|---|
| Thicker Frosting | Add more powdered sugar, 2 tbsp at a time. |
| Thinner Glaze | Whisk in 1 tsp of whole milk or heavy cream. |
| Extra Tangy | Add 1/2 tsp of fresh lemon zest to the mix. |
Store any leftover frosting in an airtight container. It keeps well in the refrigerator for up to 5 days.
The Frosting Whisperer’s Secrets
- For the smoothest application, beat the cream cheese and butter separately first until light, then combine them to ensure there are no tiny pockets of plain butter.
- If your kitchen is warm, chill your mixing bowl for 10 minutes before starting; this helps the frosting maintain a stable, spreadable structure while you work.
- Wait exactly 7 minutes after the rolls leave the oven; this is the sweet spot where the frosting melts just enough to seep into the spirals without losing its body.
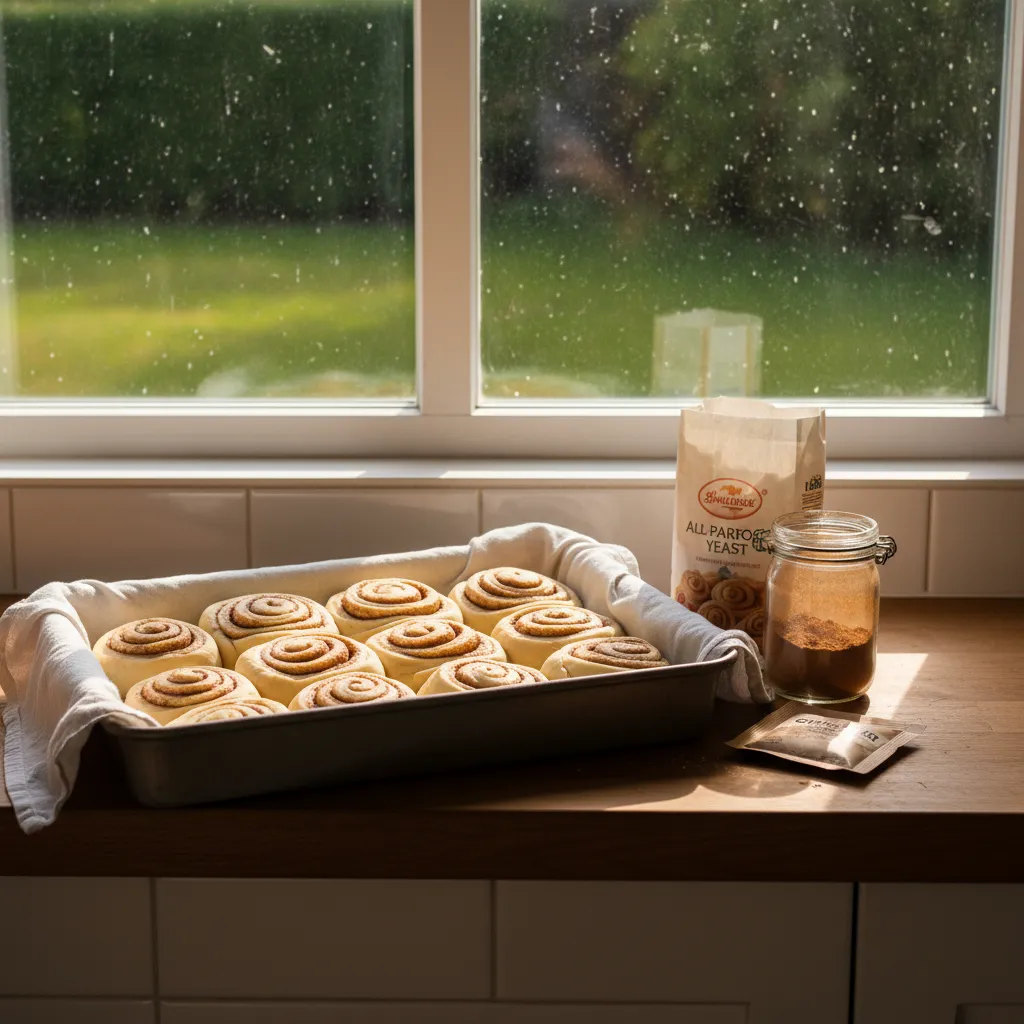
5. Simplify Your Morning with Overnight and Freezer Storage Methods
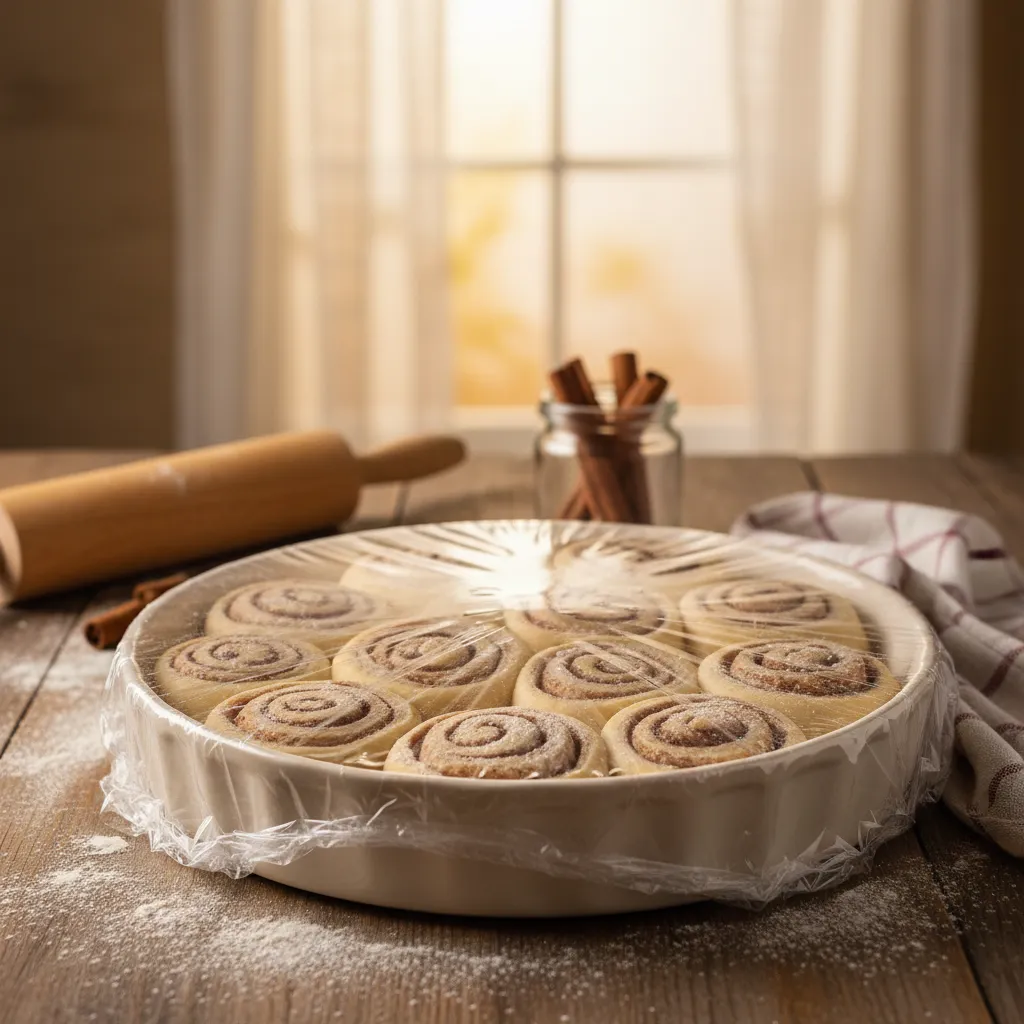
Waking up to the aroma of freshly baked rolls is a dream. You can achieve this without the early morning stress by using smart storage hacks.
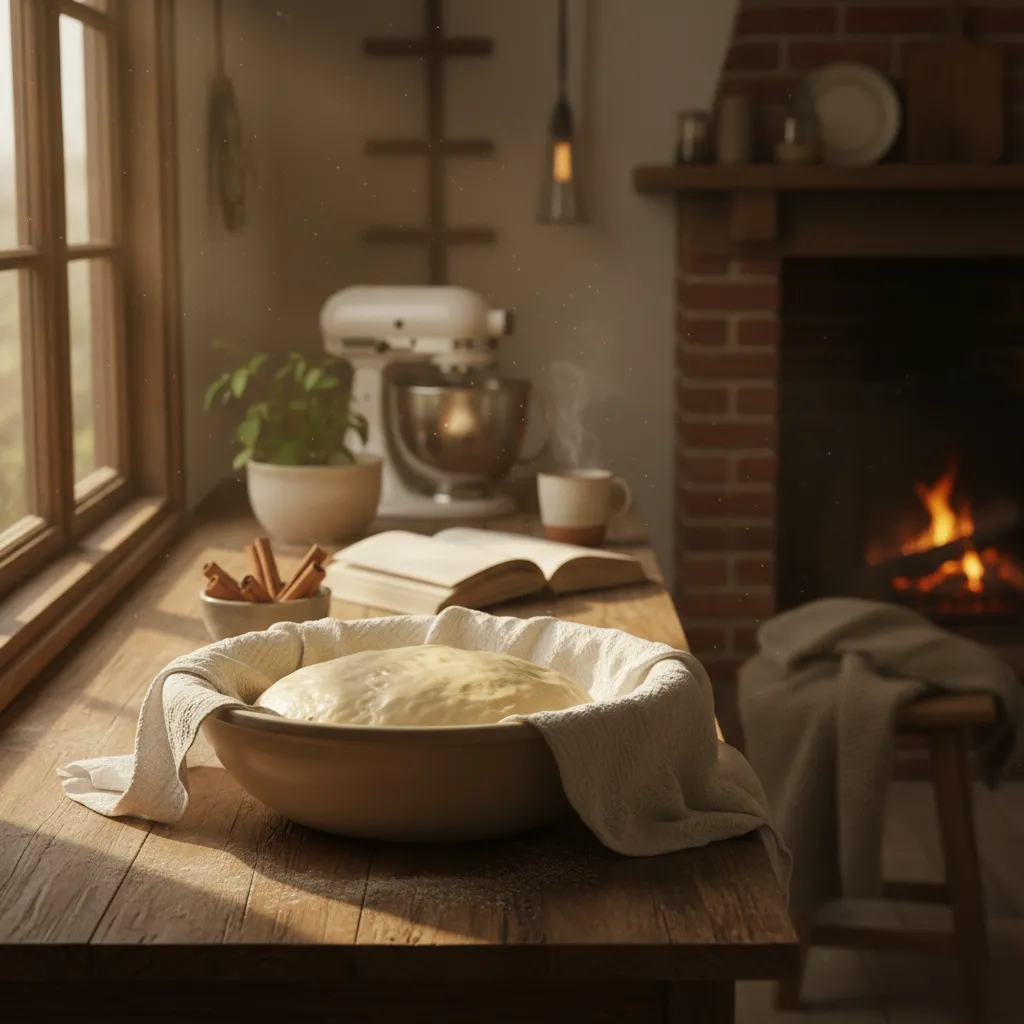
The Overnight Refrigerator Method
Prepare your dough and shape the rolls as usual. Instead of the final rise, cover the pan tightly and slide it into the fridge.
The cold slows the yeast, allowing a slow ferment. This develops a deeper, more artisanal flavor profile in your sweet dough.
For the best results, refrigerate the shaped rolls for up to 24 hours. Any longer and the yeast may exhaust its fuel.
Taste of Home Test Kitchen, How to Make Overnight Cinnamon Rolls
In the morning, let the pan sit at room temperature for 30 minutes. This allows the dough to wake up before hitting the oven.
Freezing for Future Cravings
For long-term storage, the freezer is your best friend. You can freeze unbaked rolls for up to 1 month with ease.
Flash freeze the shaped rolls on a tray first. Once firm, transfer them to a heavy-duty freezer bag to prevent any freezer burn.
Alternatively, bake the rolls fully and freeze them without frosting. This is perfect for a quick, wholesome breakfast for busy mornings.
The secret to a stress-free brunch is a pan of cinnamon rolls waiting in the fridge.
| Storage Method | Stage of Roll | Max Duration |
|---|---|---|
| Refrigerator | Unbaked and Shaped | 24 Hours |
| Freezer | Unbaked and Shaped | 1 Month |
| Freezer | Fully Baked | 2 Months |
If you love the convenience of make-ahead meals, consider trying these easy coffee cake recipes for your next gathering.
Using these methods ensures your Easy Simple Homemade Cinnamon Rolls are always ready for a special occasion or a lazy Sunday.
Baker’s Secret
- To speed up the morning wake-up period, place the chilled pan in a turned-off oven with a bowl of hot water on the rack below to create a gentle proofing environment.
- When freezing unbaked rolls, always label your freezer bag with the baking temperature and time so you do not have to search for the recipe during a busy morning.
- For the best texture after freezing fully baked rolls, reheat them in the oven at 300°F instead of the microwave to keep the crust perfectly soft and pillowy.
Sweet Success in Every Swirl
Baking fresh cinnamon rolls doesn’t have to be a day-long chore. With quick-rise yeast and pantry staples, you can enjoy bakery-style bliss in under an hour.
There is truly nothing like the scent of warm cinnamon filling your home. These pillowy treats are the perfect way to show love to your family and friends any day of the week.
Cinnamon Roll Secrets Revealed
Yes, but you must proof it in warm water first. It will also require a longer rise time before shaping, so plan for about an extra hour of waiting.
Keep them in an airtight container at room temperature for up to two days. For longer storage, freeze them and reheat in the oven for a fresh taste.
Add flour one tablespoon at a time until the dough pulls away from the bowl. Be careful not to add too much, or your rolls will become dense and heavy.
Absolutely! Shape the rolls, cover them tightly, and refrigerate overnight. Let them sit at room temperature for 30 minutes before baking the next morning.