Table of Contents
- The Butter Factor: Why Temperature Control Prevents Greasy Puddles
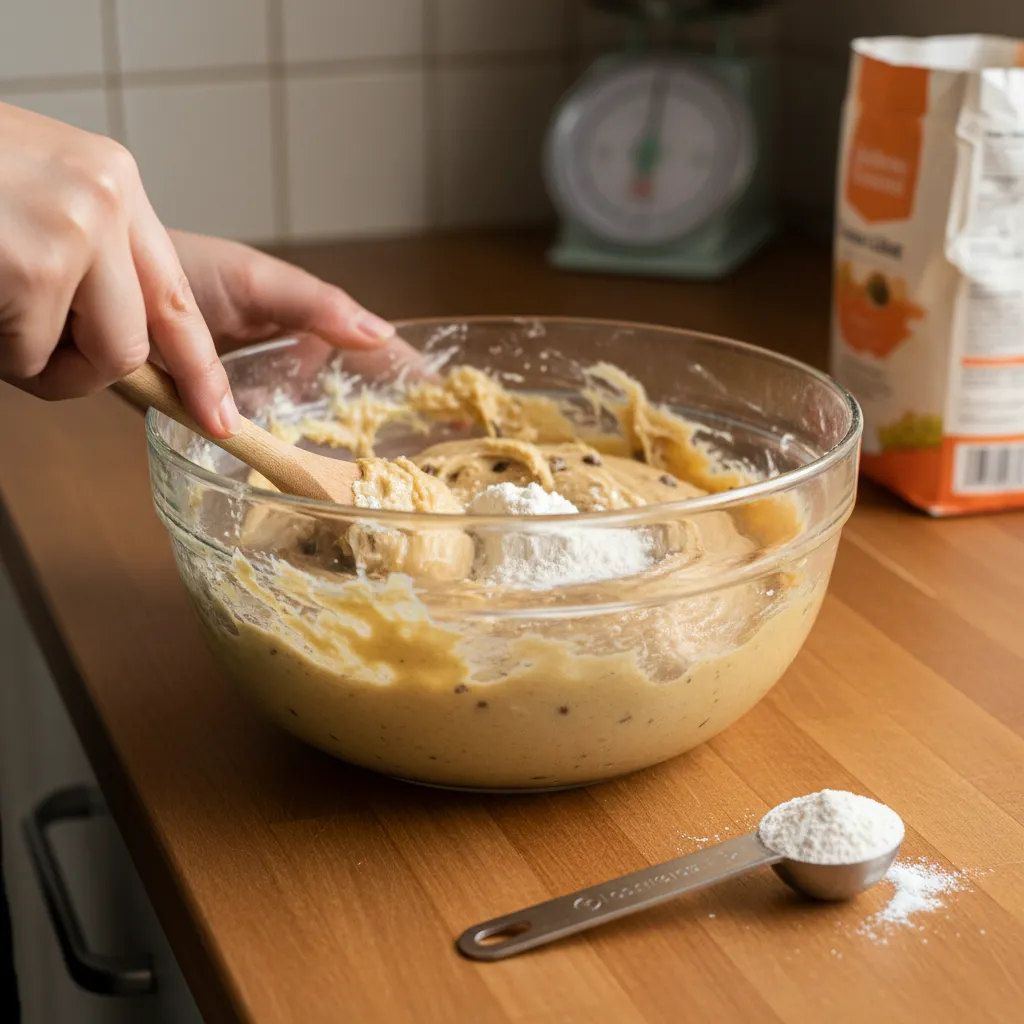
- Flour Power: The Critical Difference Between Scooping and Weighing
- The Chill Test: Solidifying Fats Before the Oven
- Oven Environment: Accurate Temperatures and Baking Sheet Choice
- Panic Button: The Cookie Scoot Trick and Fixing Batter Mid-Bake
- Your Path to Cookie Perfection
- Common Cookie Conundrums
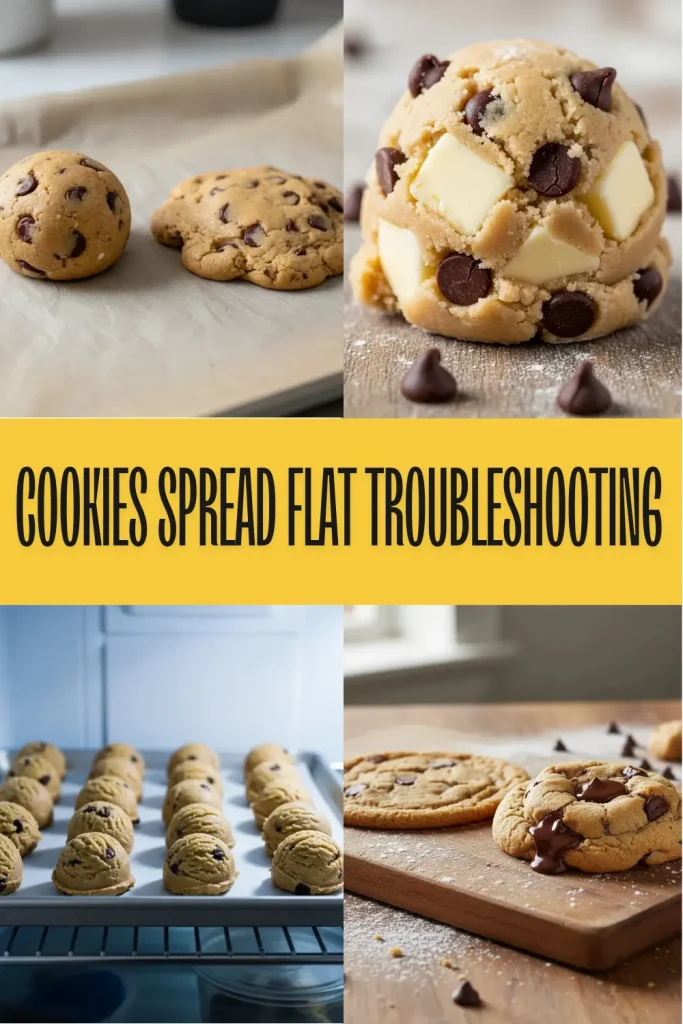
There is nothing quite as heartbreaking in the kitchen as pulling a baking sheet from the oven only to find your mounds of dough have melted into greasy puddles.
We picture thick, chewy centers and crisp edges, but sometimes chemistry has other plans. Do not despair, because this is a common stumble on the path to baking mastery.
Baking is a delicate dance of temperature and ingredients where even a slight misstep can change the final texture. Often, the culprit is simply butter that is too soft or an oven that runs cooler than the dial suggests.
By understanding the why behind the spread, you gain the power to control your results every single time.
Together we will look at the practical tweaks that turn a flat disaster into a perfect treat worth sharing with your loved ones. From chilling your dough to measuring flour correctly, these simple fixes will restore your confidence.
Let us get your apron on and bake a batch that looks as incredible as it tastes.
The Butter Factor: Why Temperature Control Prevents Greasy Puddles
Butter acts as the structural foundation for your favorite treats. It determines flavor, texture, and arguably most importantly, the spread.
If your butter is too warm, it melts rapidly in the hot oven. This causes the dough to spread out before the structure has time to set.
This results in those dreaded greasy puddles. We want the fat to melt slowly, releasing water and creating steam for lift.
Great cookies require cool confidence. If your butter is sweating, your cookies will too.
The Cool Down
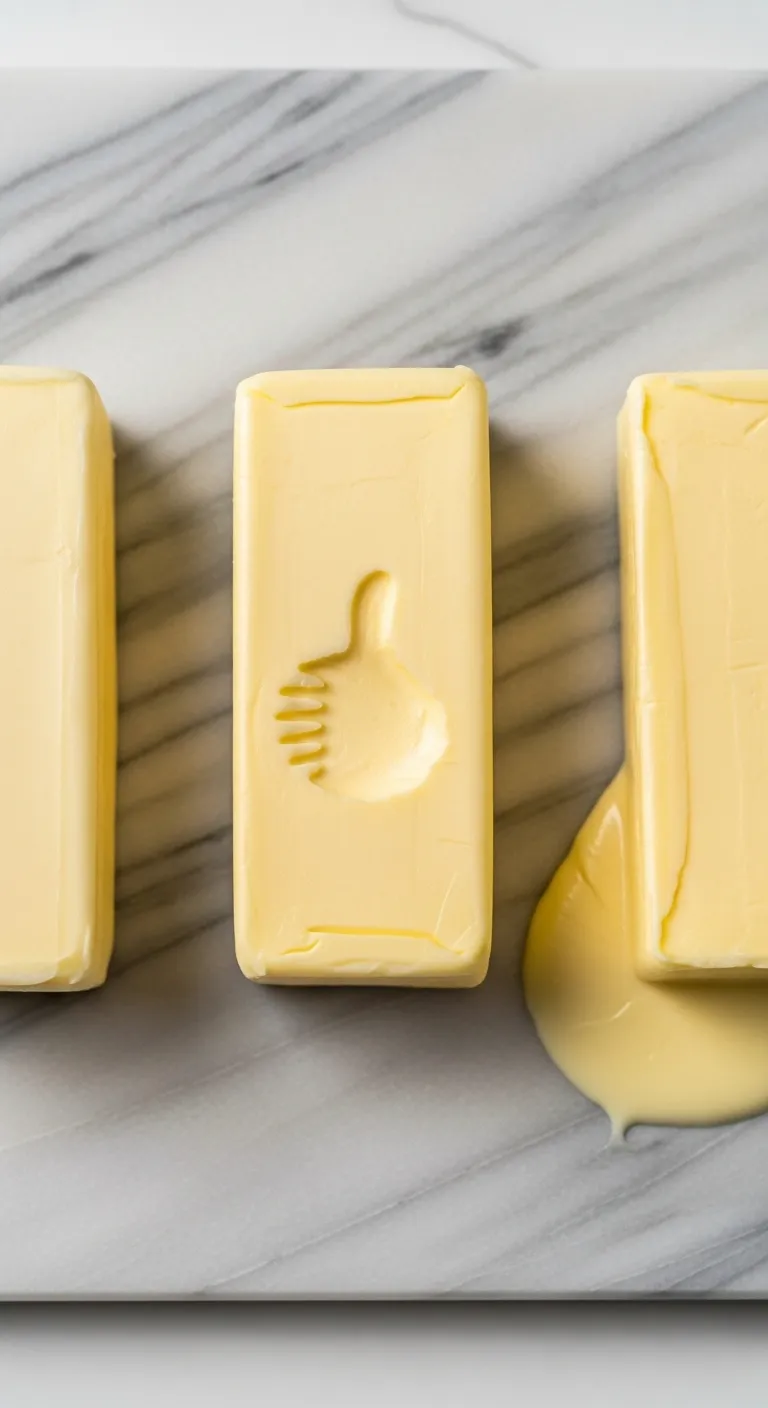
- The Finger Test: Perfectly softened butter should yield to light pressure but hold its shape. If your finger slides right through or the butter looks oily, pop it back in the fridge for 10 minutes.
- Chill Before Baking: Even if a recipe doesn’t call for it, refrigerating your scooped dough balls for 30 minutes solidifies the fat, ensuring taller, thicker cookies instead of flat puddles.
- Cut to Soften: Need room temp butter fast? Don’t microwave it! Cut cold butter into small cubes and let them sit on the counter; they will soften evenly in about 15 minutes.
The Sweet Spot: Cool Room Temperature
Many bakers misinterpret the term “room temperature.” It does not mean soft, oily, or glistening. The butter should actually feel cool.
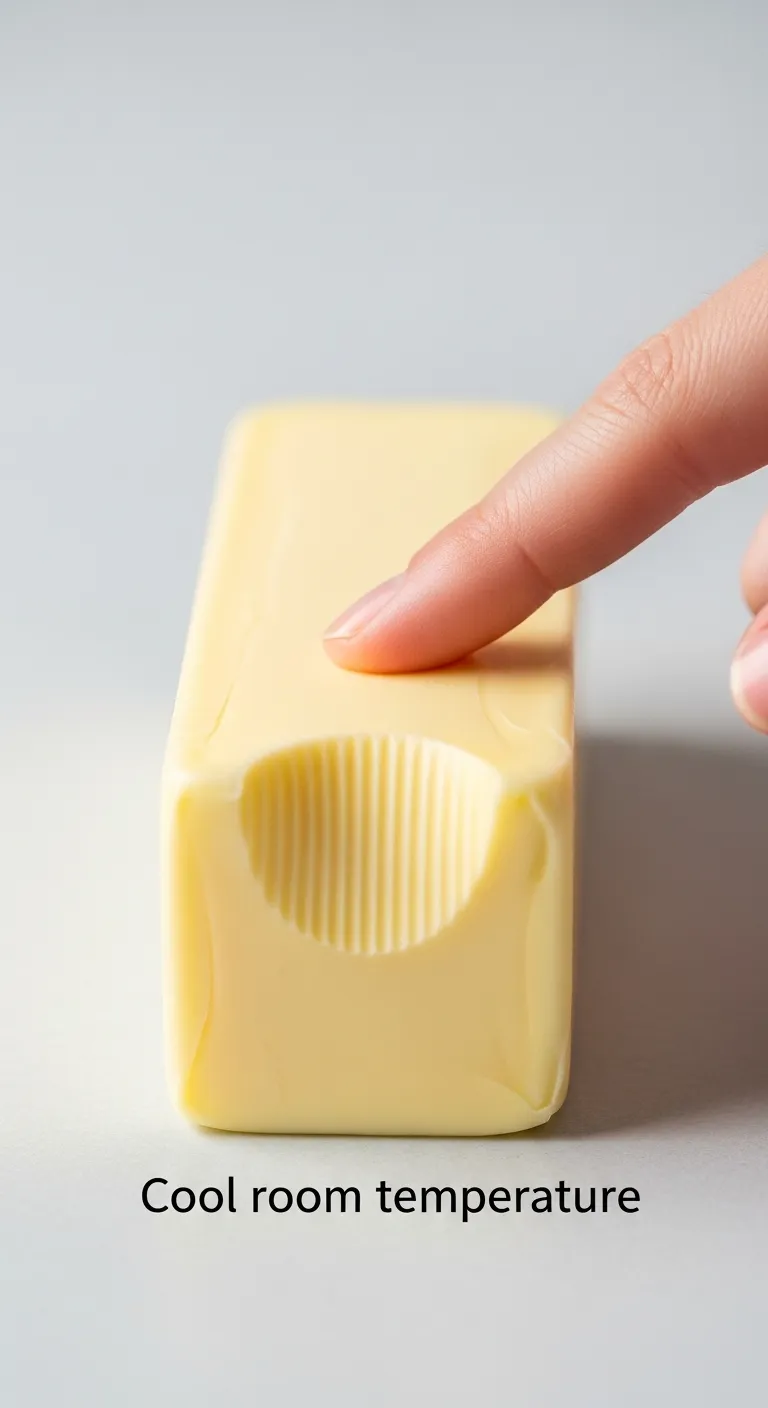
When you press it, it should indent slightly but hold its shape. If your finger slides through the stick easily, it is too soft.
Using properly chilled butter is essential for achieving the perfect texture in recipes like our 20 Chocolate Chip Cookies You’ll Love.
Room temperature butter should be cool to the touch, about 65°F. If it’s too warm, your cookies will spread and lose their shape.
Stella Parks, Serious Eats Baking Science
The Temperature Test
- The Digital Check: If you are unsure, insert an instant-read thermometer into the center of the stick. The internal temperature should read between 63°F and 68°F for optimal creaming.
- The Speed Hack: Forgot to pull your butter out? Cut the cold stick into small 1/2-inch cubes. They will reach the target cool room temperature in about 10 minutes, significantly faster than a whole stick.
- Too Soft? If your finger leaves an oily shine or slides right through, the butter has lost its emulsion. Pop it back in the fridge for 5 to 10 minutes to firm up before mixing.
Butter Texture Cheat Sheet
Use this guide to diagnose your current butter situation before you start mixing your ingredients.
| Butter State | Visual Cue | Cookie Result |
|---|---|---|
| Straight from Fridge | Hard, no indentation | Thick, cakey, potentially dry |
| Cool Room Temp (Ideal) | Slight dent when pressed | Chewy center, crisp edges, stable |
| Oily/Shiny | Finger slides through | Excessive spreading, greasy feel |
| Melted | Liquid pool | Thin, crispy, lace-like spread |
Butter Rescue Tactics
- Forgot to thaw? Don’t microwave cold butter, as it melts unevenly! Instead, cut the stick into small cubes to increase surface area—it will soften in about 10 minutes on the counter.
- Too shiny? If your butter looks greasy or your finger slides right through, it’s too warm and will cause flat cookies. Pop it back in the fridge for 5–10 minutes to firm up before mixing.
- The Glass Trick: For a gentle speed-soften, fill a glass bowl with hot water, dump it out, and immediately place the warm bowl upside down over your stick of butter to create a mini sauna.
How to Save Over-Softened Dough
If you suspect your butter was too warm during mixing, do not bake immediately. The damage is not permanent yet.
Place your baking sheet with the scooped dough in the fridge. Chill for at least thirty minutes before baking.
This re-solidifies the fat. It gives the flour time to hydrate and hold onto the butter structure during the bake.
Dough Rescue Squad
- Short on time? Pop the tray in the freezer for 10–15 minutes instead of the fridge to speed up the firming process.
- Always bake a single test cookie first; if it spreads into a flat puddle, the rest of the batch needs more time to chill.
- If the dough is extremely sticky, try scooping it onto parchment paper before chilling to avoid a mess later.
Flour Power: The Critical Difference Between Scooping and Weighing
Flour is the structural backbone of your cookie. It holds everything together against the melting fat and sugar.
If your cookies are spreading into puddles, your flour measurement is the first suspect. It is often a matter of density.
The Volume Trap
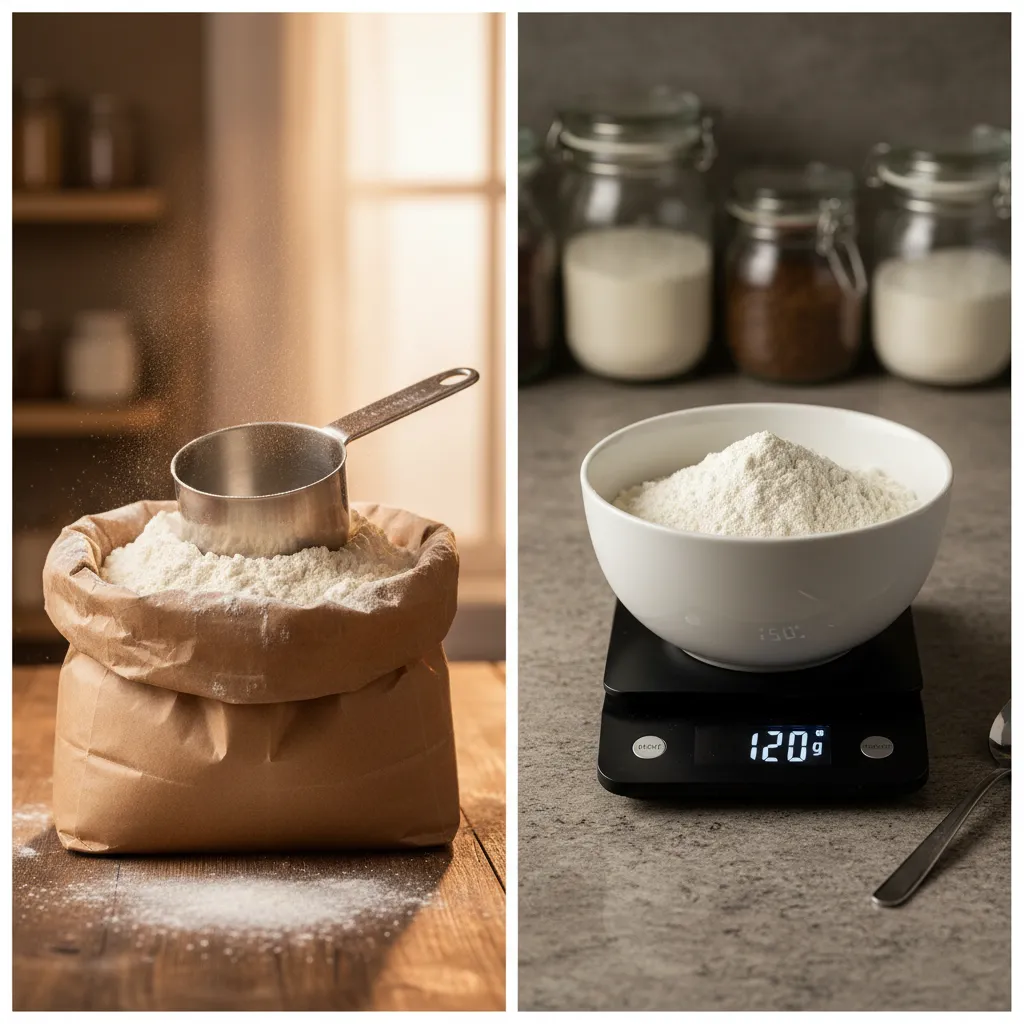
Most home cooks use measuring cups. The problem is that a “cup” is a measure of volume, not weight. Flour is compressible.
Depending on how you pack it, a single cup of all-purpose flour can vary wildly in weight. This inconsistency ruins texture.
Consider the varying weights of a single “cup” based on the method used:
- Dip and Sweep: 140g to 150g (Heavy, leads to puffy or dry cookies)
- Spoon and Level: 120g to 125g (Standard for modern recipes)
- Sifted then Measured: 95g to 100g (Light, leads to spreading flat)
If you sift flour before measuring, you might unintentionally use too little. This lack of structure causes the dough to collapse.
Using a scale to measure flour is the single most important change you can make to improve your baking.
King Arthur Baking Company, How to Measure Flour
Why Weighing Fixes the Spread
A digital scale removes the guesswork. It ensures you have the exact amount of protein and starch required to hold the shape.
When you aim for achieving perfect domes like in our Italian ricotta cookie guide, precision is non-negotiable.
If a recipe calls for 2 cups of flour, aim for 240 grams (unless specified otherwise). This guarantees the correct hydration ratio.
Baking is a science of ratios. Your kitchen scale is the most important tool for preventing flat cookies.
Visual Cues for the Dough
Even if you measure correctly, humidity can affect flour absorption. You must learn to read the dough.
The dough should pull away cleanly from the sides of the bowl. It should be tacky to the touch, but not overly sticky or wet.
If it sticks aggressively to your fingers, you may need a tablespoon more flour. This is true even for classic chocolate chip cookie recipes.
Add flour gradually. A mere 10 grams can be the difference between a chewy delight and a cakey disappointment.
The Precision Protocol
- The Spoon-and-Level Compromise. If you don’t have a scale handy, never scoop the measuring cup directly into the bag. Instead, fluff the flour, spoon it gently into the cup, and level it off with a knife to avoid packing in 20% extra weight.
- The 120g Standard. Converting a vintage recipe? A safe baseline for ‘1 cup’ of all-purpose flour is 120 grams. Start there, then use the visual dough cues to decide if you need that extra tablespoon.
- The Humidity Factor. Flour is hygroscopic—it absorbs moisture from the air. On a rainy day, your standard measurement might yield a stickier dough, so trust the texture (tacky, not wet) over the number on the screen.
The Chill Test: Solidifying Fats Before the Oven
Temperature is often the silent culprit behind flat cookies. Many home cooks mix their dough and immediately scoop it onto a hot baking sheet.
This skips a vital step called hydration. During mixing, the flour needs time to fully absorb the liquids from the eggs and butter.
If you bake immediately, the flour is still “thirsty” and cannot hold the structure. The result is a puddle rather than a perfect disc.
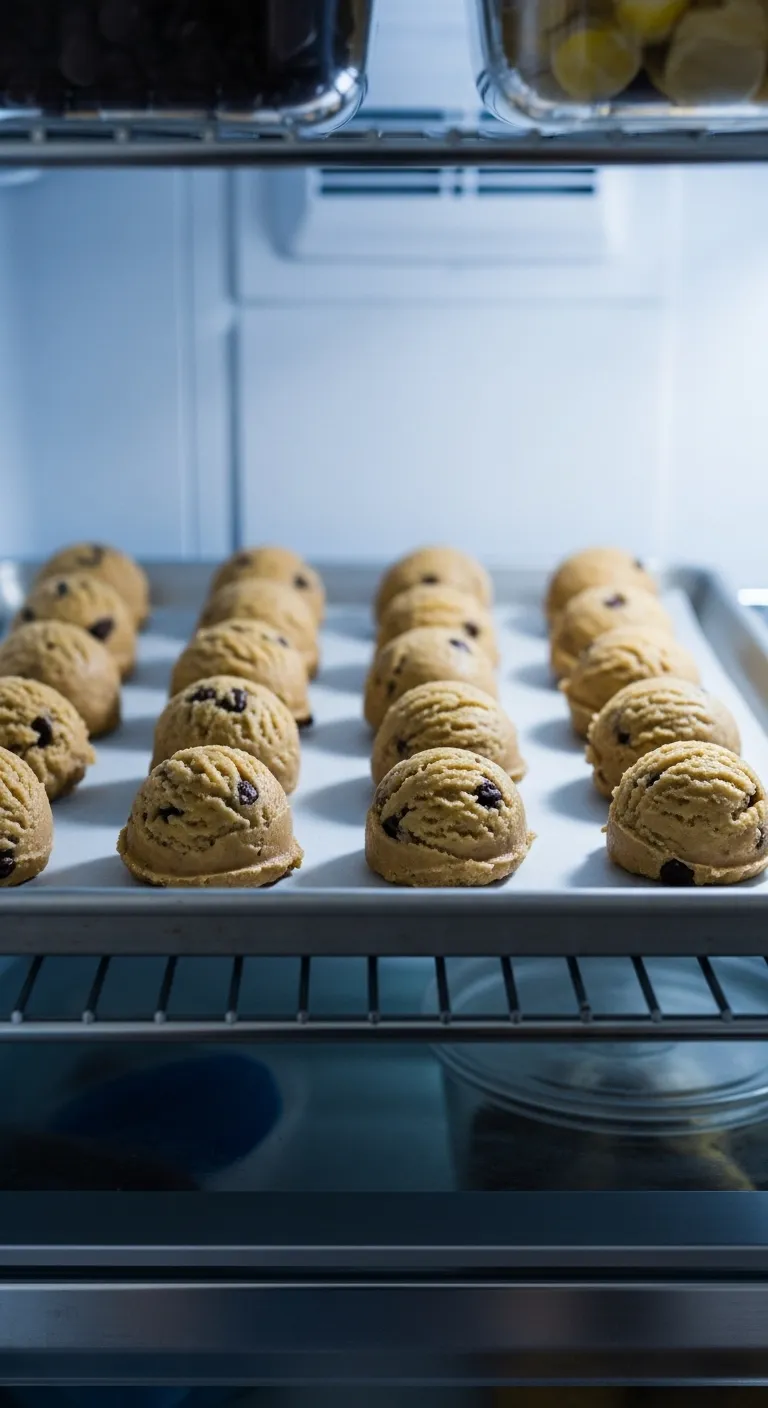
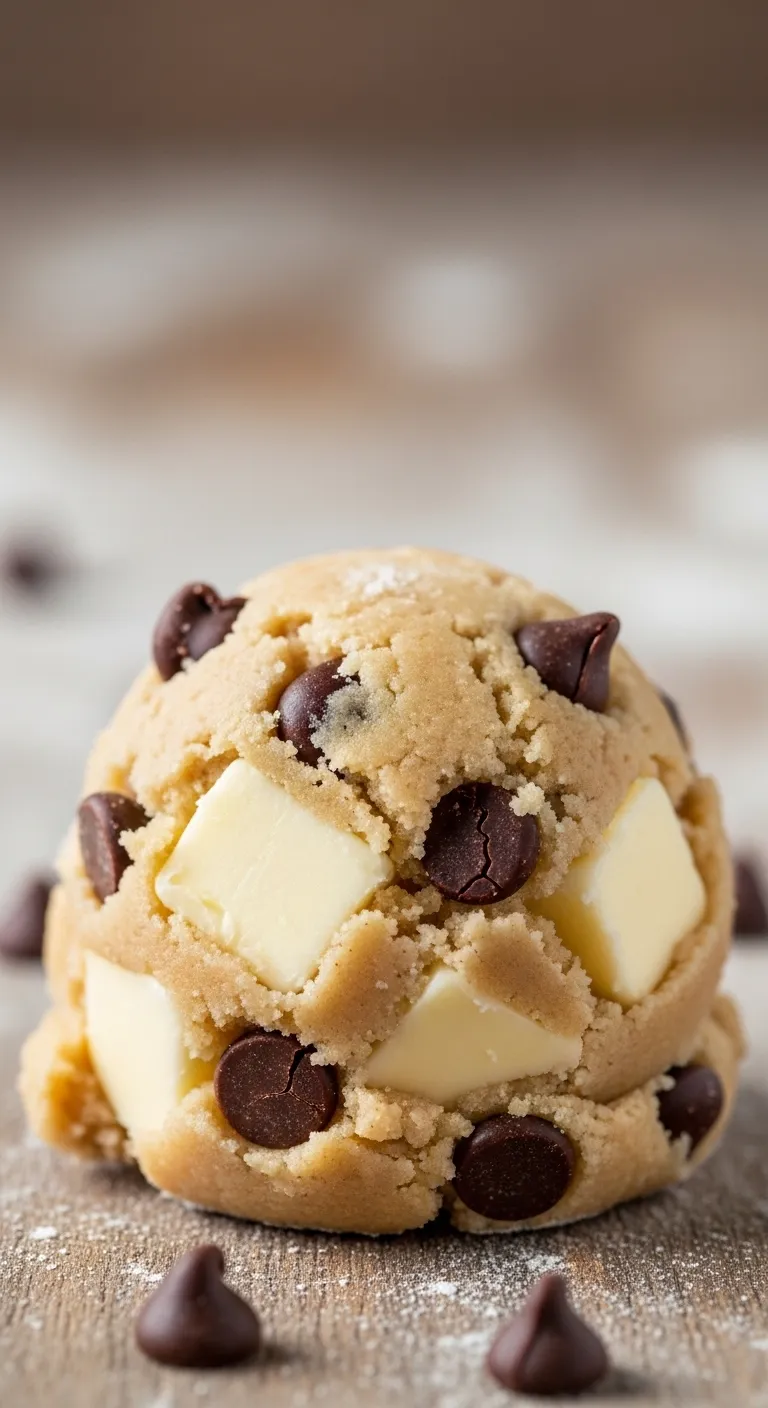
Chilling the dough acts as a pause button. It allows the saturated fats, specifically butter, to solidify completely before hitting the heat.
Chilling cookie dough controls spread. It cools the fat, meaning the cookies will bake solid before the fat melts.
King Arthur Baking Company, Chilling Cookie Dough
The Cool Down
- Scoop before you chill: Cold dough is notoriously difficult to handle. Save your wrists by portioning the dough into balls before placing them in the refrigerator.
- The 24-hour rule: While 30 minutes works in a pinch, resting the dough overnight allows the flour to fully hydrate, creating a deeper, toffee-like flavor and a chewier texture.
- Freezer fast-track: Short on time? Pop your scooped dough into the freezer for 10–15 minutes to solidify the butter quickly without the long wait.
The Science of Fat Solidification
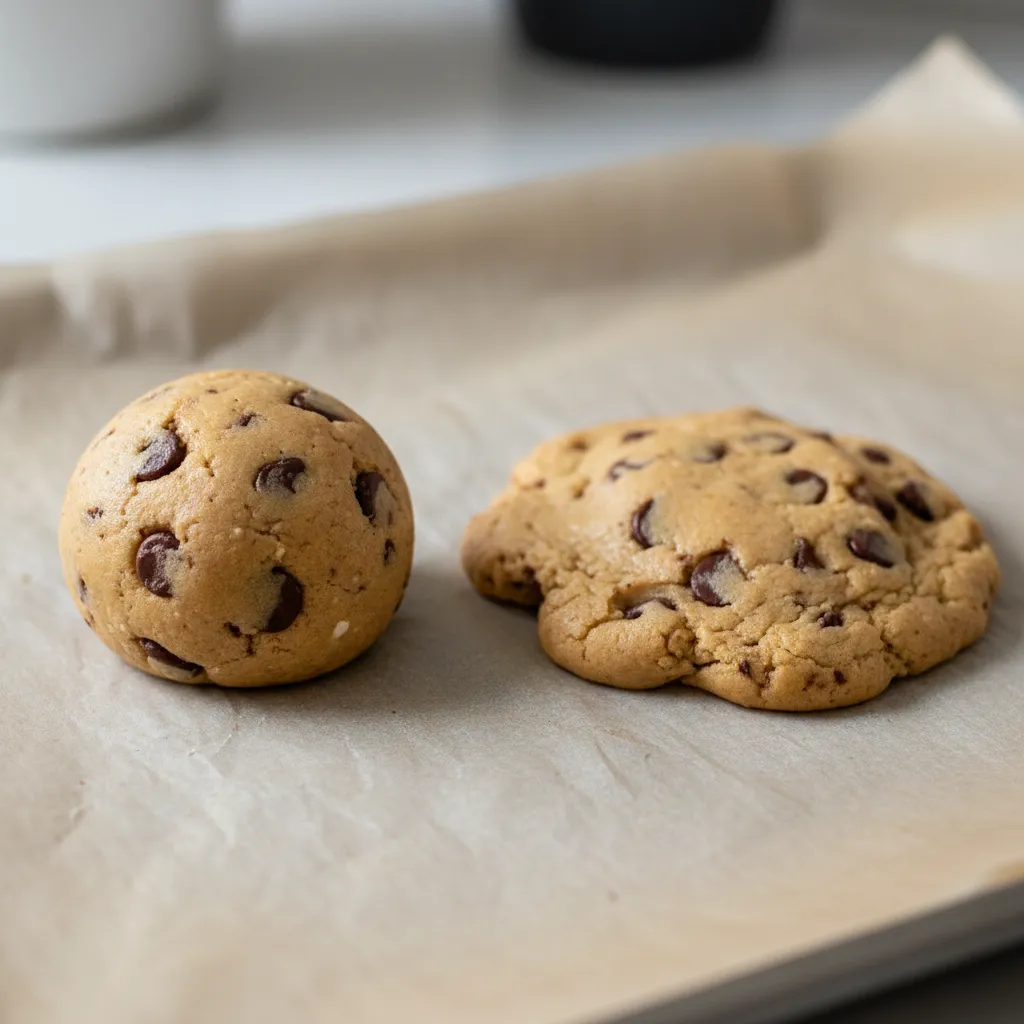
Think of your dough like a structure foundation. If the foundation is liquid, the house collapses. Cold butter provides a sturdy framework.
When chilled dough enters the oven, the butter takes longer to melt. This delay allows the edges of the cookie to set and rise first.
This technique is essential for shape retention. It is the same principle used in our Easy Italian Lemon Ricotta Cookies Recipes: Perfect Domes.
Without chilling, the butter liquefies instantly. The gravity takes over, and the batter spreads outward faster than it can rise upward.
Patience is the secret ingredient that transforms a flat puddle into a thick, chewy masterpiece.
Structure Saviors
- The Freezer Express Hack: Short on time? Pop your scooped dough balls into the freezer for 10–15 minutes while the oven preheats. This “flash chill” hardens the outer shell of butter quickly, preventing the dreaded spread without the long wait.
- The Touch Test: Don’t just rely on the clock. Before baking, press the dough gently. It should feel firm like modeling clay, not soft or sticky. If your finger leaves a greasy dent, send it back to the fridge.
- Batch Management: Never leave your dough bowl sitting on a warm oven top! Keep the main supply of dough in the refrigerator between batches to ensure the last tray turns out just as thick and chewy as the first.
How Long Should You Chill?
The duration of chilling affects both texture and flavor. Even a short chill is better than none, but patience yields better results.
- 30 Minutes: This is the minimum required time. It stabilizes the fat enough to prevent extreme spreading but does not deepen flavor.
- 2 Hours: This is the “Goldilocks” zone. The flour hydrates fully, and the dough becomes easy to handle and shape.
- 24 Hours: This creates intense caramel notes. The enzymes break down carbohydrates, creating a rich, toffee-like flavor profile.
If you are making something spiced, like our Easy Homemade Gingerbread Cookies Recipe, a long chill is non-negotiable.
Baker’s Insider Secret
- Scoop before you chill. If you aim for the 24-hour mark to get those deep caramel notes, portion your dough into balls before refrigerating. Solid, cold dough can be rock-hard and difficult to scoop later!
- In a rush? If you can’t wait the full 30 minutes, pop your dough balls in the freezer for 10–15 minutes. It’s a quick fix to stabilize the fat and prevent spreading, though it won’t develop the flavor as much.
Recipe: The Stabilized Chill-Test Cookie
Use this basic stabilized dough to test if your oven temperature or your fat content is the issue. This recipe relies on the chill for thickness.
Ingredients
- 1 cup unsalted butter, softened slightly but cool
- 1 cup granulated white sugar
- 1 large egg, cold
- 2 tsp pure vanilla extract
- 3 cups all-purpose flour
- 1/2 tsp baking powder
- 1/4 tsp fine sea salt
Instructions
- Beat the butter and sugar in a mixer on medium speed until just combined, about 2 minutes. Do not over-cream or the butter will get too warm.
- Add the cold egg and vanilla extract. Mix on low speed until the egg is fully incorporated into the butter mixture.
- Sift the flour, baking powder, and salt together. Slowly add this to the wet ingredients in three batches, mixing only until no white streaks remain.
- Crucial Step: Divide the dough into two disks. Wrap tightly in plastic wrap and refrigerate for exactly 2 hours.
- Preheat your oven to 350°F (175°C). Line a baking sheet with parchment paper.
- Remove the dough and roll into balls immediately. Place them on the sheet and bake for 10 to 12 minutes until edges are barely golden.
The Baker’s Lab Notes
- Verify your heat source. Since this is a diagnostic recipe, use an oven thermometer to confirm your oven is truly at 350°F. Internal dials can be off by up to 25 degrees, skewing your test results.
- Minimize hand contact. The warmth from your hands can melt the butter before the cookies hit the oven. Roll the dough balls quickly, and if they feel greasy, chill them for another 10 minutes before baking.
- Don’t skip the hydration window. The 2-hour chill isn’t just for temperature; it allows the flour to fully absorb the liquid from the egg and butter, which strengthens the cookie’s structure against spreading.
Oven Environment: Accurate Temperatures and Baking Sheet Choice
Your dough might be mixed to perfection, but the oven environment often dictates the final result. It is the invisible ingredient.
Many home bakers trust the dial implicitly. However, calibration drifts over time. A disparity of twenty degrees changes everything.
If the temperature is too low, the butter melts before the flour structure sets. This leads to greasy, spreading puddles.
The oven is not just a heat source; it is the final ingredient in your cookie recipe.
Calibrating Your Heat Source
Invest in a separate oven thermometer. Place it in the center of the rack to gauge the true ambient heat.
Preheating is also non-negotiable. Allow the oven to cycle fully at least once after the beep sounds.
A thoroughly heated oven ensures the edges of your cookies set immediately. This creates a barrier against spreading.
Avoid opening the door frequently. This causes temperature fluctuations that interrupt the rising process.
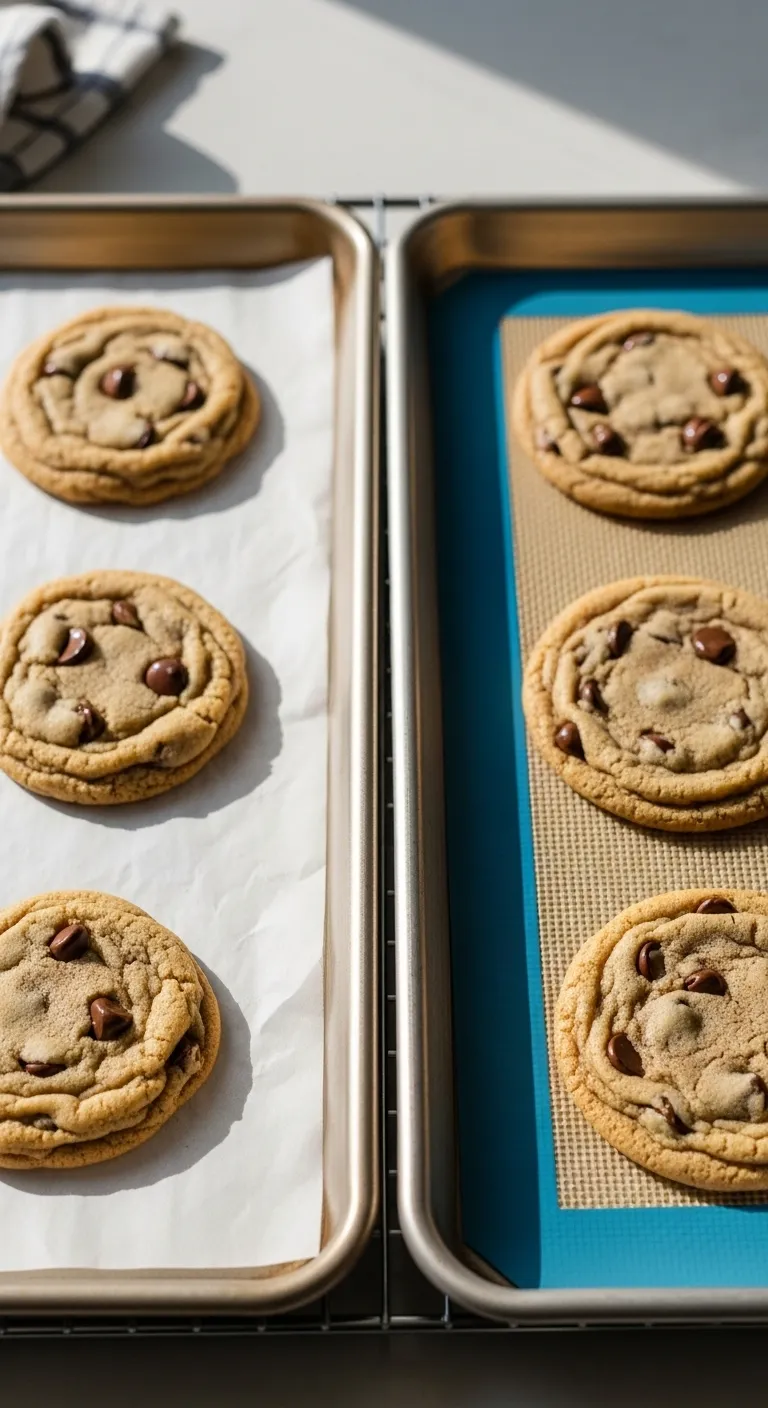
Silicone mats are slicker than parchment paper. This means your cookie dough will spread more easily and bake up flatter.
Tessa Arias, Parchment Paper vs. Silicone Baking Mats
Selecting the Right Baking Surface
The material of your baking sheet drastically affects heat conduction. Not all pans behave the same way in the oven.
Dark metal pans absorb heat rapidly. This promotes faster setting of the bottom crust, which can help prevent spread.
However, dark pans can also lead to burnt bottoms before the center is cooked. Adjust your timing accordingly.
Light aluminum pans reflect heat. They provide a slower, more even bake, which is often safer for delicate doughs.
Similar to the precision needed for our Easy Sugar Cookie Fudge Recipes, your liner choice matters.
Silicone mats are naturally non-stick and slippery. High-fat doughs tend to slide and spread out on this surface.
Parchment paper offers subtle friction. It grips the bottom of the dough, holding it in place as it rises.
If you prefer sturdy shapes like our Easy Homemade Gingerbread Cookies Recipe, parchment is superior.
| Surface Material | Friction Level | Effect on Spread |
|---|---|---|
| Parchment Paper | High | Reduces spread, holds shape |
| Silicone Mat | Low (Slippery) | Increases spread, flatter cookie |
| Greased Pan | Very Low | Maximum spread, crispy edges |
| Ungreased Aluminum | Medium | Moderate spread, even browning |
Control Batch Test Recipe
Use this simple, stable dough to test if your oven or pans are the culprit. It has no leavening agents to confuse the results.
Ingredients
- 1/2 cup salted butter, softened
- 1/4 cup granulated sugar
- 1 cup all-purpose flour
Instructions
Preheat your oven to 350°F (175°C) and verify with a secondary thermometer. Cream the butter and sugar until just combined, not fluffy.
Add the flour and mix until a dough forms. Roll into three balls and place on your chosen baking sheet.
Bake for 12-15 minutes until edges are golden-brown. If these spread flat, your oven temp is too low or the pan is too slick.
Baker’s Bench Notes
- Trust a thermometer, not the dial. Oven thermostats are notoriously inaccurate. Hanging a cheap separate thermometer on the center rack is the only way to guarantee you are baking at the right temperature.
- Compensate for dark pans. If you must use dark metal baking sheets, lower your oven temperature by 25°F. Since dark metal absorbs heat faster, this adjustment prevents burnt bottoms before the centers are fully baked.
- Swap your liner for height. If your cookies are coming out too thin, try switching from silicone mats to parchment paper. The paper provides friction that grips the dough, preventing it from sliding outward and resulting in a thicker cookie.
Panic Button: The Cookie Scoot Trick and Fixing Batter Mid-Bake
The timer beeps and you rush to the oven. Instead of fluffy mounds, you see puddles merging on the tray. Do not panic just yet.
You can salvage the hot batch and fix the remaining dough. Speed is your best friend in this culinary emergency.
Before you scrap the tray, try the viral “cookie scoot” technique. It transforms uneven blobs into perfectly round, bakery-style treats.
The Cookie Scoot Technique
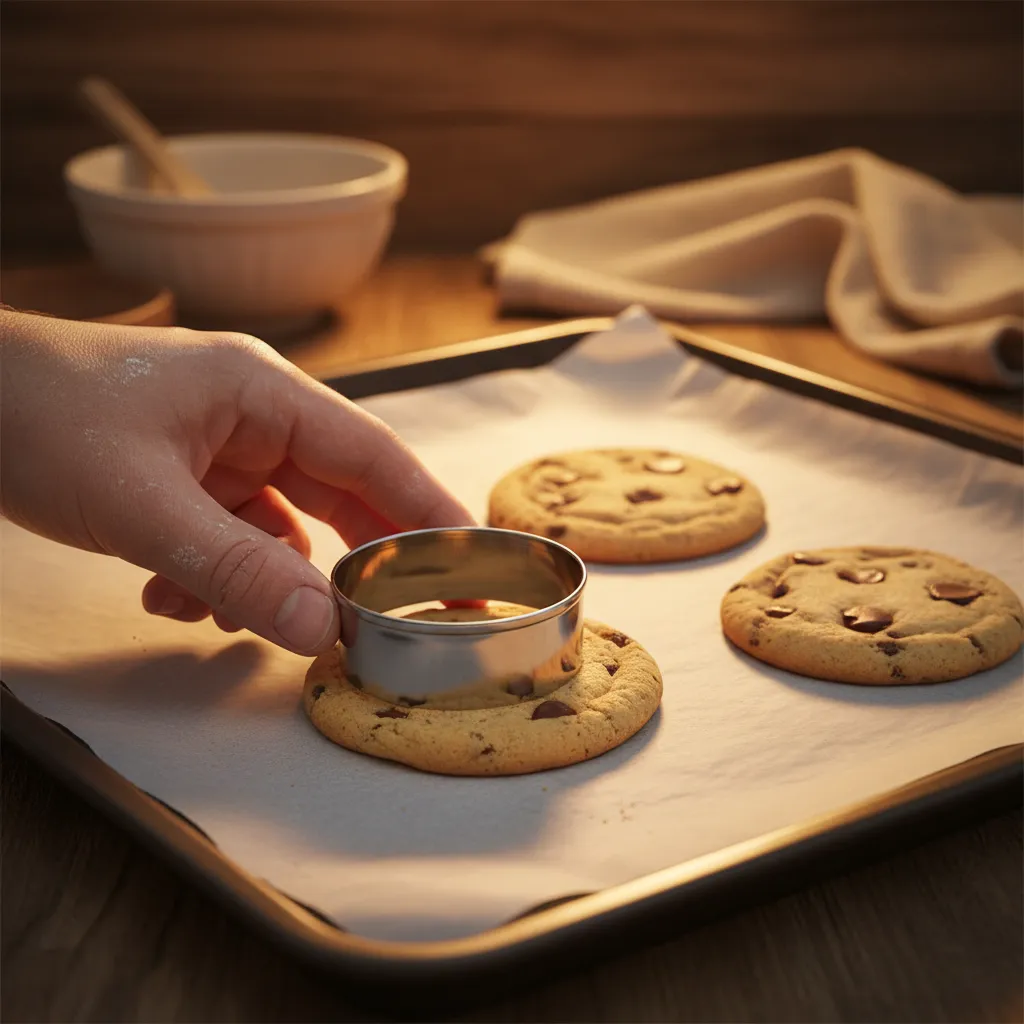
This method works because the cookies are still pliable when they first leave the oven. You must act immediately while the sugars are molten.
You need a round object slightly larger than your cookies. A biscuit cutter, a large glass, or even a mug works perfectly for this.
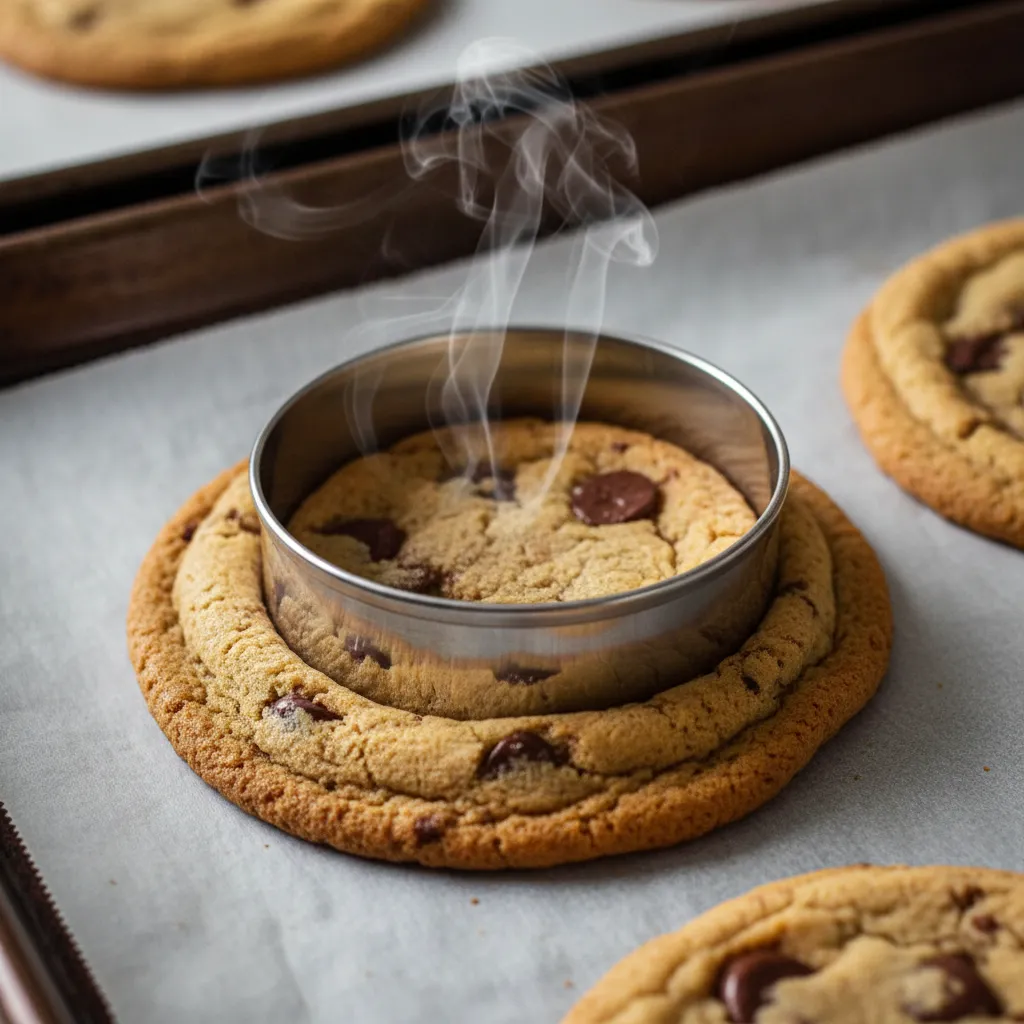
- Remove immediately: Pull the baking sheet from the oven and place it on a heat-safe surface.
- Place the cutter: Set your round cutter or glass over the hot, misshapen cookie. Do not cut into it.
- Swirl gently: Move the cutter in a circular motion around the cookie. Nudge the spreading edges inward.
- Let it set: The centrifugal force pulls the edges in. Allow them to cool completely on the tray to lock in the shape.
A failed cookie is just an opportunity for a delicious transformation. Reshape while hot, and no one will know the difference.
Rescuing the Remaining Batter
If your first tray spread too thin, do not bake the second one yet. The dough likely needs a structural adjustment or a temperature reset.
Denser recipes, like peanut butter blossom cookies, rarely spread because of their fat ratio. Your dough might be too wet or warm.
You can thicken the batter mid-process. Small adjustments make a massive difference in the final texture of the remaining cookies.
If the dough is too soft, refrigerate it. Cold dough spreads less because the fats are solid.
Food Network Kitchen, How to Fix Flat Cookies
Use this troubleshooting guide to decide which amendment your specific dough needs right now.
| The Symptom | The Quick Fix | Why It Works |
|---|---|---|
| Greasy & Wet | Add 1-2 tbsp Flour | Absorbs excess moisture and strengthens the gluten structure immediately. |
| Warm & Sticky | Freeze for 15 min | Solidifies the butter, ensuring it melts slower in the oven. |
| Too Sweet/Lacey | Add 1 tsp Cornstarch | Adds structure without making the cookie tough or cakey. |
| Total Flop | Crumble It | Use broken pieces for sugar cookie fudge recipes instead. |
Always bake a single “test cookie” after making an adjustment. This prevents wasting the entire bowl if the fix needs tweaking.
Baker’s 911
- Wipe the rim: Clean the edge of your glass or biscuit cutter with a paper towel between every few cookies to prevent melted chocolate smears from transferring to the next batch.
- Scoop before chilling: If you use the freezer method to firm up warm dough, form the dough balls before placing them in the cold; scooping a rock-hard block of frozen dough later is incredibly difficult.
- Gentle incorporation: When adding emergency flour or cornstarch, fold it in gently with a spatula rather than using a mixer. This prevents overworking the gluten, which could make your cookies tough instead of just thicker.
Your Path to Cookie Perfection
Remember, patience with your butter is the secret ingredient. Keep it cool to the touch to prevent those greasy puddles.
Don’t forget the power of precision. Weighing your flour ensures your dough has the strength to hold its shape in the oven.
When in doubt, chill it out. A brief stint in the fridge can save even the softest dough and deepen those delicious flavors.
Now that you know the science, you can bake with confidence. Get those trays ready and enjoy the thick, chewy cookies you deserve!
Common Cookie Conundrums
This is usually caused by butter that was too warm or measuring too little flour. When fat melts faster than the structure sets, the cookie spreads thin.
Absolutely. Dark non-stick pans absorb heat rapidly, melting the butter too fast. We recommend heavy-duty, light-colored aluminum sheets for even baking.
You can try adding a tablespoon of flour at a time, but don’t overdo it. The best fix is usually chilling the dough for an hour to solidify that fat.
Yes. Baking soda neutralizes acid and encourages spreading and browning. If you want a puffier, thicker cookie, look for recipes using baking powder.