
Table of Contents
- 1. Adjusting the Flour-to-Molasses Ratio for Your Perfect Texture
- 2. Essential Chilling and Rolling Techniques to Prevent Spreading
- 3. Visual Troubleshooting: Identifying Why Cookies Spread or Cracked
- 4. Customizing the Spice Blend: Balancing Ginger, Cloves, and Cinnamon
- 5. Royal Icing Consistencies: The Secret to Perfect Decoration
- Baking Memories, One Cookie at a Time
- Solving Spiced Dilemmas
There is nothing quite like the aroma of warm spices filling your kitchen to signal that a special season has arrived.
Today we are mastering the art of the perfect gingerbread cookie, ensuring a texture that stays delightfully soft for days. We will banish dry, cardboard-like biscuits forever and replace them with tender, molasses-rich treats that practically melt on your tongue.
Achieving that iconic chewiness requires a specific balance of ingredients, particularly the ratio of dark molasses to brown sugar. I will guide you through the science of chilling your dough, which is the secret to maintaining distinct shapes without sacrificing tenderness.
Trust the process, because even a small adjustment in baking time can make the difference between a brittle snap and a luxurious chew.
These cookies are not just a dessert; they are a canvas for your creativity and a gift of love for your friends and family.
Whether you decorate them with intricate royal icing or enjoy them plain with a glass of cold milk, the robust spice profile speaks for itself. Let us preheat our ovens and create a batch that is sure to become a cherished tradition in your home.
1. Adjusting the Flour-to-Molasses Ratio for Your Perfect Texture
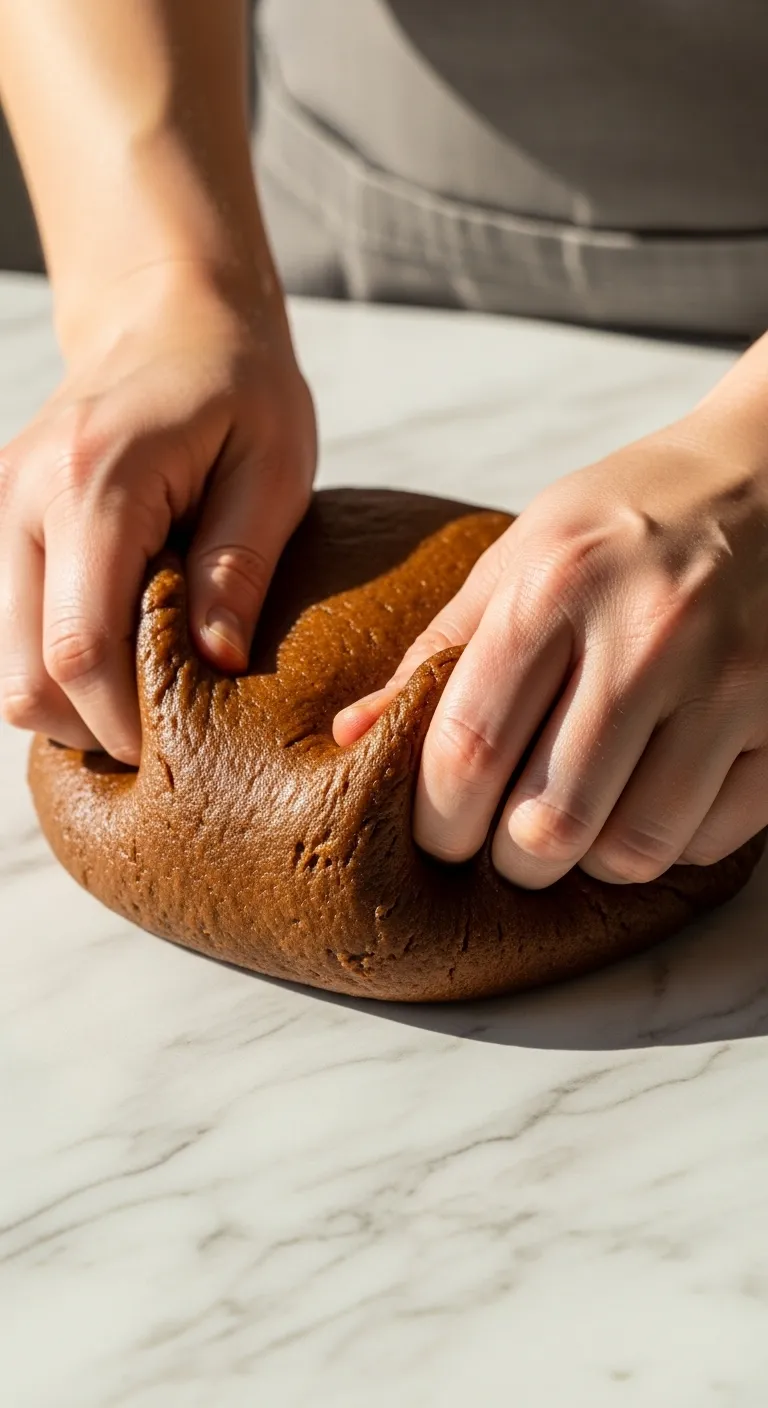
Achieving the perfect gingerbread cookie is not magic. It is simple chemistry. The balance between dry flour and sticky molasses dictates the bite.
Too much flour creates a dense, tough cookie. This is often the result of scooping directly from the bag. It packs the flour down tightly.
Conversely, an excess of molasses causes the dough to spread. The cookies may lose their shape in the oven. Precision here is absolute key.
Baking is a conversation between ingredients. Listen to what the dough tells you through its texture.
Baker’s Secret
- Weigh for the win. For the most consistent texture, use a kitchen scale to measure your flour in grams. If you must use cups, always use the spoon-and-level method to avoid packing the flour down.
- Slick solution. Molasses clings to measuring cups, which can throw off your ratio. Lightly coat your cup with non-stick spray or a drop of oil so the syrup slides right out.
- The thumb test. Press the mixed dough lightly. If it cracks, it is too dry; if it clings to your skin, it needs a dusting more flour. It should feel pliable like modeling clay.
Understanding Dough Consistency
The texture you desire requires a specific ratio tweak. You might want a sturdy structural cookie or a soft, pillowy treat for the holidays.
For those who love sugar cookie recipes that are sweet perfection, you likely enjoy a softer bite. Gingerbread can mimic this.
Adjusting your ingredients slightly changes the outcome dramatically. Use the chart below to guide your measurements for your ideal palate.
| Desired Texture | Flour Adjustment | Molasses Adjustment | Result |
|---|---|---|---|
| Structural / Crispy | Increase by 2 tbsp | Standard Amount | Hard snap, holds shape well. |
| Soft / Chewy | Standard Amount | Increase by 1 tbsp | Bends slightly, moist crumb. |
| Cakey / Puffy | Decrease by 1 tbsp | Standard Amount | Light, airy, rises higher. |
One of the most common mistakes is measuring flour… scooping the measuring cup directly into the flour bag will firmly pack the flour.
Sally McKenney, Sally’s Baking Addiction
If your dough feels too crumbly, do not panic. Add molasses one teaspoon at a time. Knead it gently until it comes together into a smooth ball.
If the dough is sticky, chilling is better than adding flour. Cold dough is easier to handle. This technique preserves the deep flavor profile.
Mastering this ratio prepares you for 30 must-try recipes for fall flavors. A good base dough is versatile.
Baker’s Secrets
- Always use the spoon-and-level method for flour. Scooping the cup directly into the bag packs the flour down, often resulting in dry, rock-hard cookies.
- Resist the urge to add extra flour to sticky dough! Instead, chill it for 20 minutes. This firms up the fats for easier rolling without diluting the rich molasses flavor.
- Unsure about your consistency? Bake a single test cookie first. If it spreads too much, the dough needs more chilling; if it stays too stiff, allow it to warm slightly.
2. Essential Chilling and Rolling Techniques to Prevent Spreading
Achieving the perfect gingerbread shape starts long before the cookies hit the oven. The secret lies in temperature control. If your dough is too warm, your carefully cut shapes will spread into unrecognizable blobs.
Proper hydration allows the dry ingredients to fully absorb the liquid. This process creates a sturdy structure that holds up during baking. The spices also need time to meld with the fats for a deeper flavor profile.
Patience is the secret ingredient. The magic of gingerbread happens while the dough rests in the cold.
The Science Behind the Chill
Chilling your dough serves a dual purpose in baking. First, it solidifies the butter. This ensures the fat melts slowly in the oven, which locks the cookie’s structure in place before it can spread.
Second, the resting period relaxes the gluten network. Relaxed gluten prevents the dough from shrinking or snapping back while you roll it. This is similar to the resting techniques used for classic sugar cookie recipes to ensure precise edges.
Chilling cookie dough controls spread. Cooler fat takes longer to melt in the oven. And the longer the fat remains solid, the less your cookies spread.
PJ Hamel, King Arthur Baking: Why you should chill your cookie dough
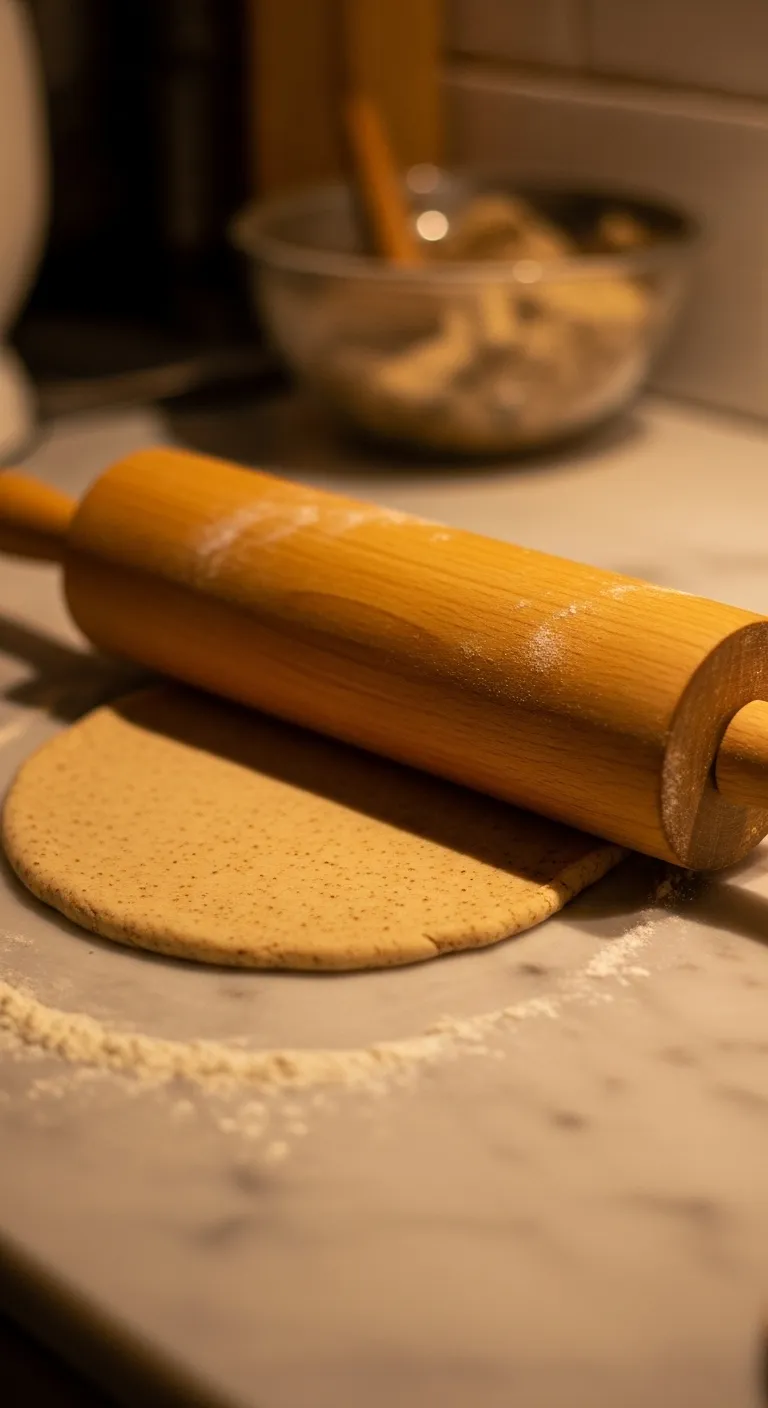
Precision Rolling Techniques
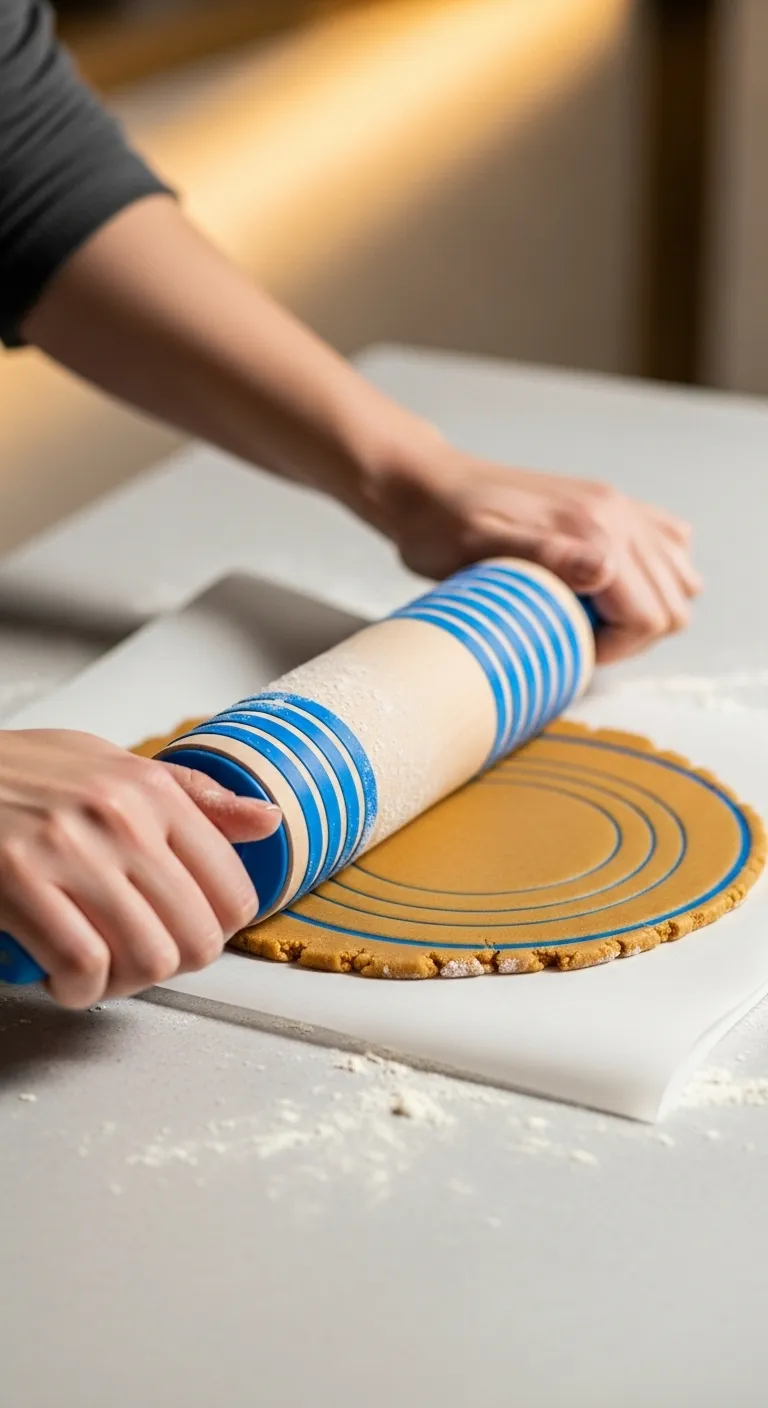
To avoid adding excess flour, roll your dough between two sheets of parchment paper. This method prevents sticking without drying out the mixture. It also makes transferring the rolled sheet to the freezer much easier.
Uniform thickness is vital for even baking. If some cookies are thin and others thick, you will end up with burnt edges and raw centers. Use rolling pin guide rings or wooden dowels to maintain a consistent height.
If you enjoy baking structured treats like structured chocolate chip cookies, you know that texture is everything. For gingerbread meant for decorating, roll the dough to exactly one-quarter inch thick.
Troubleshooting Common Spreading Issues
Even with the best recipe, environmental factors can cause issues. Use this guide to identify why your cookies might be losing their shape.
| Issue | Likely Cause | Quick Fix |
|---|---|---|
| Undefined Edges | Dough was too warm | Freeze cut shapes for 10 minutes before baking. |
| Bubbled Surface | Over-mixing the dough | Mix on low speed only until combined. |
| Excessive Spread | Greased baking sheet | Use silicone mats or parchment paper instead. |
| Uneven Browning | Inconsistent rolling | Use 1/4 inch guide sticks for uniformity. |
Ingredients
- 1 cup (227g) unsalted butter, softened
- 1 cup (200g) granulated sugar
- 1 cup (340g) unsulphured molasses
- 1 large egg, room temperature
- 5 cups (625g) all-purpose flour
- 1 tsp baking soda
- 1/2 tsp salt
- 4 tsp ground ginger
- 4 tsp ground cinnamon
- 1 tsp ground cloves
Instructions
- Cream the Fats: In a large bowl, beat the butter and sugar until light and fluffy, about 2 minutes. Do not overbeat, as too much air can cause spreading.
- Add Wet Ingredients: Mix in the molasses and egg until fully combined. Scrape down the sides of the bowl to ensure even mixing.
- Combine Dry Ingredients: In a separate bowl, whisk together the flour, baking soda, salt, ginger, cinnamon, and cloves.
- Form the Dough: Gradually add the dry mixture to the wet ingredients on low speed. Stop mixing as soon as no flour streaks remain.
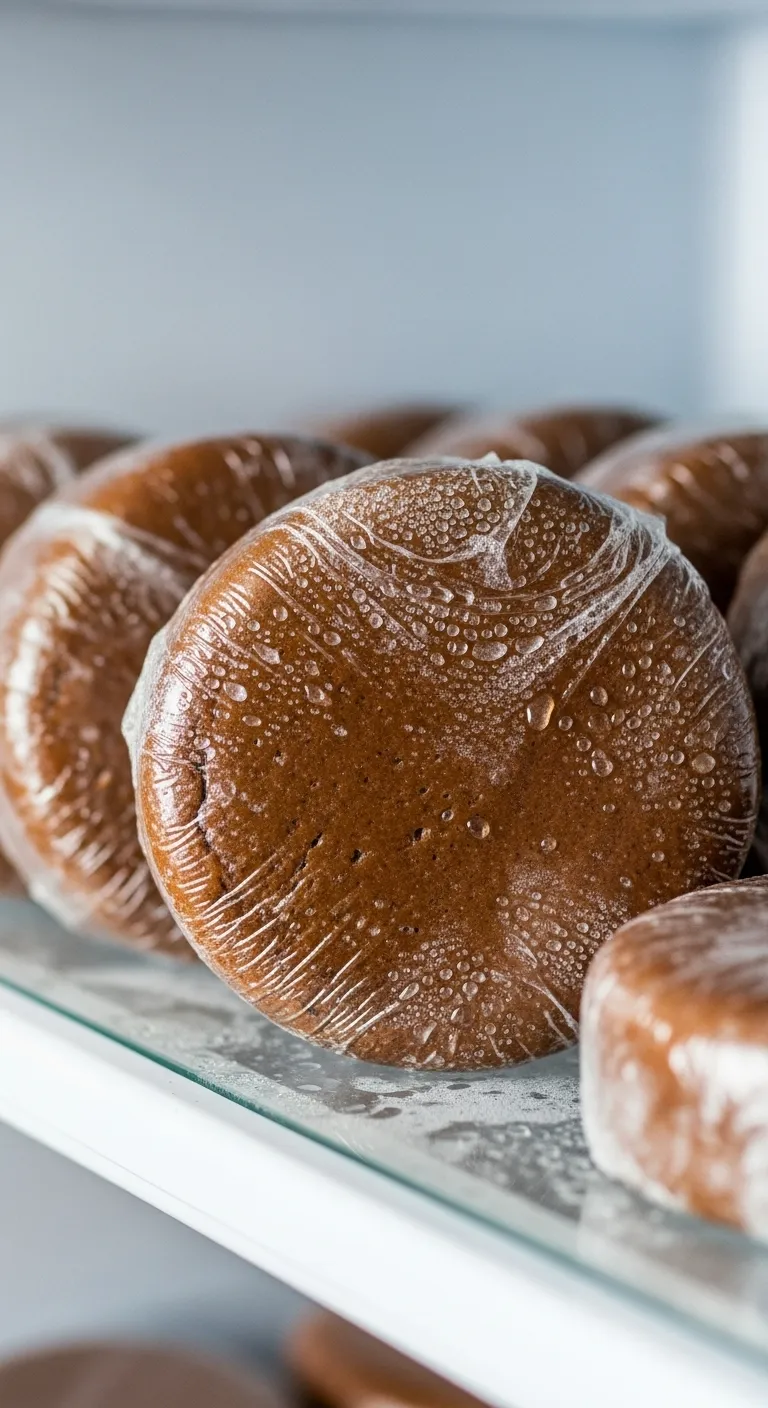
- Chill: Divide the dough into two discs. Wrap each tightly in plastic wrap. Refrigerate for at least 3 hours, or overnight for best flavor.
- Roll and Cut: Remove one disc at a time. Roll between parchment paper to 1/4 inch thickness. Chill the rolled sheet for 10 minutes before cutting shapes.
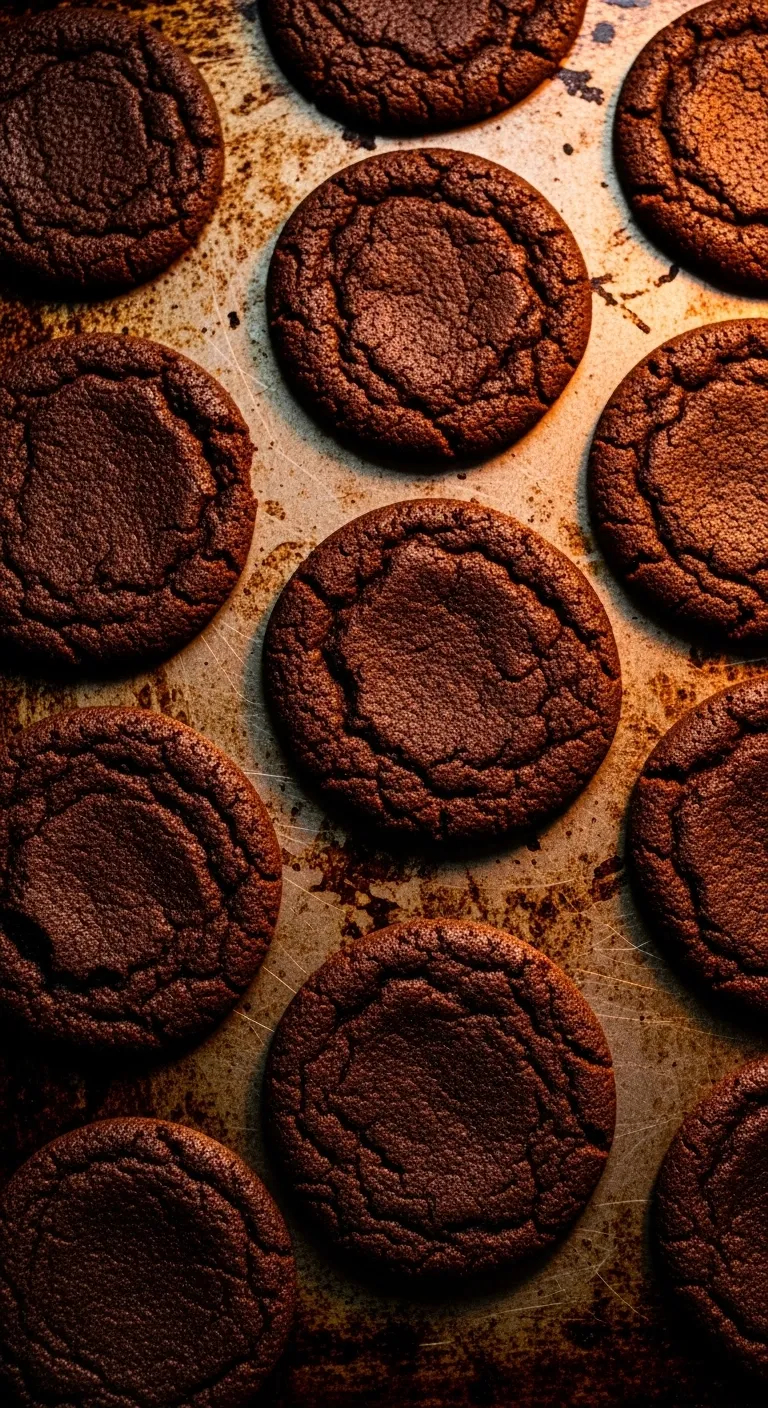
- Bake: Preheat oven to 350°F (175°C). Place shapes on a parchment-lined sheet. Bake for 8-10 minutes until edges are set.
The No-Spread Secret
- The Freezer Flash: After cutting out your shapes, place the entire baking sheet in the freezer for 10 minutes before putting it in the oven. This ensures the butter is solid when baking begins, locking in those sharp edges.
- The Parchment Sandwich: Roll your dough between two sheets of parchment paper rather than dusting your counter. This prevents the dough from absorbing excess flour, which can make gingerbread dry and tough.
- DIY Thickness Guides: If you don’t have rolling pin rings, place two 1/4-inch wooden dowels (or clean rulers) on either side of your dough to act as tracks for your rolling pin, guaranteeing perfectly even cookies.
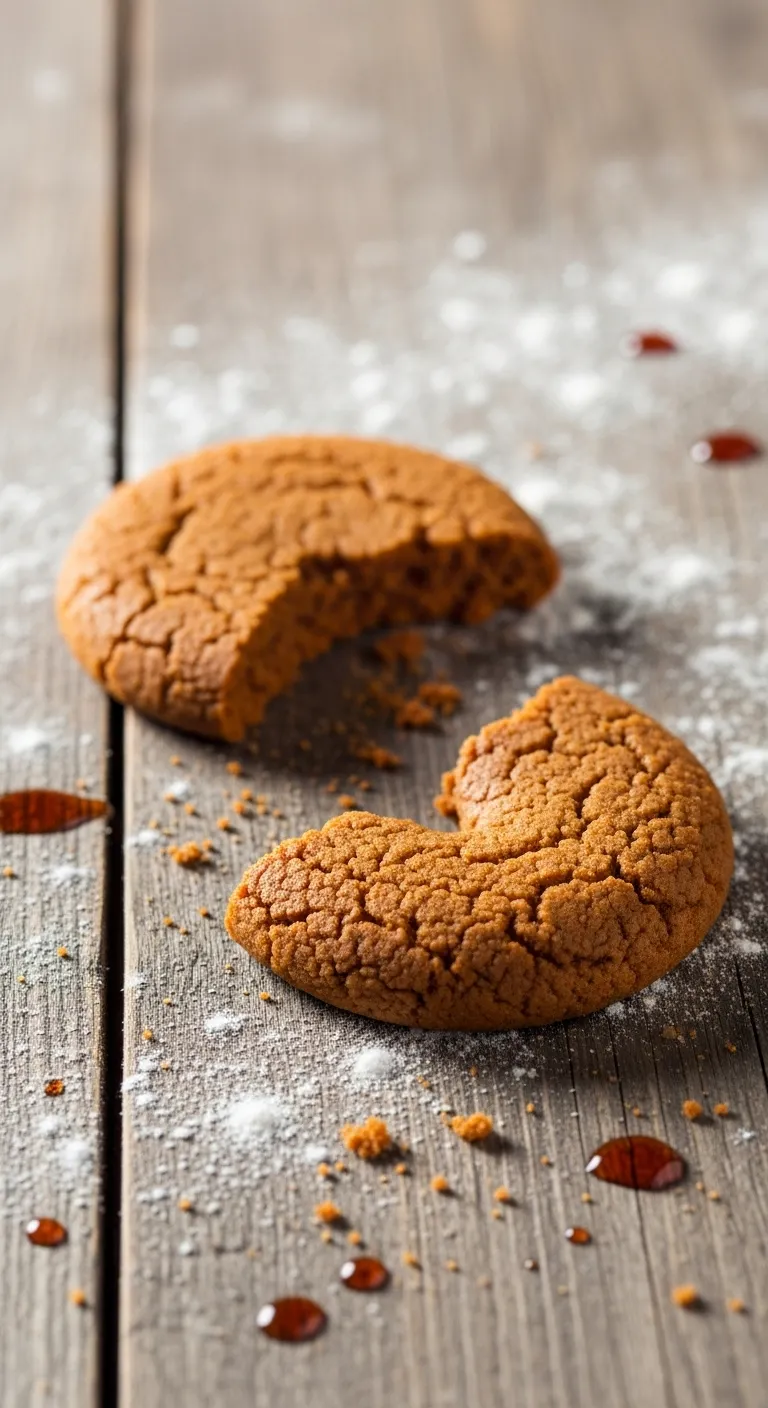
3. Visual Troubleshooting: Identifying Why Cookies Spread or Cracked
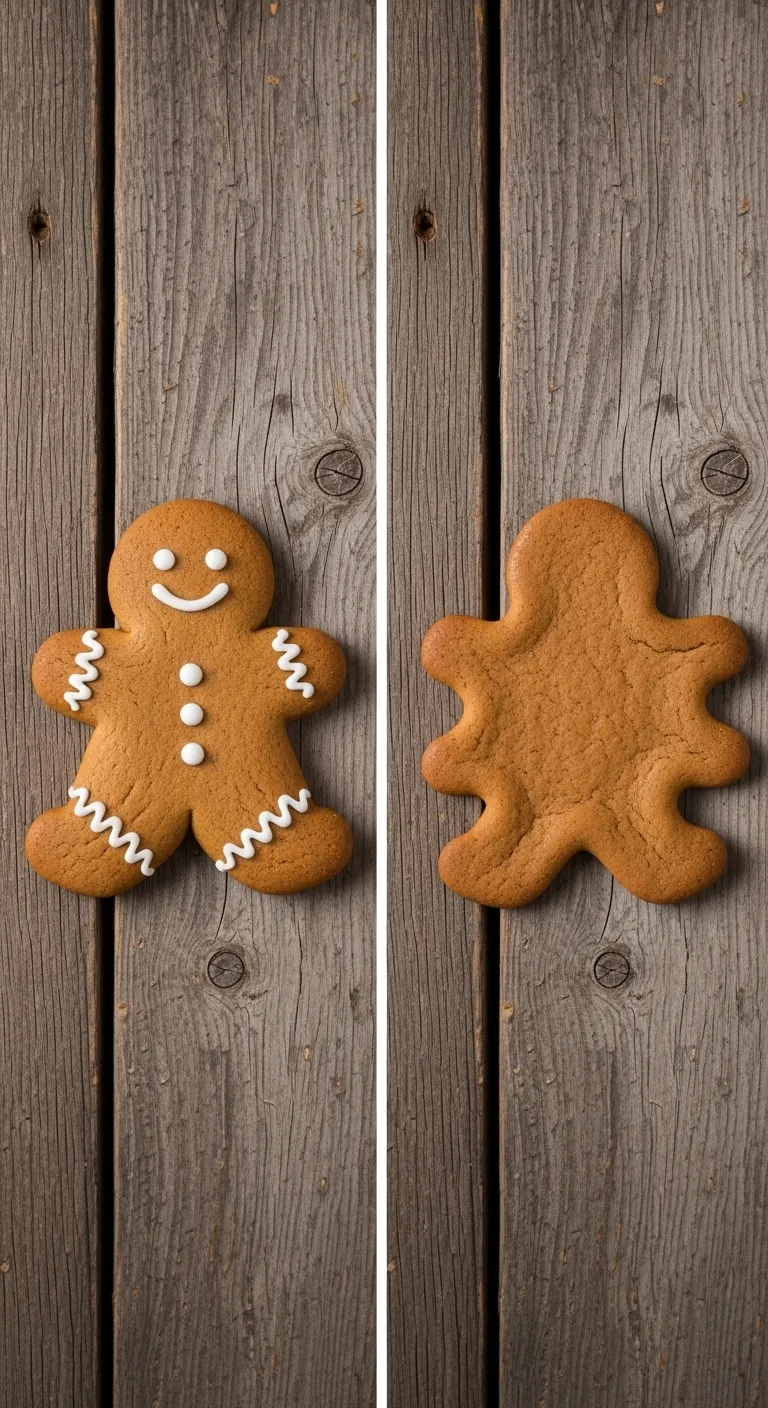
We have all been there. You pull your tray from the oven, expecting crisp shapes. Instead, you find a merged sheet of brown dough. It is heartbreaking.
Gingerbread is temperamental. It relies heavily on the ratio of fat to flour and the temperature of your dough. Small variables make big changes.
Baking is a science of precision, but gingerbread is an art of patience and timing.
Why Your Cookies Spread Too Much
The dreaded “puddle” effect usually comes down to temperature. If your butter was melted rather than softened, the structure collapses early in the oven.
Warm dough is another culprit. You must chill your cutouts before baking. This solidifies the fat, ensuring the cookie sets its shape before melting.
Excess leavening agents can also cause spreading. Double-check that you did not mistake baking powder for baking soda. They react differently.
If you love soft centers like in our 20 Chocolate Chip Cookies You’ll Love, remember that gingerbread needs more structure to hold intricate shapes.
Why Your Cookies Cracked or Are Dry
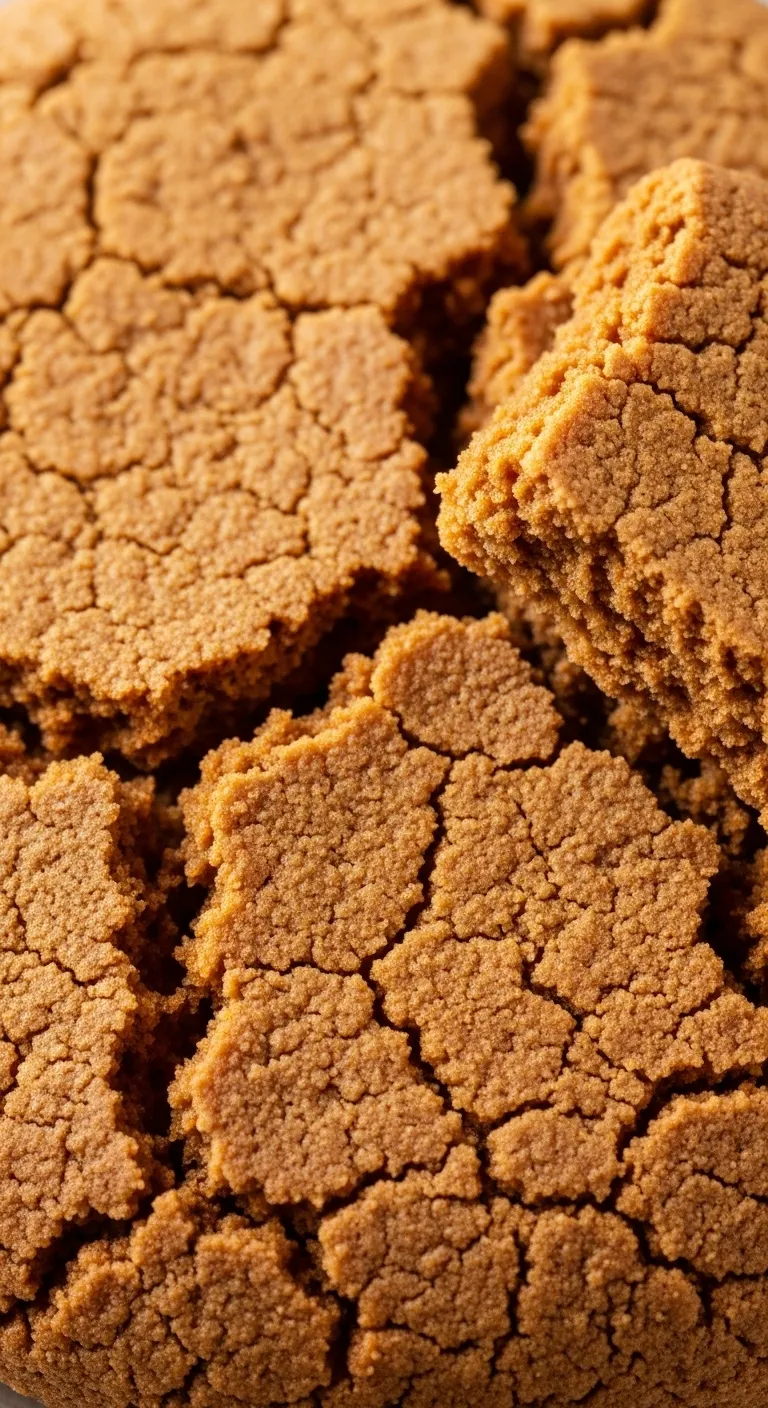
Cracks usually signal that the dough is too dry. This often happens if you scoop flour directly with the measuring cup, packing it down tight.
Too much flour creates a sandy texture. Always spoon your flour into the cup and level it off. This keeps the measurement light and accurate.
Overworking the dough develops gluten. This makes the cookies tough and prone to shrinking or cracking as they cool. Handle the dough gently.
Rolling the dough too thin can also lead to cracking. Aim for a quarter-inch thickness for a sturdy cookie that stays soft in the middle.
If your dough cracks when you roll it, it may be too cold. Let it sit at room temperature for 5 to 10 minutes to become pliable again.
The Test Kitchen, Cookie Baking Guide
Quick Fix Checklist
Diagnose your baking issues quickly with this reference guide. It helps you adjust your next batch for better results.
| Visual Issue | Likely Cause | The Fix |
|---|---|---|
| Undefined Edges | Dough too warm | Freeze cut shapes for 10 mins |
| Hard & Crumbly | Too much flour | Add 1 tsp milk or molasses |
| Bumps on Surface | Butter not mixed | Cream butter/sugar longer |
| Dark Bottoms | Dark baking sheet | Reduce oven temp by 25°F |
Mastering these variables takes practice. It is similar to learning the nuances of fermentation in our Ultimate Sourdough Starter Troubleshooting Guide & Fixes.
Test Kitchen Secrets
- Flash freeze for sharp edges. Pop your baking sheet with the cut shapes into the freezer for 10 minutes immediately before baking to lock the butter in place and prevent spreading.
- Skip the extra flour. Roll your dough between two sheets of parchment paper to prevent sticking; this avoids adding excess flour that leads to dry, cracked surfaces.
- Rescue dry dough. If your mixture is too crumbly to roll, knead in a teaspoon of molasses or milk to rehydrate it rather than forcing it, which creates deep cracks.
4. Customizing the Spice Blend: Balancing Ginger, Cloves, and Cinnamon
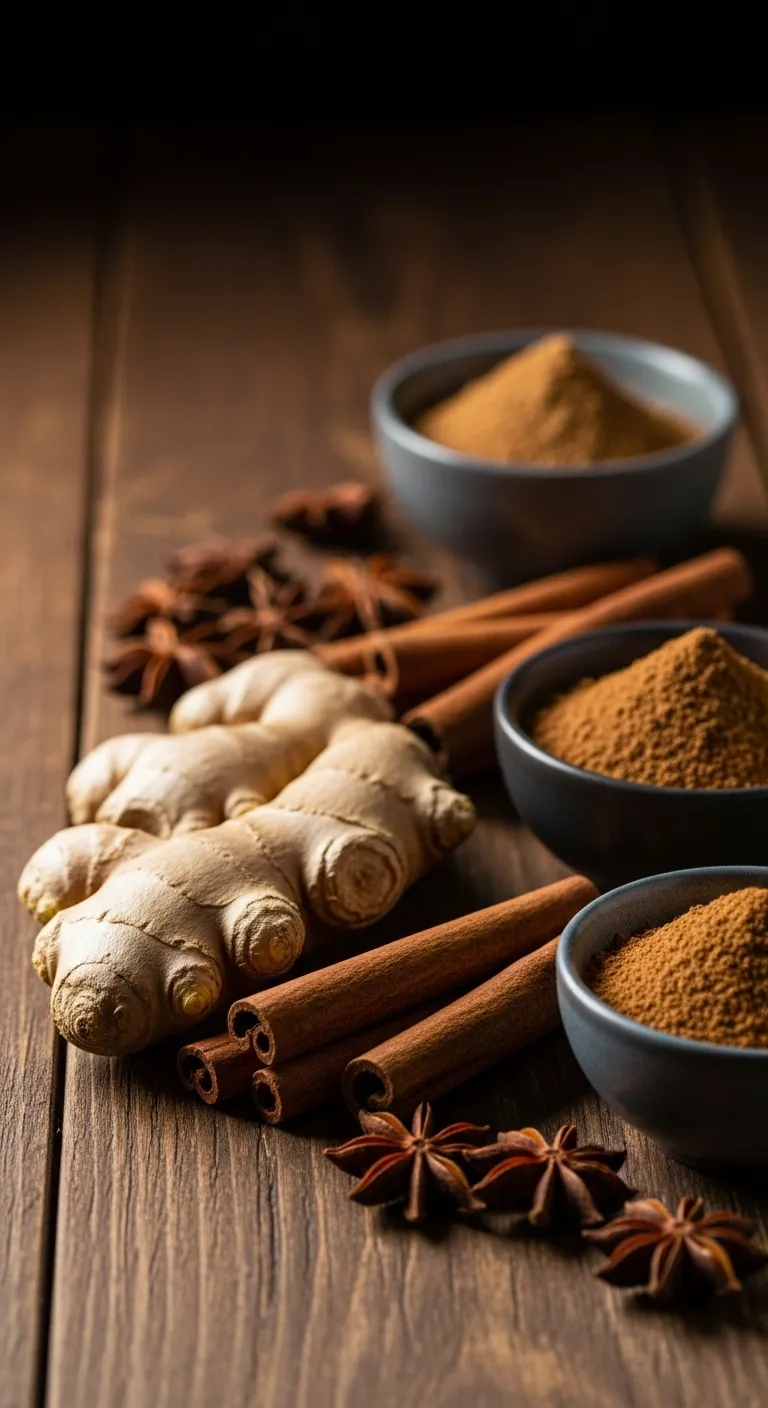
The soul of any gingerbread cookie lies directly in its spice blend. While molasses provides the texture, the spices create the memory.
Finding the perfect balance between heat, warmth, and earthiness allows you to tailor the recipe to your family’s specific palate.
Some bakers prefer a fiery kick that lingers on the tongue. Others enjoy a milder, sweeter profile that pairs well with vanilla icing.
A great gingerbread cookie should warm you from the inside out, with a spice blend that tells a story of comfort.
Understanding the “Holy Trinity” of Spices
The flavor profile of classic gingerbread relies on three primary components. Understanding the role of each helps you customize your dough.
Ginger is the powerhouse. It provides the signature heat and “bite” that cuts through the rich molasses. More ginger means a spicier cookie.
Cinnamon acts as the bridge. It offers a sweet, woody warmth that rounds out the sharp edges of the ginger.
Cloves provide the bass notes. They are numbing, slightly bitter, and intensely aromatic. A little goes a very long way.
These warming ingredients are the backbone of many must-try recipes for fall flavors, making this blend versatile beyond just cookies.
Spice Ratio Guide
Use this table to determine the starting ratio for your dry mix based on your flavor preference. These ratios assume 3 cups of flour.
| Flavor Profile | Ground Ginger | Ground Cinnamon | Ground Cloves |
|---|---|---|---|
| Kid-Friendly (Mild) | 1 tsp | 2 tsp | 1/4 tsp |
| Classic Bakery | 2 tsp | 1.5 tsp | 1/2 tsp |
| Spicy & Robust | 1 tbsp | 1 tsp | 3/4 tsp |
| Exotic Twist | 2 tsp | 1 tsp | 1/2 tsp (+ 1/4 tsp Cardamom) |
Spices lose their potency over time. For the best flavor, check the expiration dates on your spices and replace them if they don’t have a strong aroma.
The McCormick Kitchens, Spice Storage Guide
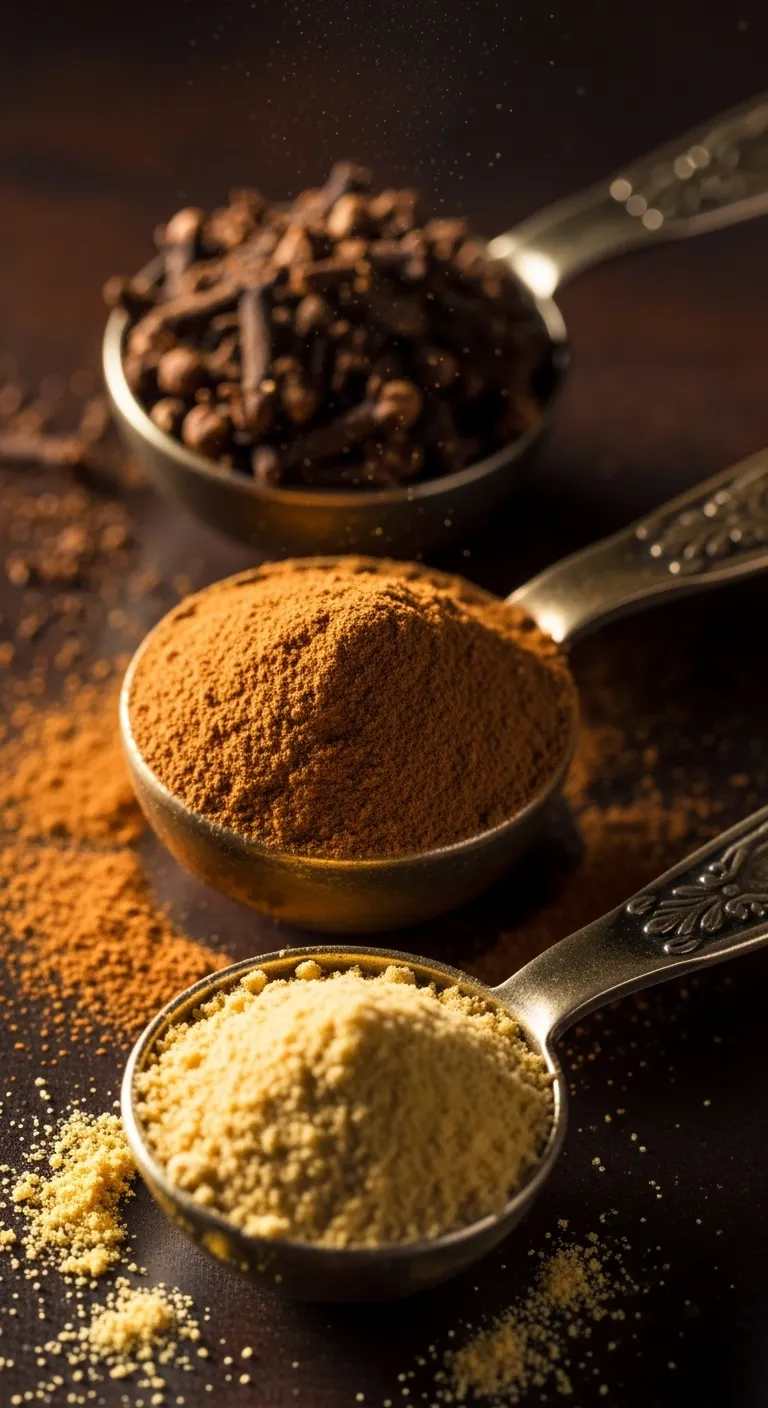
Master DIY Gingerbread Spice Blend
Mixing your own blend in bulk saves time during the busy holiday baking season. This recipe yields enough for 3 to 4 separate batches of cookies.
Ingredients
- 4 tbsp ground ginger
- 3 tbsp ground cinnamon
- 1 tbsp ground cloves
- 1 tsp ground nutmeg (optional, for nuttiness)
- 1/2 tsp ground allspice
- 1/4 tsp finely ground black pepper (the secret ingredient for heat)
Instructions
- Measure all spices carefully into a small mixing bowl. Precision is key to maintaining the balance.
- Whisk the spices together vigorously for 60 seconds to ensure the cloves and pepper are evenly distributed throughout the ginger and cinnamon.
- Transfer the mixture to a small, airtight glass jar. Label the jar with the date.
- Store in a cool, dark cupboard. Shake the jar well before each use to redistribute the oils.
- Usage: Use 1 tablespoon of this blend for every 3 cups of flour in your favorite cookie recipe.
You can also stir a teaspoon of this blend into your morning coffee or oatmeal. It is a simple way to utilize those leftover ingredients in your pantry, though typically we associate leftovers with savory meals.
Baker’s Spice Secrets
- To ensure your cookies pack a punch, perform a quick sniff test before mixing. Rub a pinch of spice between your fingers; if the aroma isn’t immediate and intense, replace the bottle or increase the amount by 25% to compensate for flavor loss.
- Want the heat without the bitterness? If you prefer the Fiery Kick profile, try adding a pinch of white or black pepper. This enhances the ginger’s bite at the back of the throat without overpowering the delicate cinnamon notes.
- Don’t let your custom bulk blend go to waste! Stir a teaspoon into morning oatmeal, latte foam, or pancake batter to enjoy the warming comfort of the holidays long after the cookies are gone.
5. Royal Icing Consistencies: The Secret to Perfect Decoration
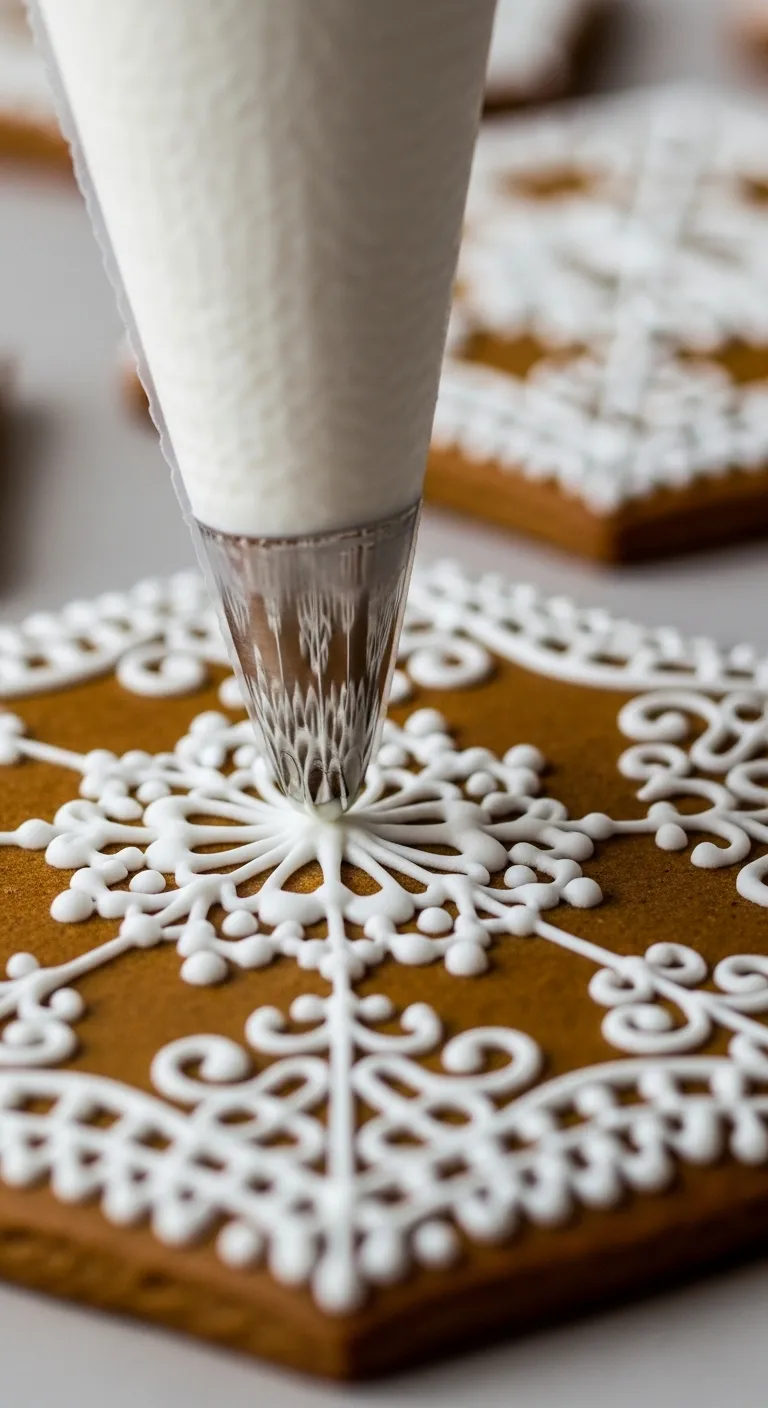
Royal icing acts as both the glue and the paint for your edible canvas. It transforms a rustic cookie into a piece of art.
Getting the texture right is actually more important than the recipe itself. The flavor is simple, but the physics are complex.
Many beginners struggle because they try to use one thickness for everything. This leads to runny outlines or lumpy fills.
To achieve professional results, you must master water control. A few drops can change the icing from mortar to glaze.
Royal icing is the magic that turns a simple baked good into a storybook character.
Mastering the Three Key Stages
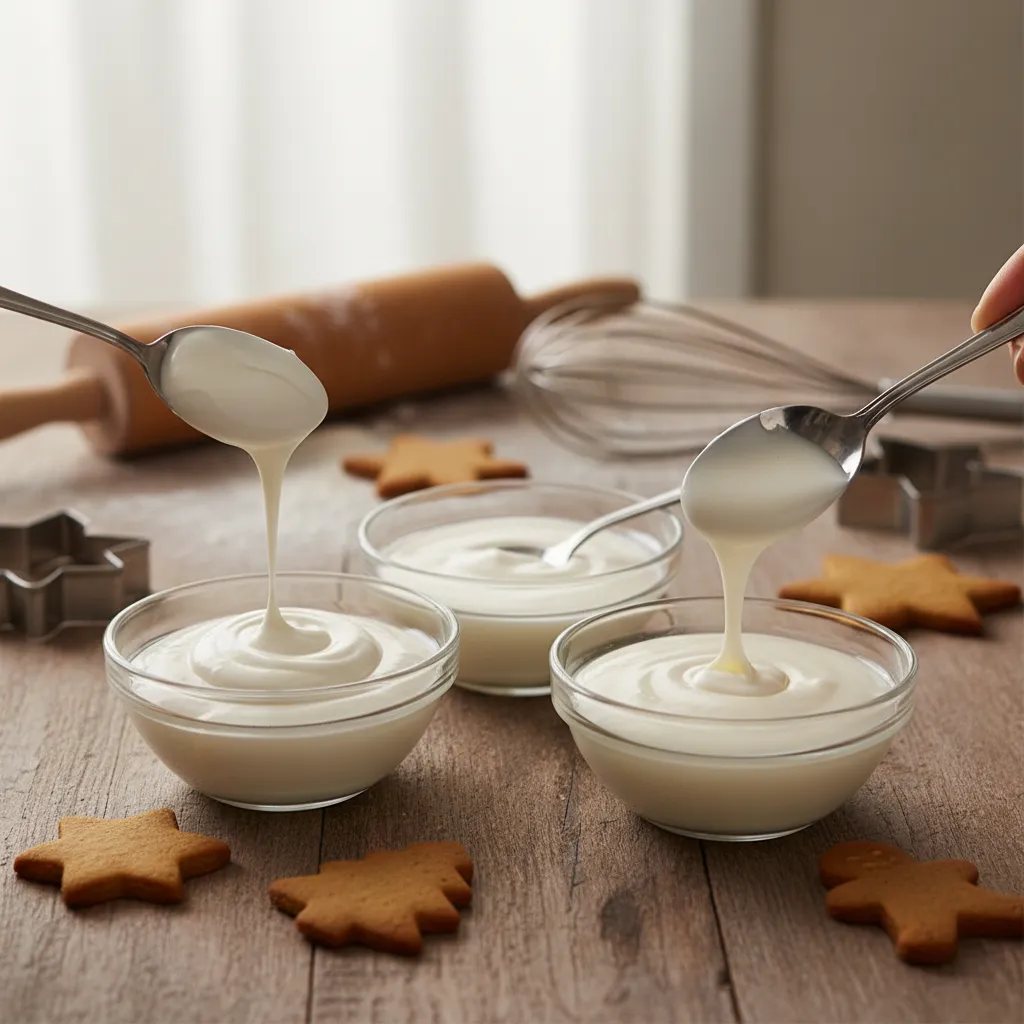
1. Stiff Consistency (The Mortar)
This texture resembles thick toothpaste or spackle. It holds a stiff peak that does not curl over when you lift the whisk.
Use this for constructing gingerbread houses or piping 3D flowers. It acts as a heavy-duty adhesive that dries rock hard.
2. Piping Consistency (The Outline)
Think of this stage as soft-serve ice cream or yogurt. When you pull the spoon up, the peak curls over gently but does not melt back.
This is used for outlining cookies and adding details. It creates a dam that holds the thinner icing inside.
3. Flood Consistency (The Filler)
This is akin to heavy cream or shampoo. If you run a knife through it, the line should disappear in about 15 seconds.
Use this to fill in the areas defined by your piping consistency. It settles into a smooth, glass-like finish.
If you choose to make icing with raw eggs instead of powder, you might end up with extra yolks. Check out what to do with leftover egg whites recipes for ideas on how to manage your ingredients efficiently.
Troubleshooting Common Icing Issues
Even experienced decorators encounter issues with humidity and mixing. Use this guide to fix problems instantly.
| Problem | Likely Cause | Quick Fix |
|---|---|---|
| Air Bubbles | Over-whipping the meringue. | Let bowl sit for 10 mins; tap on counter. |
| Dull Finish | Dried too slowly or humidity. | Place cookies in front of a gentle fan. |
| Colors Bleed | Base layer wasn’t fully dry. | Wait longer between flooding colors. |
| Cratering | Over-thinning the icing. | Add more sifted sugar to thicken it. |
The 15 to 20 second count is the magic number for flood consistency icing. If it smooths out faster, it’s too thin; slower, and it’s too thick.
Callye Alvarado, The Twenty Second Rule
Ingredients
- 4 cups (480g) confectioners’ sugar, sifted
- 3 tbsp meringue powder
- 1/2 cup warm water (plus more for thinning)
- 1 tsp clear vanilla extract
Instructions
- Combine Dry Ingredients: In a large grease-free bowl, whisk together the sifted confectioners’ sugar and meringue powder until combined.
- Add Liquids: Add the warm water and vanilla extract. Beat on medium-high speed with a hand mixer or stand mixer for 5 to 7 minutes.
- Check Textures:
. This is your base “Stiff” consistency. - Divide and Color: Separate the icing into different bowls for your colors. Cover any unused icing immediately with a damp cloth to prevent crusting.
- Thin for Flooding: To create flood icing, add water 1/2 teaspoon at a time. Stir gently to avoid creating air bubbles. Aim for the “15-second consistency.”
Decorator’s Cheat Sheet
- Use a spray bottle filled with water to thin your icing instead of a spoon. A fine mist allows for micro-adjustments, preventing you from accidentally adding too much liquid and ruining the consistency.
- To achieve a high-gloss, professional shine, place your decorated cookies in front of a gentle fan immediately after flooding. Rapid drying helps set the surface quickly, preventing a dull, matte finish.
- Prevent your icing from crusting over while you work by placing a damp paper towel directly on the surface of the icing in the bowl, or wrap a wet cloth around the tip of your piping bag when setting it down.
Baking Memories, One Cookie at a Time
Baking the perfect gingerbread is about understanding the conversation between flour and molasses. It is chemistry you can taste.
Remember to chill your dough thoroughly. This simple step preserves those intricate shapes and ensures the perfect snap or chew.
Whether you prefer them crispy or soft, your kitchen now holds the scent of the holidays. Share these spiced treasures with love.
Solving Spiced Dilemmas
Spreading often happens if the dough was too warm or contained too much molasses. Chill the dough again before baking to set the structure.
Absolutely. Gingerbread dough actually improves with age. You can refrigerate it for up to 3 days to let the spices fully meld.
If your dough crumbles, do not force it. Simply add molasses one teaspoon at a time. Knead gently until it forms a smooth, cohesive ball.
A hard cookie usually means too much flour was packed into the cup. Weighing ingredients is best, or spoon and level your flour carefully.