
Table of Contents
- 1. The Broken Sauce Flowchart: Rescuing Separated Emulsions
- 2. The Spice-O-Meter Guide: Taming Dangerously Spicy Dishes
- 3. Quick-Reference Dough Diagnostics: Fixing Sticky or Tough Bakes
- 4. Visual Egg Substitution Guide for Mid-Recipe Crises
- 5. Download Your Printable Kitchen Emergency Fridge Cheat Sheet
- Your Culinary Safety Net: Embrace the Fix
- Kitchen Curiosities: Emulsion Emergencies
Welcome to the heart of the home, where every simmer and sizzle tells a story. Even the most seasoned hands face a salty soup or a dry roast occasionally.
Transforming a kitchen mishap into a culinary masterpiece is simply a matter of technique and a splash of confidence.
In this guide, we explore the secrets of flavor balance and texture restoration to ensure your family never misses a beat.
Whether you are a busy parent or an aspiring chef, you will find practical solutions to rescue any dish.
We prioritize nutritional integrity and vibrant presentation in every single bite.
Cooking is an act of love, and every meal shared is a celebration of life. Let us turn those stressful moments at the stove into opportunities for growth and joy.
With the right tools and a bit of guidance, you will master the art of the perfect fix every time you cook.
1. The Broken Sauce Flowchart: Rescuing Separated Emulsions

There is nothing quite as heartbreaking as watching a luscious, velvety sauce suddenly separate into a greasy, curdled mess.
This dreaded kitchen event happens when the delicate balance of fat and water completely shatters.
Fear not, because a broken emulsion is rarely a lost cause.
With a clear mind and clever techniques, you can coax that stubborn mixture back into a cohesive masterpiece.
Just like when you wonder what to do if buttercream frosting is too runny, fixing a sauce requires patience.
A broken sauce is not a culinary failure, but an invitation to master the art of the emulsion.
According to a survey of culinary instructors, roughly 80 percent of home cooks discard broken sauces prematurely.
You can save expensive ingredients by learning rescue methods recommended by Michelin-trained chefs.
| Sauce Technique | Impact | Expected Result |
|---|---|---|
| Adding oil too quickly | ❌ | Causes immediate separation |
| Using room temperature eggs | ✅ | Encourages smooth blending |
| Whisking vigorously | ✅ | Breaks fat into tiny droplets |
| Overheating the mixture | ❌ | Cooks the egg, ruining texture |
A broken emulsion can often be rescued by starting with a fresh egg yolk and slowly whisking the broken mixture into it.
Harold McGee, On Food and Cooking: The Science and Lore of the Kitchen
The Foolproof Garlic Aioli Rescue
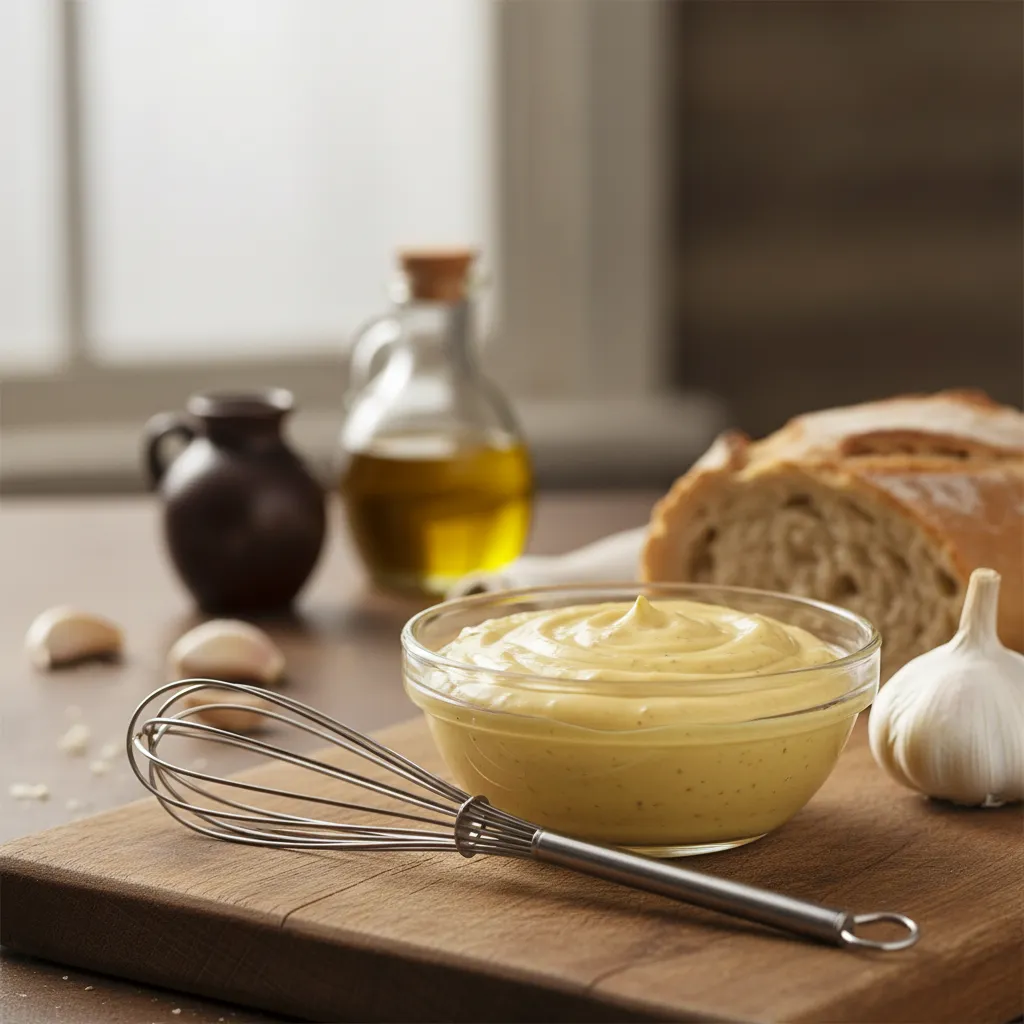
Ingredients
- 1 large egg yolk, room temperature
- 1 tbsp fresh lemon juice
- 1 tsp Dijon mustard
- 1 clove garlic, finely grated
- 0.5 cup extra virgin olive oil
- 1 tbsp boiling water, reserved for rescue
- 1 pinch sea salt
Instructions
- Place the room temperature egg yolk, fresh lemon juice, Dijon mustard, and grated garlic into a heavy glass bowl.
- Whisk the base ingredients vigorously until they turn a pale, creamy yellow color.
- Begin adding the olive oil drop by drop, whisking constantly to ensure the fat emulsifies into the liquid.
- Once the mixture thickens slightly, you may pour the remaining oil in a very slow, thin, and steady stream.
- If the aioli separates and looks greasy, immediately stop adding oil to the bowl.
- In a clean, separate bowl, add your measured tablespoon of boiling water.
- Slowly whisk the broken aioli into the hot water, drop by drop, until the smooth texture is fully restored.
- Season with a generous pinch of sea salt to elevate the rich, savory flavor profile.
Mastering this simple rescue technique will permanently elevate your culinary confidence.
You will never need to throw away an expensive batch of homemade sauce ever again.
Sauce Savior Secrets
- Shock it with heat: A single tablespoon of boiling water whisked vigorously into your separated sauce can quickly bind the fat and liquid back together.
- The fresh yolk method: If your emulsion is truly stubborn, place a fresh, room-temperature egg yolk in a clean bowl and slowly whisk the broken mixture into it drop by drop.
- Patience is your best tool: Prevent breaks before they happen by adding oils at a snail’s pace and keeping all base ingredients at room temperature for a smoother, more stable blend.
2. The Spice-O-Meter Guide: Taming Dangerously Spicy Dishes
You take a taste of your vibrant chili, and suddenly your palate is on fire. Do not panic and toss the whole pot.
Taming a dangerously spicy dish is a classic kitchen rescue mission. It requires a basic understanding of food science.
Capsaicin is the chemical responsible for the fiery sensation in hot peppers. It is an alkaline oil that is highly fat-soluble.
This means drinking water will only spread the spicy oil around your mouth. You need the right ingredients to neutralize the burn.
Just as you might search for how to fix overly salty soup, balancing heat is pure kitchen chemistry.
Industry data reveals that nearly 60% of home cooks over-season dishes monthly. A Statista report highlights how common flavor accidents truly are.
Casein, a protein found in dairy, essentially acts as a detergent, pulling capsaicin away from the pain receptors in your mouth.
American Chemical Society, Reactions Science Series
Four Proven Ways to Tame the Heat

When your palate is overwhelmed, turn to these four reliable culinary rescue methods to restore flavor balance.
- Incorporate Dairy: Stir in heavy cream, whole milk, or a dollop of full-fat yogurt. The casein strips capsaicin from your taste buds.
- Add Bright Acid: A squeeze of fresh lime juice, a splash of apple cider vinegar, or chopped tomatoes can neutralize the alkaline molecules.
- Sweeten the Pot: A teaspoon of honey, agave nectar, or brown sugar provides a sweet distraction, masking the intense heat.
- Bulk Up the Base: Serve the meal over bland starches like plain rice, or add extra vegetables to dilute the chili concentration.
If adding extra dairy or broth makes your sauce too thin, you can easily thicken chili without cornstarch using pureed beans.
Do not fight culinary fire with water. Neutralize the burn with rich fats, bright acids, and a touch of sweetness.
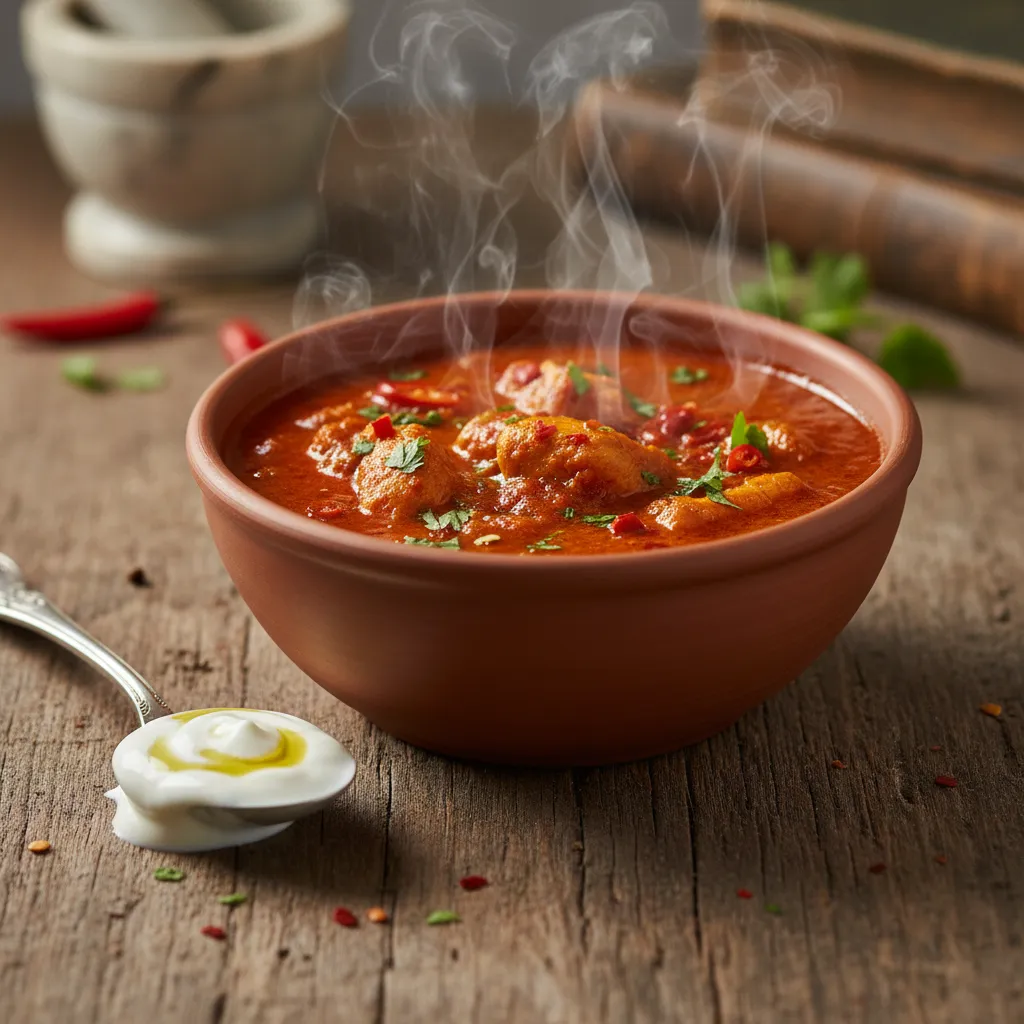
Quick Cooling Cucumber Raita
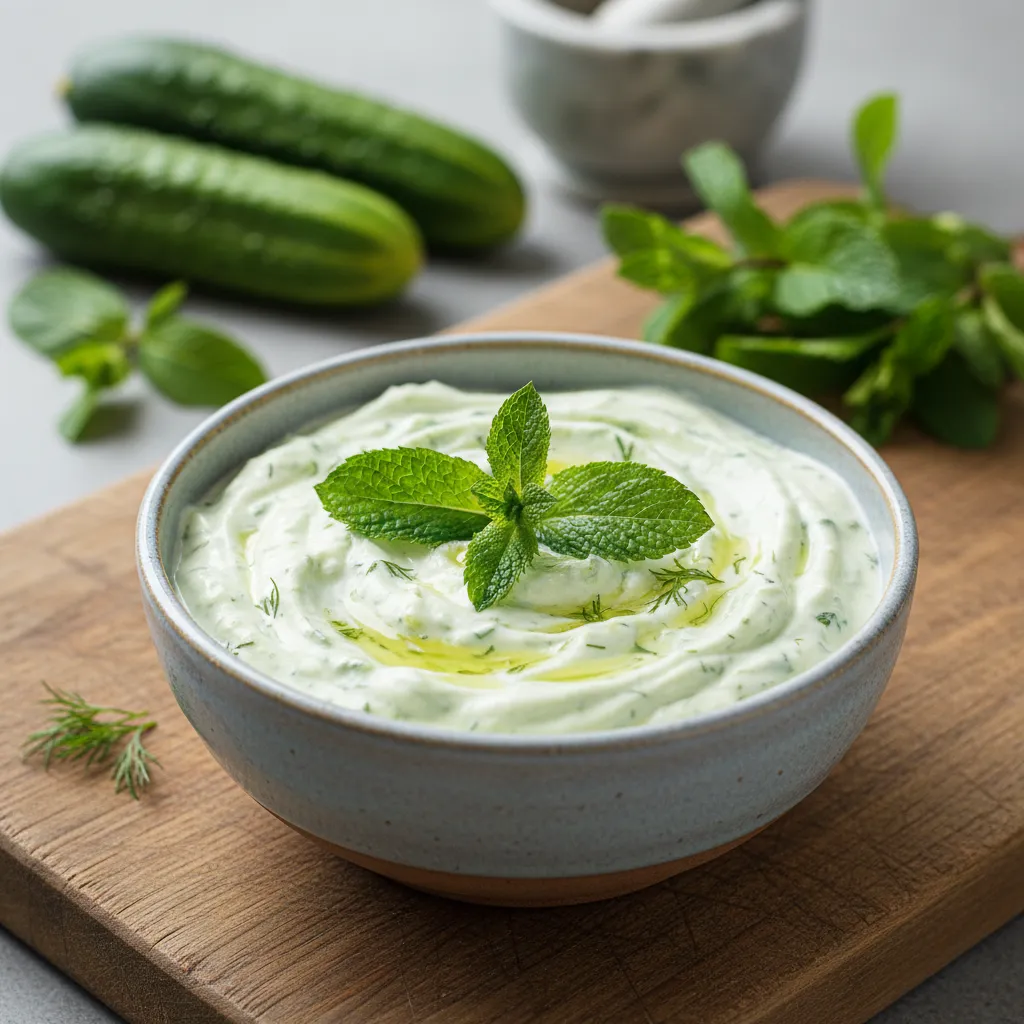
If you cannot alter the main dish itself, serve this refreshing, wholesome cooling sauce on the side to soothe the palate.
Ingredients
- 1 cup whole milk plain Greek yogurt
- 0.5 cup English cucumber, finely grated
- 1 tbsp fresh mint leaves, minced
- 1 tsp freshly squeezed lemon juice
- 0.25 tsp kosher salt
- 1 pinch roasted ground cumin
Instructions
- Place the grated cucumber in a clean kitchen towel and wring out all excess moisture to prevent a watery sauce.
- In a medium mixing bowl, vigorously whisk the whole milk yogurt until it is completely smooth and creamy.
- Fold the dried cucumber, minced mint leaves, lemon juice, kosher salt, and roasted cumin into the yogurt.
- Stir the mixture gently until all ingredients are perfectly incorporated and beautifully aromatic.
- Cover the bowl tightly and refrigerate for at least 30 minutes to allow the savory flavors to meld before serving.
Heat-Busting Pro Tips
- Skip the Water Glass: Because capsaicin is an alkaline oil, drinking water will only spread the fiery heat across your palate. Always reach for a dairy-based drink or a spoonful of full-fat yogurt to wash away the burn.
- Thickening Rescue: If adding extra dairy or broth to dilute the spice makes your chili or sauce too thin, stir in some pureed mild beans. It is a fantastic way to restore a thick texture while further mellowing the heat.
- Keep a Cooling Side on Standby: If you are serving a dish that you cannot easily alter, provide a fat-rich, acidic condiment like Cucumber Raita on the side to give your guests an immediate, refreshing palate-soother.
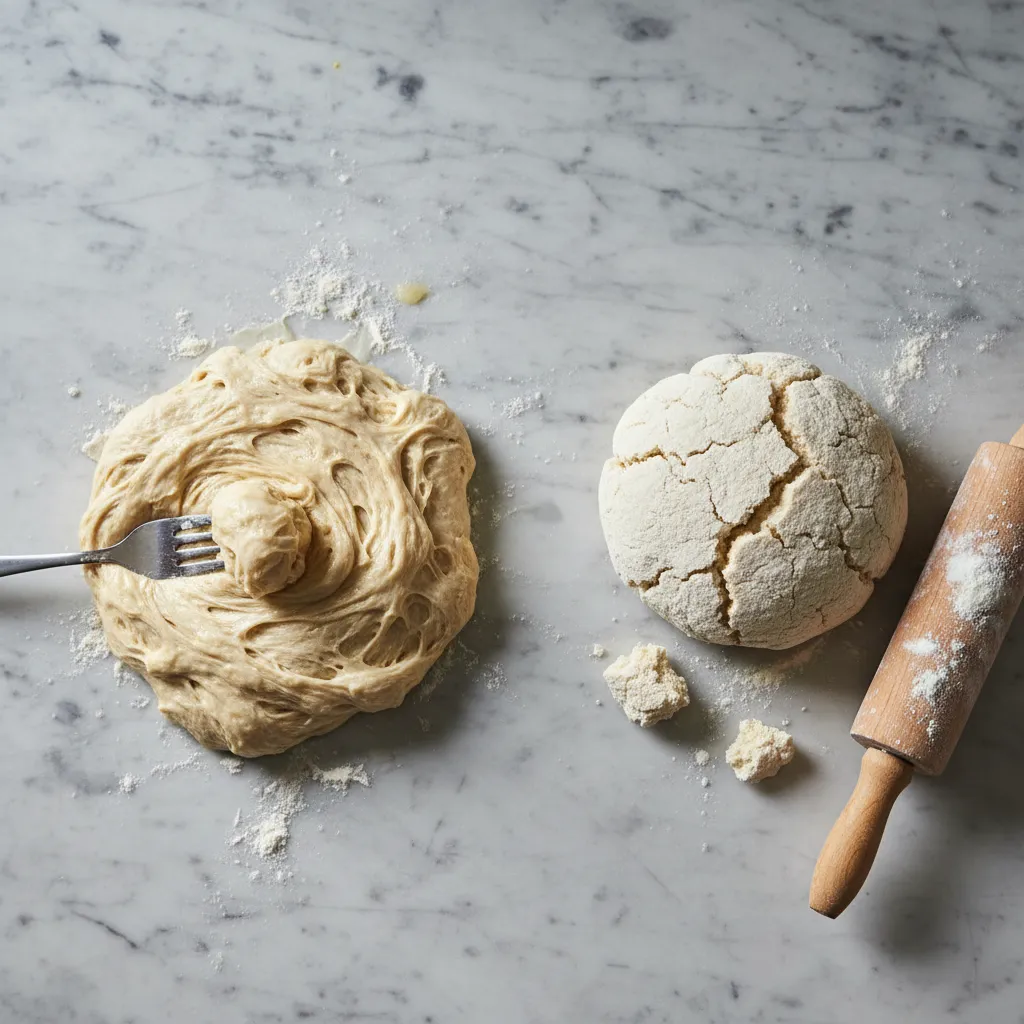
3. Quick-Reference Dough Diagnostics: Fixing Sticky or Tough Bakes
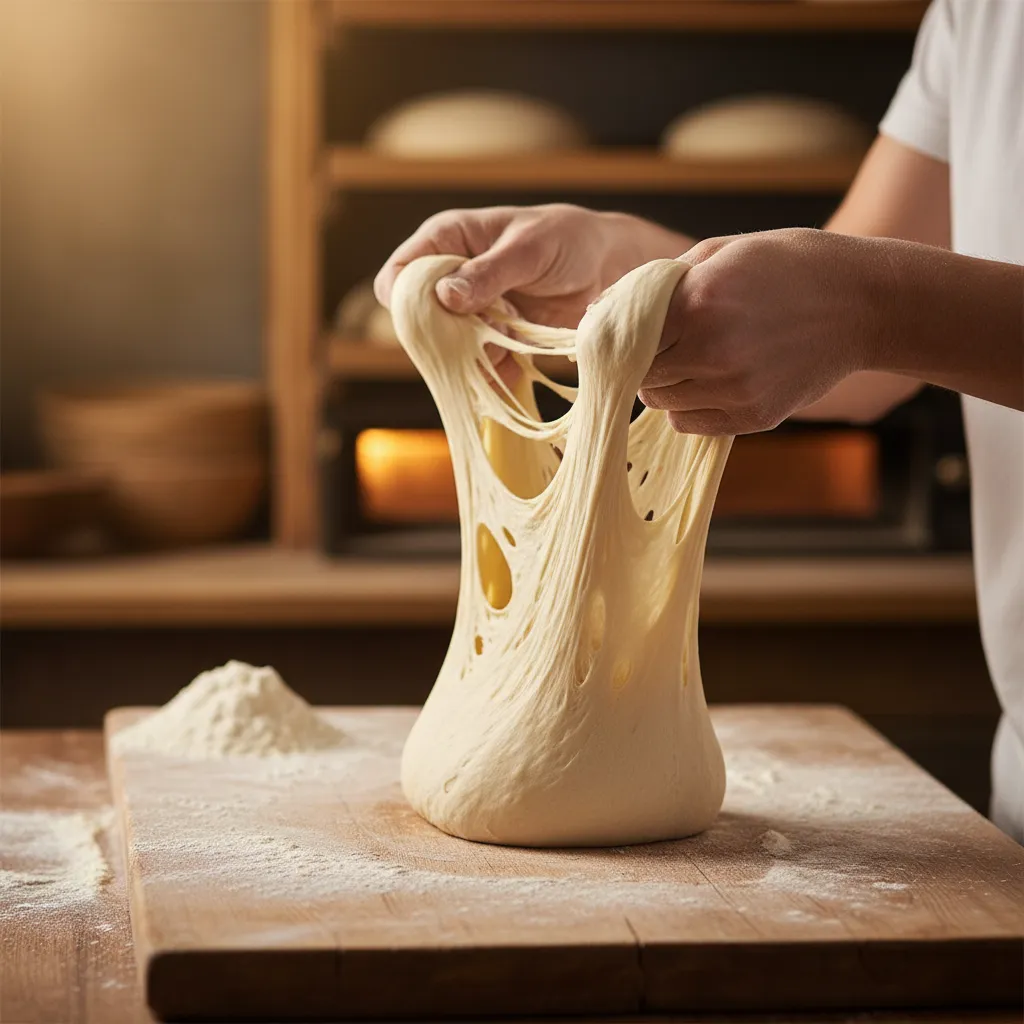
Working with yeast or pastry dough can feel like a high-stakes science experiment. A smooth, elastic ball of dough is the ultimate goal.
Sometimes your mixture becomes an unmanageable, sticky mess. Other times, it turns into a stubborn, tough rock that refuses to stretch.
Understanding the delicate balance of hydration is essential. This knowledge becomes your secret weapon for wholesome, artisanal bakes.
Diagnosing Texture Issues
Let us troubleshoot common problems. If you struggle with wild yeast, read our ultimate sourdough starter troubleshooting guide first.
When a dough is overly sticky, resist the urge to dump in cups of extra flour. Adding too much flour leads to dense, heavy bread.
Instead, lightly wet your hands or oil your work surface. High hydration doughs need folding to build strength and a tight structure.
If your dough is tough and snaps back when rolled, it suffers from overworked gluten. The fix is incredibly simple: give it time.
If your dough shrinks back as you try to roll it, cover it and let it rest for 15 minutes. The gluten will relax, making it easier to shape.
PJ Hamel, King Arthur Baking
Standard bread flour can absorb up to 70 percent of its weight in water before it becomes overly sticky, according to Bakerpedia.
- Overly Sticky: Perform stretch-and-folds with wet hands to build gluten without flour.
- Tough to Knead: Cover with a damp cloth and rest for 20 minutes to relax the gluten.
- Crumbly and Dry: Spray lightly with warm water and knead gently until the hydration balances.
- Tearing Windowpane: Knead for an additional 5 minutes to fully develop the structural network.
Great bread is never rushed. Trust the resting process, and your dough will reward you with perfect texture.
Fail-Proof Olive Oil Rescue Flatbread

If your dough will not cooperate for a loaf, pivot and turn it into a delicious rustic flatbread. It is an incredibly forgiving process.
This pivot is a lifesaver. It is as simple as whipping up quick and easy sourdough focaccia on a busy afternoon.
Ingredients
- 1 lb problematic dough (over-hydrated or dense)
- 2 tbsp extra-virgin olive oil
- 1 tsp flaky sea salt
- 1 tbsp fresh rosemary, finely chopped
Instructions
- Preheat a large cast iron skillet over medium-high heat until it is smoking slightly.
- Divide your dough into four equal pieces and stretch them gently into rough oval shapes.
- Brush both sides of the stretched dough generously with the extra-virgin olive oil.
- Place one piece of dough into the hot skillet and cook for exactly 2 minutes per side.
- Remove the flatbread when it is golden-brown and puffed. Garnish with sea salt and rosemary.
Remember that baking is a journey of the senses. Enjoy the tactile experience of the dough, and share your golden creations with loved ones.
Dough Doctor Secrets
- When dough is too sticky to handle, stop reaching for the flour jar. Instead, lightly oil your hands or dip them in cold water. This allows you to perform stretch-and-folds without altering the hydration ratio, ensuring your final bake stays light and airy.
- If your dough is fighting back during shaping, it needs a nap. Cover it with a damp cloth and walk away for 15 to 20 minutes. This resting period allows the gluten network to relax, making the dough much more pliable and easier to roll without shrinking.
- To check if your dough is ready for the oven, use the poke test: gently press your finger about half an inch into the dough. If it springs back slowly and leaves a small indentation, it is perfectly proofed and ready to bake.
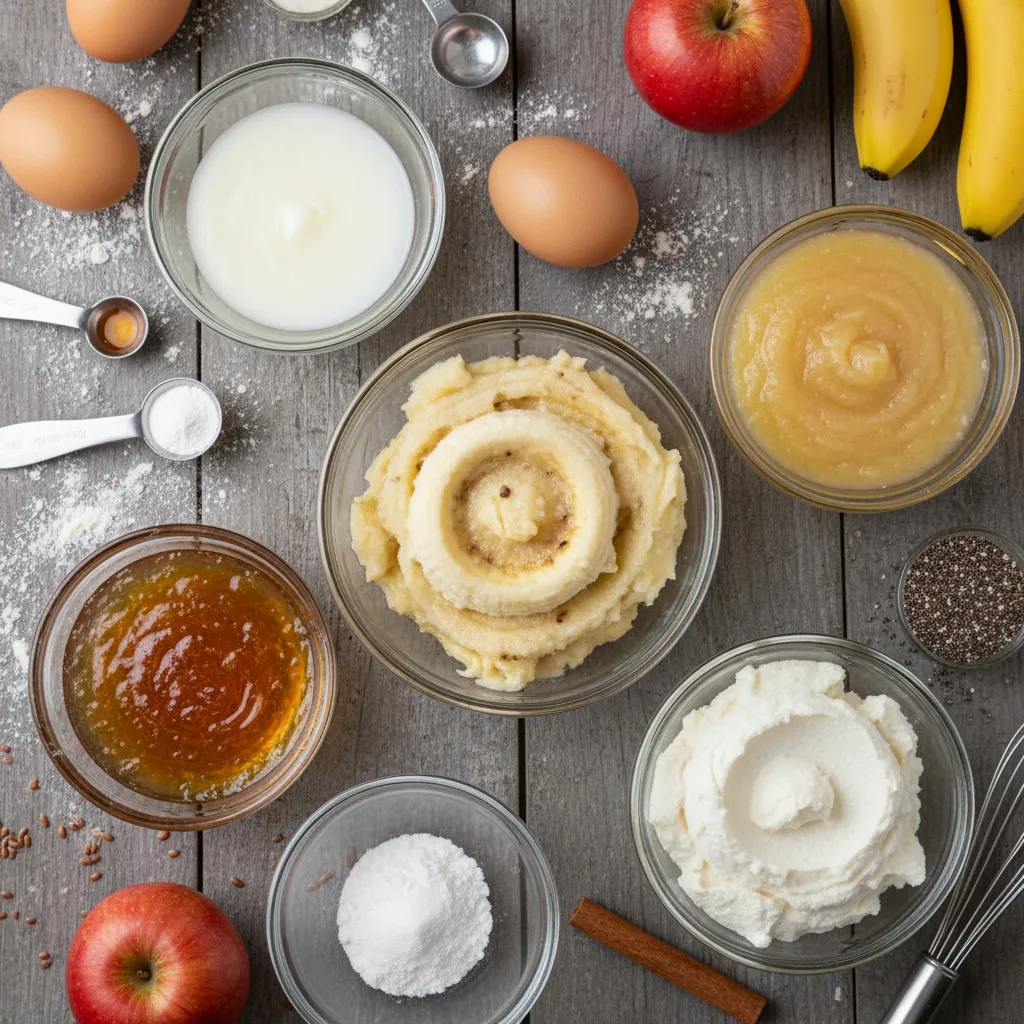
4. Visual Egg Substitution Guide for Mid-Recipe Crises
Running out of eggs mid-recipe is a classic kitchen panic moment.
Fortunately, your pantry holds numerous wholesome alternatives.
The key is matching the substitute to the egg’s specific purpose.
Around 2 percent of children have egg allergies. ACAAI
Plant-Based Binders
Different recipes require different binding strengths.
A poor binder ratio is often why banana breads sink.
- Flaxseed Meal: Perfect for earthy bakes. It creates a gel that effectively binds ingredients.
- Applesauce: Ideal for dense cakes. It provides moisture but lacks strong binding power.
- Mashed Banana: Excellent for quick breads. It adds sweet flavor and dense texture.
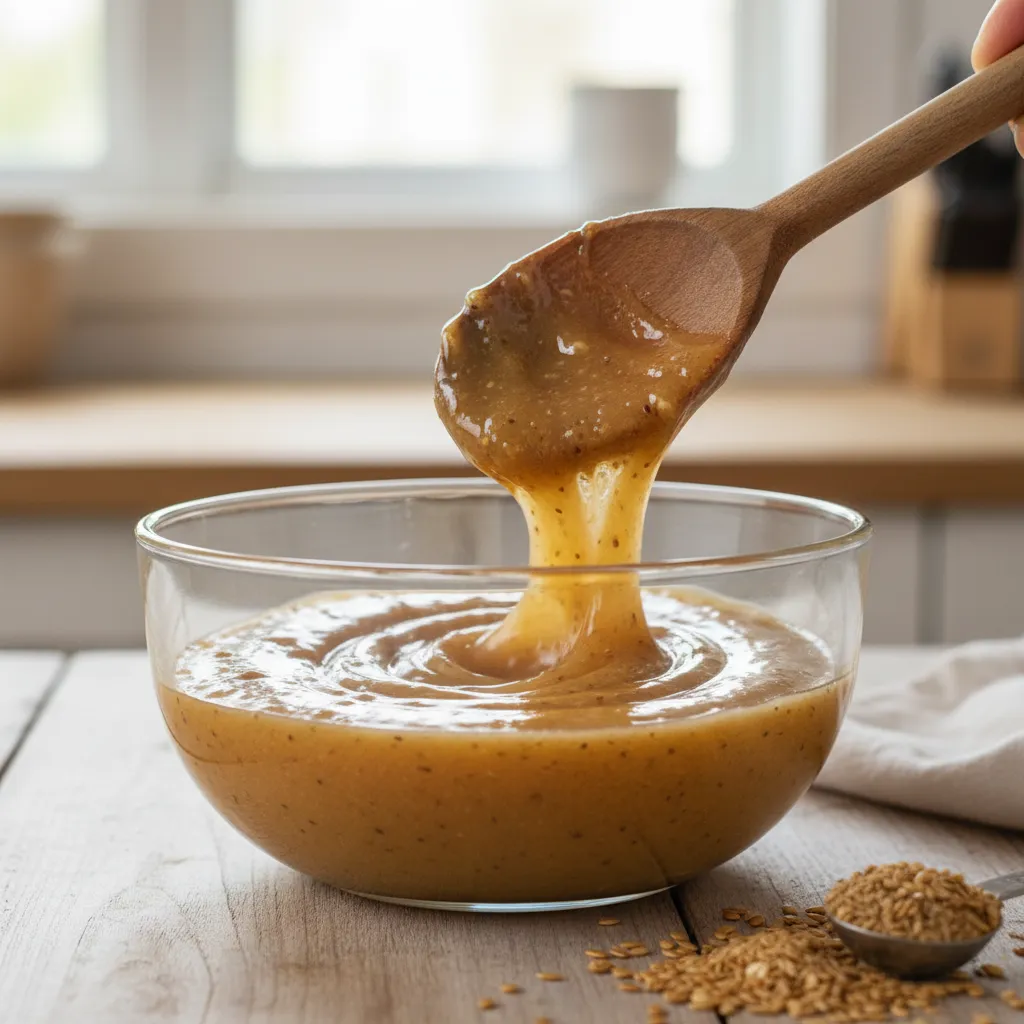
Flax seeds have a lot of mucilage, a gummy substance that swells when it comes into contact with water.
J. Kenji López-Alt, Serious Eats
Baking without eggs is an invitation to explore new flavor profiles.
Crafting a plant-based flax egg is a vital skill for modern bakers.
Ingredients
- 1 tbsp organic ground flaxseed
- 3 tbsp warm filtered water
Instructions
- Whisk the ground flaxseed and warm water together in a small bowl until combined.
- Let the mixture sit for five minutes to allow the mucilage to thicken.
- Check the consistency. It should stretch slightly to mimic a raw egg.
- Gently fold the emulsified mixture directly into your wet ingredients.
Kitchen Hero Hacks
- Boost the Lift: Since fruit-based substitutes like applesauce do not provide the same leavening as eggs, add an extra 1/2 teaspoon of baking powder to your dry ingredients to prevent a dense, flat bake.
- Temperature Check: For the best flax egg consistency, use warm water rather than cold. The heat helps release the mucilage faster, creating a stronger binding gel in half the time.
- The Texture Rule: Always match your substitute to the density of the final product; use mashed bananas for heavy quick breads and flax eggs for cookies or brownies that require a slightly chewier structure.
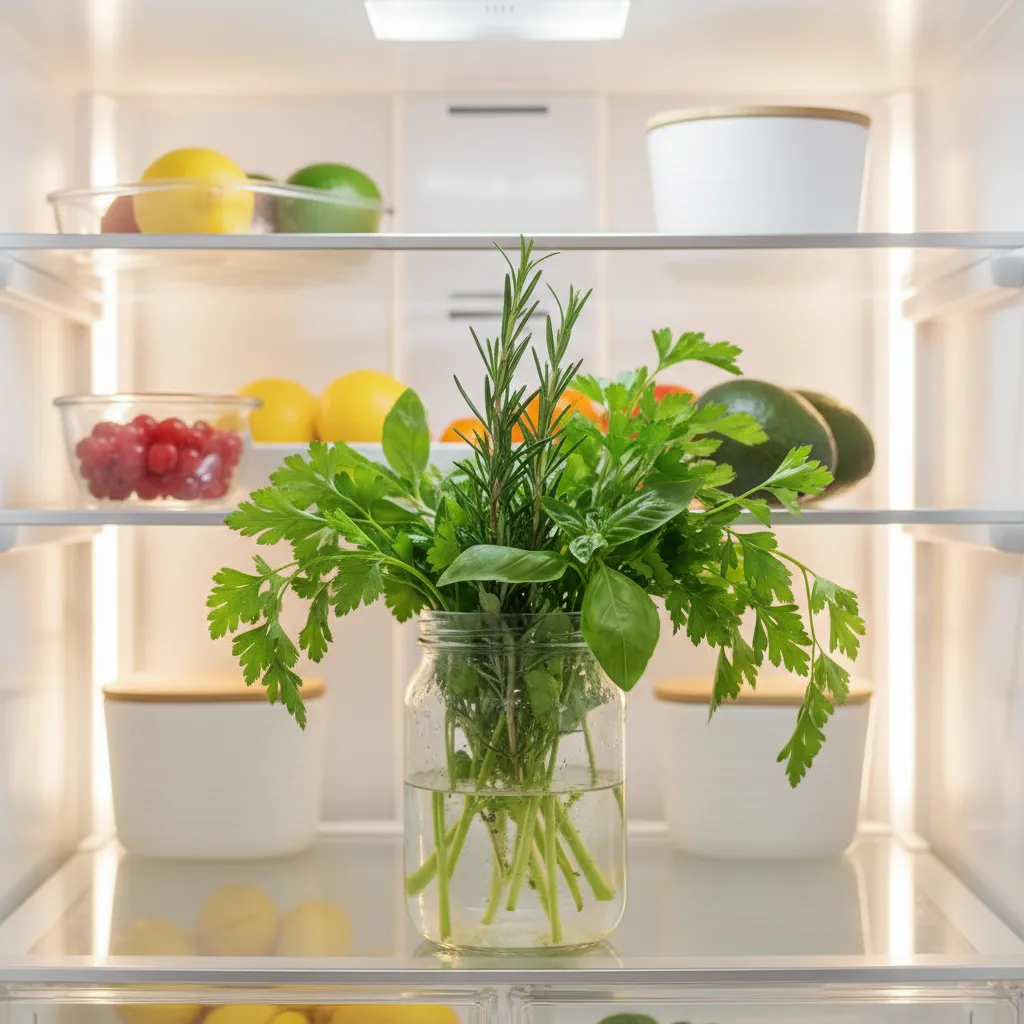
5. Download Your Printable Kitchen Emergency Fridge Cheat Sheet

Every home cook faces moments of pure kitchen panic when staring into a chaotic refrigerator. A visual guide transforms confusion into absolute culinary confidence.
Having a reliable system prevents wholesome ingredients from spoiling. You can quickly identify what needs to be cooked to maintain a vibrant flavor profile.
Food waste is a frequent issue. If you wonder what to do with almost expired milk, this guide helps.
An organized fridge is the canvas where every great, spontaneous meal begins.
The FDA reports that keeping your refrigerator temperature at or below 40°F reduces the risk of foodborne illness. Proper storage is vital for fresh food.
Keep the refrigerator temperature at or below 40° F (4° C). The freezer temperature should be 0° F (-18° C).
FDA, Are You Storing Food Safely?
Quick Ingredient SOS Reference
Keep this cheat sheet taped inside your kitchen cabinet. It provides instant solutions when your palate craves a quick meal but your daily schedule is tight.
| Ingredient Issue | Quick Kitchen Fix |
|---|---|
| Wilted Greens | Blanch quickly in salted water to revive vibrant color and snap. |
| Separated Sauces | Whisk vigorously with a splash of hot water to emulsify again. |
| Hardened Sugar | Microwave with a damp paper towel for ten seconds to soften. |

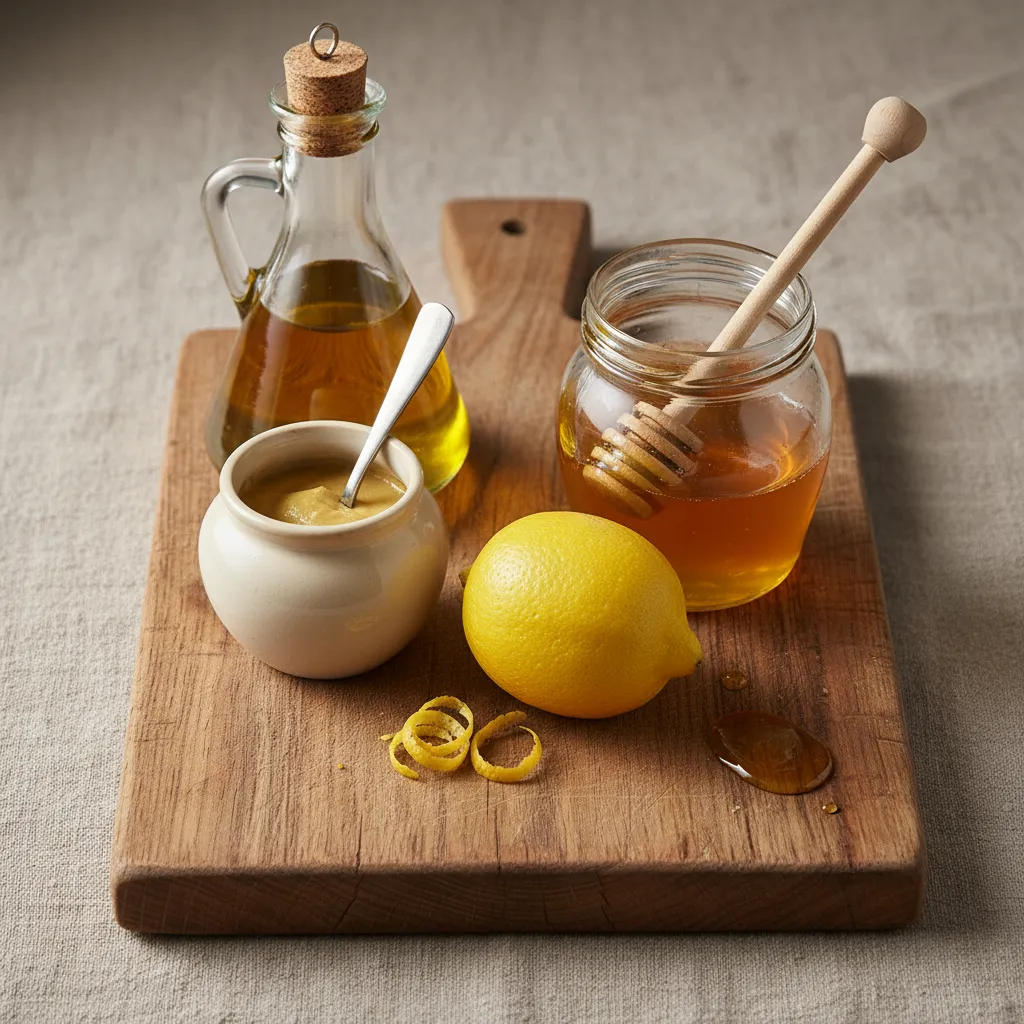
Emergency Fridge-Raid Vinaigrette
This plant-based, gluten-free dressing rescues lonely condiments. It creates a savory, umami flavor profile for any simple weekday salad or roasted vegetable.
Ingredients
- 1/2 cup extra virgin olive oil
- 1/4 cup leftover pickle juice or citrus juice
- 1 tbsp Dijon mustard
- 1 tsp organic honey or maple syrup
- 1/2 tsp kosher salt
Instructions
- Gather your mise en place and place all ingredients into a clean glass jar with a tight-fitting lid.
- Seal the jar securely and shake vigorously for thirty seconds to fully emulsify the dressing.
- Taste and adjust the seasoning, adding a pinch of salt if needed to balance the zesty acidity.
- Drizzle this umami dressing over mixed greens or use it to marinate roasted root vegetables.
Do not throw away soft produce. Discovering uses for overripe avocados reduces waste and saves money.
Chef’s Rescue Kit
- Laminate your printable guide and use a dry-erase marker to jot down the dates of your newest grocery haul, ensuring nothing gets lost in the back.
- Designate a small Eat Me First bin on the middle shelf for items nearing expiration to significantly reduce food waste and inspire your next meal.
- Store your emergency vinaigrette in a glass mason jar rather than plastic to maintain the brightest flavor profile and allow for quick, mess-free re-shaking.
Your Culinary Safety Net: Embrace the Fix
Every great home cook faces a broken sauce or a kitchen mishap. It is simply a rite of passage on your beautiful culinary journey.
Armed with these troubleshooting tips, you never have to toss out a delicious meal again. Patience and technique are your best friends.
So tie your apron tight, embrace the joyful mess, and cook with fearless passion. Your next unforgettable meal is just a whisk away!
Kitchen Curiosities: Emulsion Emergencies
If the eggs are fully cooked and chunky, you cannot save it. You must start over. If it is only slightly grainy, whisk in a splash of boiling water.
Cold temperatures cause the oil to solidify and break the emulsion. Simply let it sit at room temperature for a few minutes and whisk vigorously.
Yes, it is perfectly safe to eat as long as the ingredients are fresh. However, the oily texture is unpleasant, so rescuing it is highly recommended.